If you want to learn how to sell on Shopify, this will be a great starting guide for you. Especially since Shopify is a beginner-friendly platform that has been improving its functionality to be as easy to use as possible.
The best thing about it is that you don’t have to worry about setting up your store from scratch – which can be a real headache for anyone, let alone a beginner. Since Shopify does the technical part for you, you can focus on building and promoting your business.
In this article, we’ll go through nine main steps on how to sell on Shopify for beginners and kick off your business. Let’s get started.
How old do you have to be to use Shopify?
If you want to create a Shopify account, you have to be at least 18 years old according to Shopify’s Terms of Service. These restrictions apply because in many countries it’s not legal for minors to agree to such legal contracts. The good news is that if you’re below 18, you can still create a Shopify website by setting up your guardian as the owner of the site.
Now that we’ve established who can use Shopify to sell products, let’s take a look at the 9 steps you should take to actually start selling on the platform. Here’s our comprehensive step-by-step guide:
1. Decide on the product idea
Deciding on what products to sell might be the hardest part of the process. If you already have it locked down, lucky you!
If you haven’t decided yet, you can go multiple ways:
- Choose a product that interests you
- Choose a trending niche
- Choose a product that you already use and love
- Monetize your hobby
- Research what people are interested in
- Find a niche that’s not over-saturated
- Sell digital products
- Look at other Shopify store examples to get ideas
There’s almost no limit to the imagination – that can be freeing, and scary. Our advice would be to choose something that’s not too far from your interests. This way, you won’t be as compelled to give up when you run into inevitable hurdles.
2. Sign up for a free Shopify trial
You’ve got your idea, now it’s time to sign up for Shopify. Your free trial lasts three days, then you pay $1 for a month. If you decide Shopify is right for you, then you’ll have to get one of Shopify’s subscription plans. As a beginner, you can start low, and upgrade later on.
Here’s how to create your Shopify account:
1. Go to Shopify.com and start your free trial.
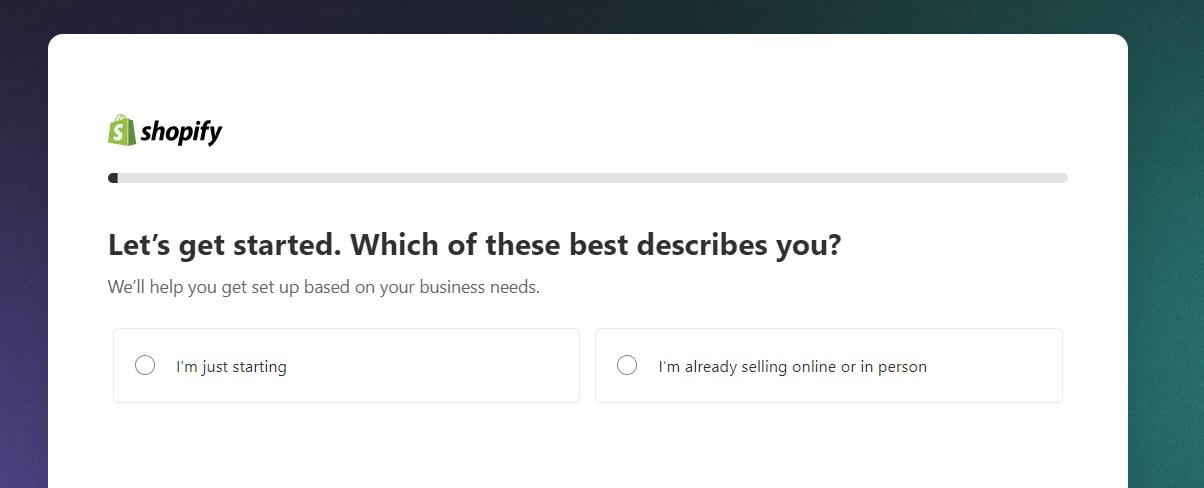
2. Fill in the information about your business, or – if you’re not sure yet – skip it all for now.
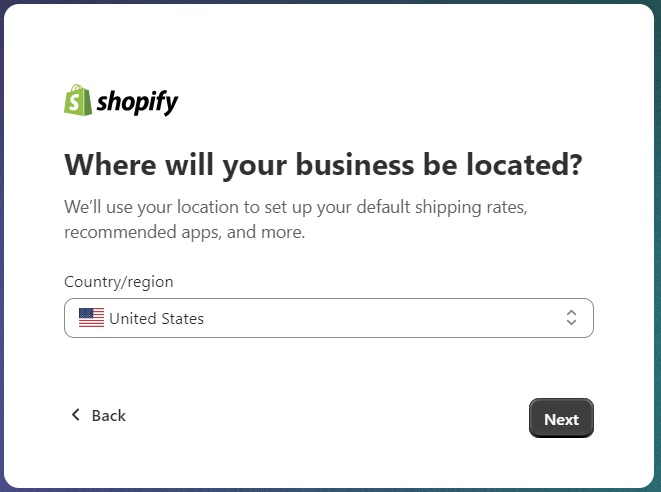
3. Choose a country where your business will be located. Keep in mind that if you want to choose a different country other than your own, you might run into issues related to tax, shipping, and payments.
4. Create your Shopify account.
5. Go through the standard signup process – it will vary depending on the method you choose, but shouldn’t be anything you haven’t done before.
Suggested reading
3. Set up your store
Once you create your account, you’re ready to build your Shopify store.
Choose a Shopify theme
There are many good Shopify themes out there – once you know your niche, you can pick a theme based on that. If you’re a complete beginner and you’re not ready to invest in an expensive Shopify theme, you can choose one of the free ones. Free Shopify themes have fewer bells and whistles but they will function just as well.
You can also keep the default theme Shopify assigns to you if you’re happy with its look and the functionality of it. The good thing about Shopify themes is that most of them allow for pretty thorough customization which allows you to personalize your store to reflect your brand.
Buy a custom domain
When you create a Shopify store, your domain will look something like 68147c-5.myshopify.com. Needless to say, if you want to have a successful online business, you must get a domain that’s easier to type and discover. You can buy a domain from your Shopify admin panel. We recommend setting a domain name the same or very similar to your brand name for better search engine rankings and improved user experience. Just make sure the domain name is not taken already!
Create all necessary pages
Every online store has pages for the privacy policy, terms of service, returns and refunds, about us, FAQ, contacts, and shipping information. Don’t forget to set these pages up first, and only then move to building your product and collection pages.
4. Add products to your store
Once you set up important pages, buy a domain, and choose your Shopify theme, you can move on to adding products to your store.
The process for this is pretty simple – Shopify makes it pretty easy for its users to add, edit, and delete products anytime they want. From your Shopify dashboard, go to Products (on the left sidebar), and click Add product.
If you have decided to dropship, you can upload items to your Shopify store manually or automatically using various Shopify dropshipping apps.
Shopify also allows you to operate a print-on-demand (POD) store. Both dropshipping and POD share similar advantages – you don’t have to worry about inventory or shipping since the suppliers 100% take care of it. It can also be a great route for beginner sellers in order to understand the eCommerce market without the stress of product logistics.
5. Create collections
Shopify collections allow you to organize your store better. Depending on what you sell, collections might look different – it can be t-shirts, jeans, dresses, and best sellers, to name a few examples.
In order to create collections, follow the steps below:
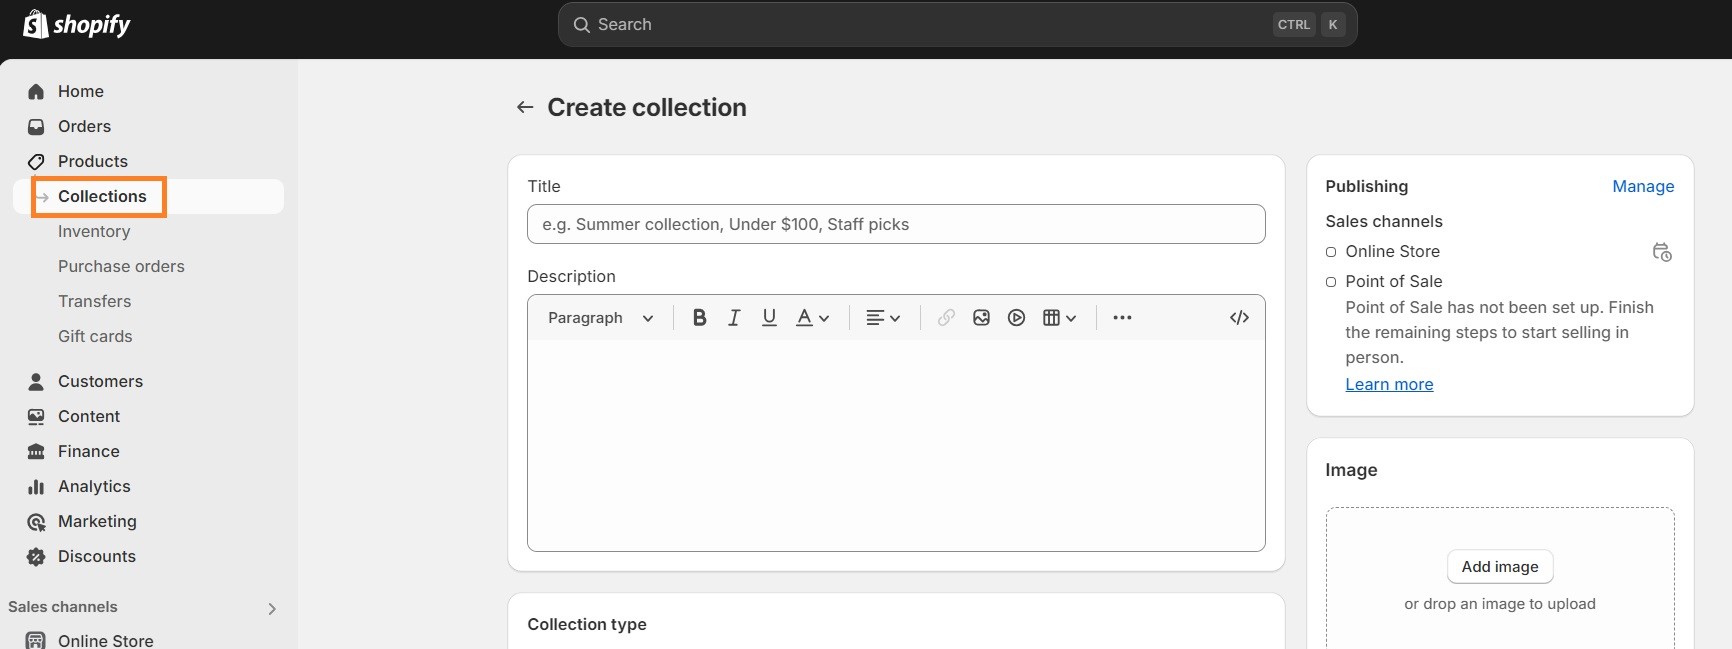
- From your Shopify dashboard, go to Products.
- On the same left sidebar, click Collections.
- In the top right corner, click Create collection.
- Fill in the information and click Save. Keep in mind that the title and description can help with your search engine optimization (SEO) efforts, so be descriptive, relevant, and to the point.
One thing to note is that you can either add products to your collections manually or set up automated collections with certain conditions. This way, once you create a product that matches the same conditions, it will be automatically added to a specific collection.
6. Add payment methods
In order to add a payment method, you need to follow these steps:
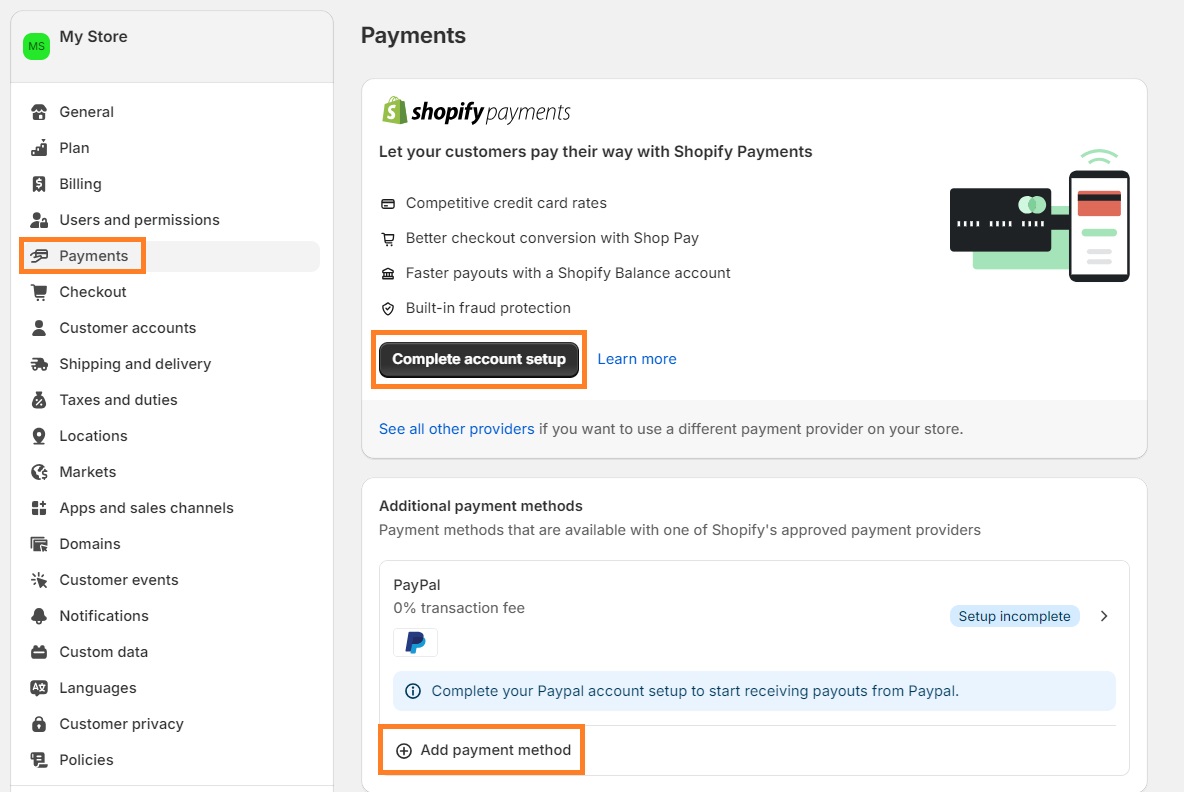
- From your Shopify dashboard, go to Settings.
- Click Payments.
- From there, you can choose a third-party payment provider (Shopify recommends their partner Stripe), set up or connect your PayPal account, or add a manual payment method.
7. Choose shipping methods
In order to set up shipping methods, go to Settings from your Shopify dashboard, and click Shipping and delivery.
You can choose to ship domestically, internationally, or both. From there, you can also set custom shipping rates, choose whether expected delivery dates will be shown at checkout, set up local delivery and pickups, and more.
8. Add analytics
Once you launch your store and start selling products, you should set up analytics to track your store’s performance. Shopify offers its own analytics dashboards but if you want to get even more insights on how your pages appear in search engines, and whether they’re indexed and working properly, we recommend setting up Google Search Console and Google Analytics.
Suggested reading
9. Test UX and ordering
It’s important to always keep an eye on your website’s functionality. Ask your friends or check yourself if the navigation works properly, if people can find your products easily, and if the search function works as it should.
We also suggest placing a test order and going through the checkout process yourself. This way, you can act as a customer and improve areas that may be difficult to understand or navigate.
You can also hire user experience specialists who could help you out and make sure your Shopify store functions well in all areas.

You're selling on Shopify – what's next?
Once you get the ball rolling, you should look for ways to increase your store’s visibility and revenue.
Promote your store
You can promote your store in various ways. We’ll talk about the most popular and effective strategies.
Search Engine Optimization
There’s a lot that goes into good SEO but you certainly can get the basics right from day one. Do keyword research, take care of meta titles and descriptions for all pages, make sure your store doesn’t load too long, optimize images, add ALT texts, optimize your headings for keywords that are relevant to your store, make sure your website has correct breadcrumbs set up. These are just a couple of ways to ensure good SEO but it’s a good place to start.
Social media
Everyone’s on social media – make sure you are too. Create an Instagram account, run ads, and promote your store on TikTok. Generally, try to find out what your target audience is and where they’re mostly located.
Suggested reading
Google ads
Yes, people still click on ads in search engines. And even if they don’t, they still see them, so it’s a great way to increase visibility to your store.
Add more sales channels
You can sell your Shopify products from other sales channels, including Instagram, Facebook, TikTok Shop, your other websites, Google and YouTube, to name a few. Keep in mind that some sales channels might only be available in certain countries.
In order to add other sales channels to your store, follow these steps:
1. From your Shopify dashboard, go to Settings.
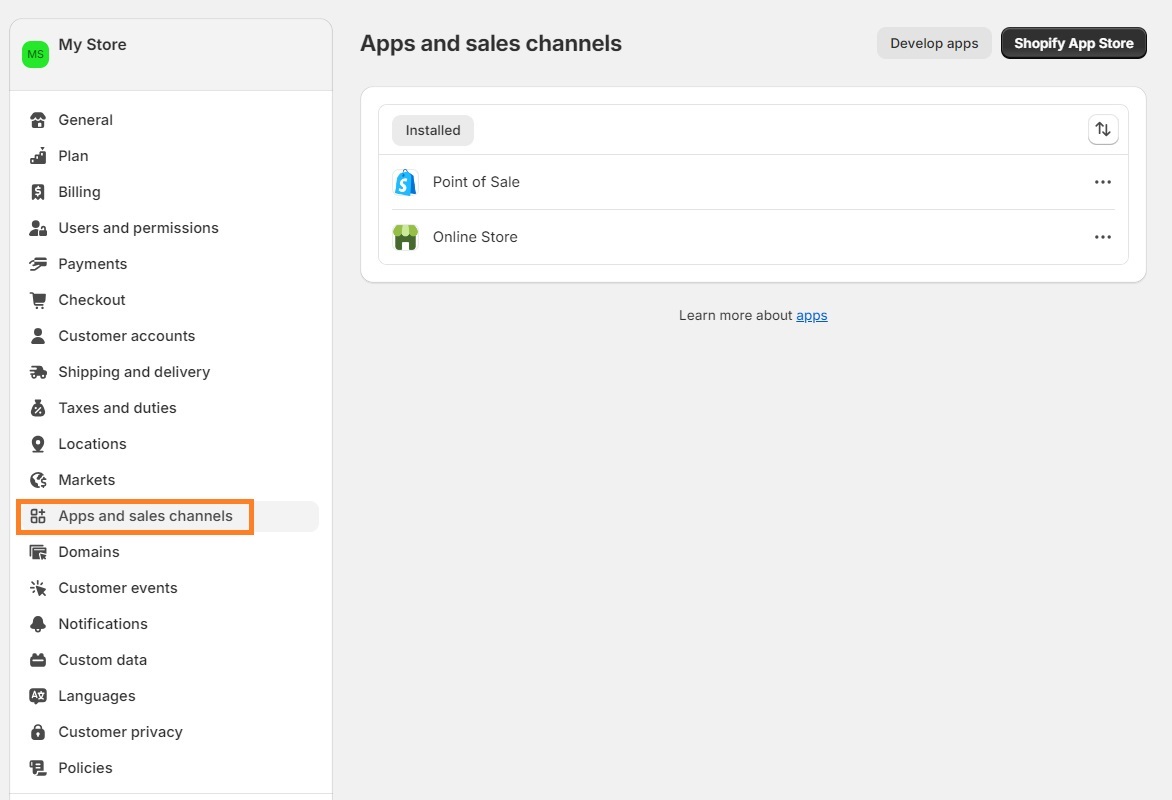
2. Click on Apps and sales channels.
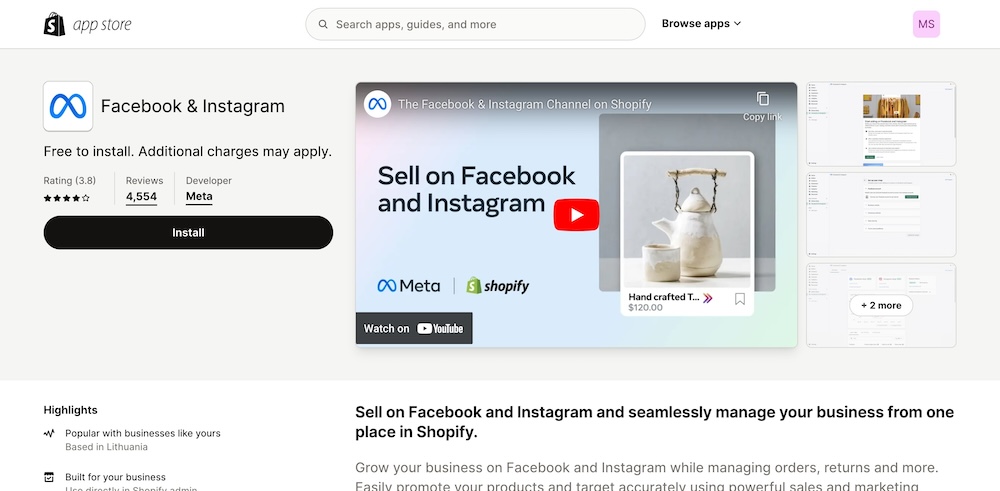
3. Go to the Shopify App Store and search for channels you want to add.
4. Install the channel to your store.
Work on maximizing the sales
There are always ways to improve your business’ performance and increase sales.
Conversion rate optimization
If your store is getting decent traffic but that doesn’t reflect in the sales, it’s time to think of ways to optimize conversions. One way of doing that is by implementing conversion rate optimization (CRO) strategies. You can see your conversion rate by using analytics tools like Google Search Console.
In order to increase conversion rate, you can implement such strategies as enticing call-to-actions, limited-time sales, and running A/B tests on landing pages. You can also work on your Shopify blog which can be a great source of organic traffic, increase your store’s visibility, and eventually lead to sales.
Affiliate and influencer marketing
You can also start affiliate marketing on Shopify and allow other websites to promote your products for a percentage of the revenue. In the same way, you can reach out to influencers or people with a substantial amount of followers, and ask them to promote your products.
Buy now, pay later options
Give your customers a chance to pay for items later by implementing installment payments. You can install a Shopify app to help process these payments seamlessly.
Curious to read more? Check out these articles:

Frequently asked questions
Shopify can cost you roughly $2,000 to $3,000. You’ll need to buy a Shopify plan, which starts from $348/year, a domain (roughly $20/year), a theme (can cost a few hundred dollars), third-party apps, shipping, inventory, marketing, design, and payment gateway fees.
You can start selling on Shopify by getting a plan, building a website, selecting sales channels, setting up payments, creating product pages, placing a test order, and going live.
Shopify is a beginner-friendly platform, so starting to sell on it is relatively easy compared to other eCommerce platforms. Just make sure you focus on the product quality and testing your order placements before going live.
Shopify transaction fees depend on the plan you purchase: Basic plan – 2.9% + 30¢ USD, Shopify – 2.7% + 30¢ USD, and Advanced – 2.5% + 30¢ USD.

