After you create your Shopify account and choose the theme, it’s time to launch your business! To do that, you need to learn how to add products to Shopify.
In this article, we’ll cover all the ways of adding products to your store, as well as managing and deleting them.
Adding new products to Shopify: a quick guide
Before we dive into detailed guides, let’s see how to quickly add products to Shopify on the desktop:
- Go to your admin panel, click on Products.
- Then, click on Add your products.
- Fill in all the fields, like Title, Photos, Pricing, and others.
- At the bottom right, click Save.
Before you add products to your store
To make the process of adding new products to Shopify easier, it’s better to prepare in advance. Here’s what you can do to make the process easier:
- Prepare product descriptions. Here’s our guide on writing a great Shopify product description.
- Prepare product photos. You can learn to take better product photos with your smartphone, or order a professional product photoshoot.
- Optimize product image sizes. If you follow Shopify product image size guidelines, your store will be better optimized and look professional.
Now that you’re ready to start adding products to Shopify, let’s start with the manual guide.
Option 1: Add new products manually
We’ll start with the guide of adding new products to Shopify manually.
Go to Shopify Add product dashboard
Once you’re in the dashboard, click “Add your product”.
Add product details
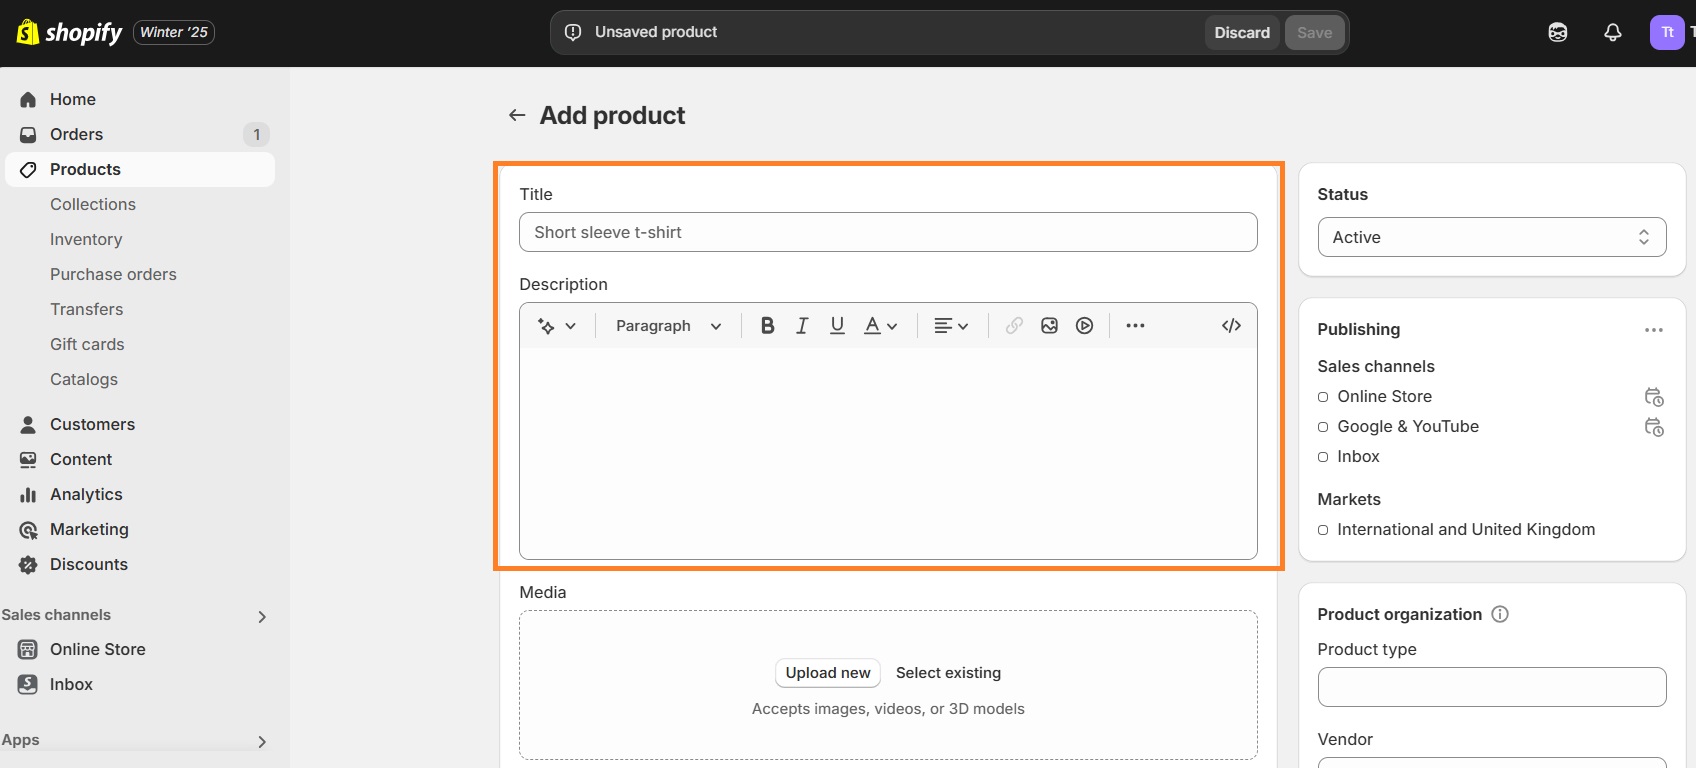
Add product title and description. Both the product title and description should be very specific and descriptive, and only contain relevant information. This information appears at the top of the page, meaning you must pay attention to what you put there. For better optimization and helpful tips, check out our Shopify SEO guide.
Add product images
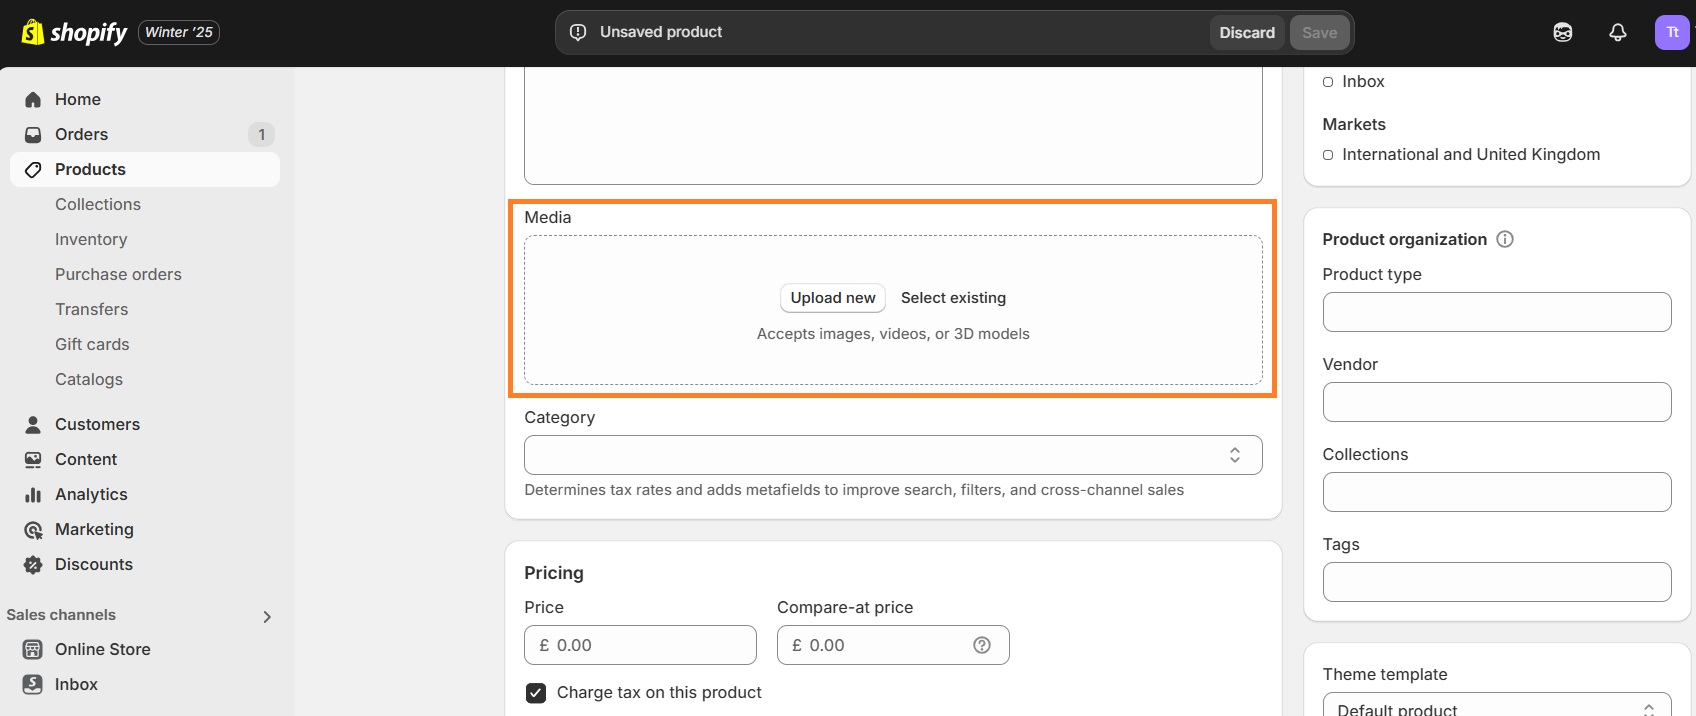
In the Media tab, add images, videos, or 3d models of your product. There are certain rules to Shopify image sizing. So, in order to save time, you can get the TinyIMG app and automate image optimization!
Add product price
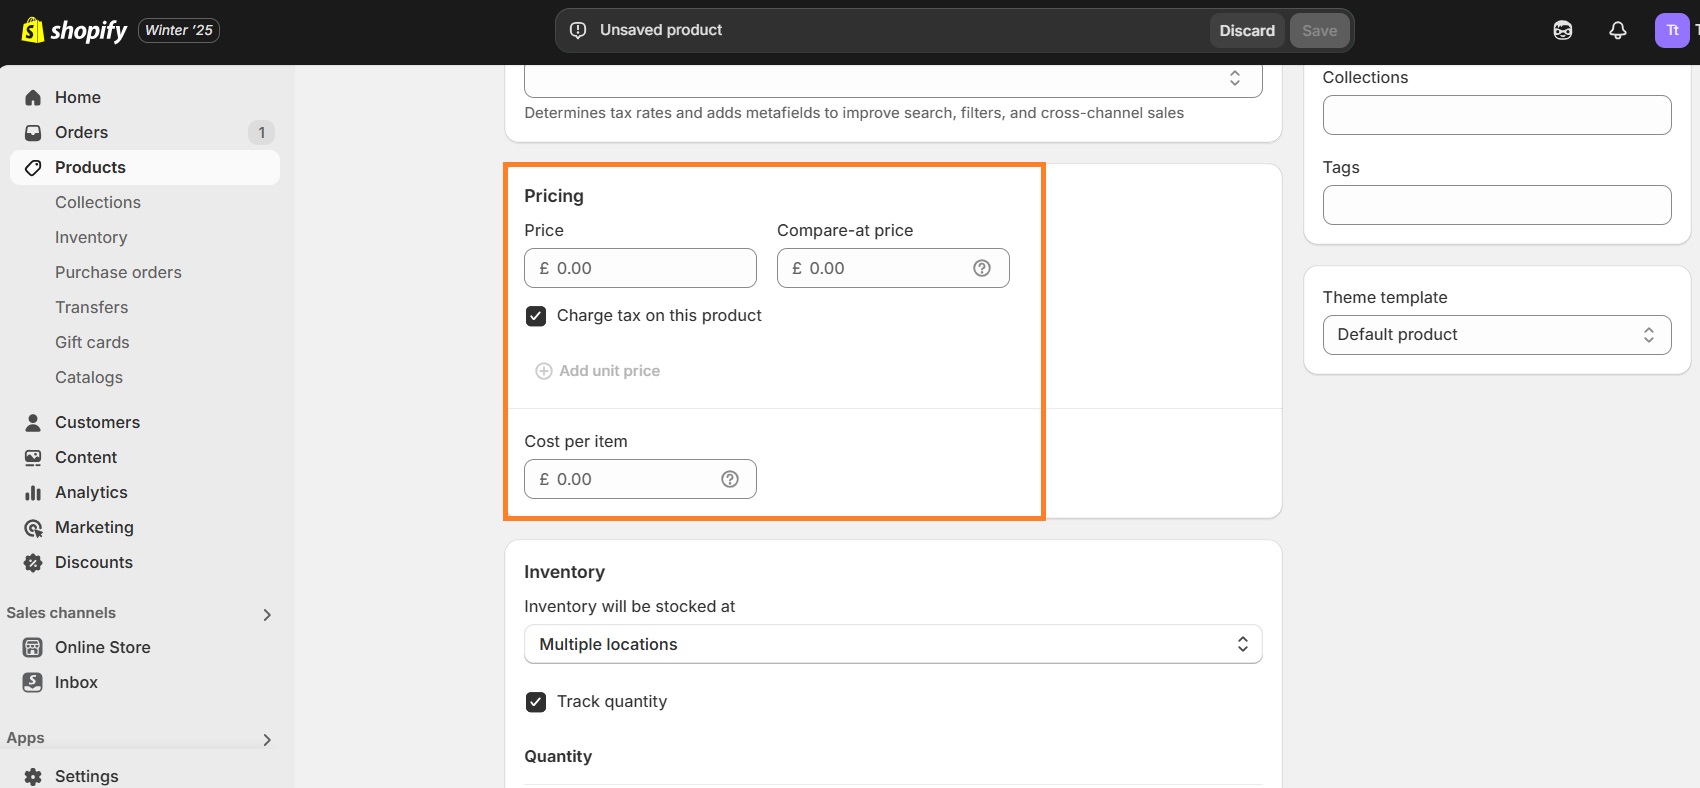
In the Pricing tab, add your product’s price. Here, you have an option to set a discount and the original price, so the customers can see the price difference. If you want to set a discount, put the original price in the “Compare-at price” input field, and the lower price in the “Price” input field.
If you’re not offering a discount, you can leave the “Compare-at price” field empty and just set the product price in the “Price” field.
Add inventory and shipping information
In the Inventory tab, you should enter the quantity of the particular product in order to not sell more products than you currently have.
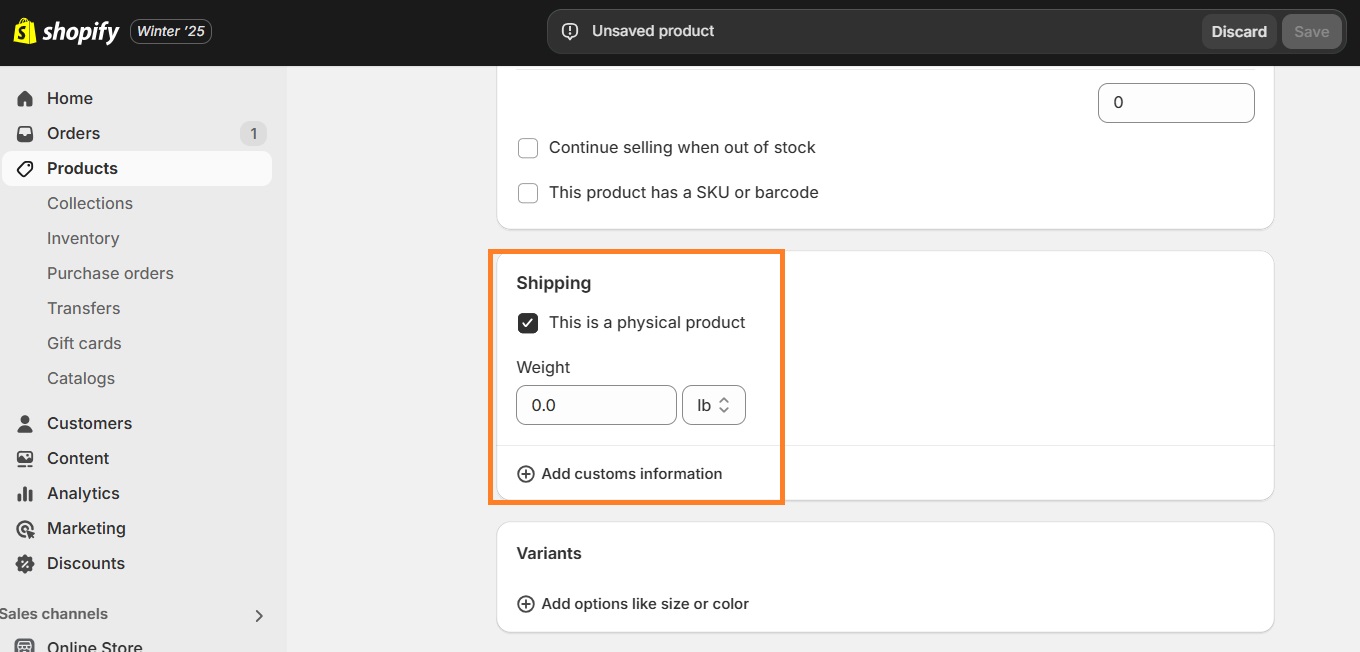
If you’re selling a physical product, you should also enter the shipping weight and the product’s origin information, i.e., where the product is manufactured or assembled.
When selling digital products, select "Digital products", and customers won't enter shipping details at the checkout.
If you want to boost your marketing efforts, there are a lot of great Shopify apps that can help you get more reach. We suggest you check the following articles:
- Shopify apps for back in store alerts – for when your sold-out items come back in stock
- Shopify apps for pre-ordering – to allow customers to get an item as soon as it comes out for the public
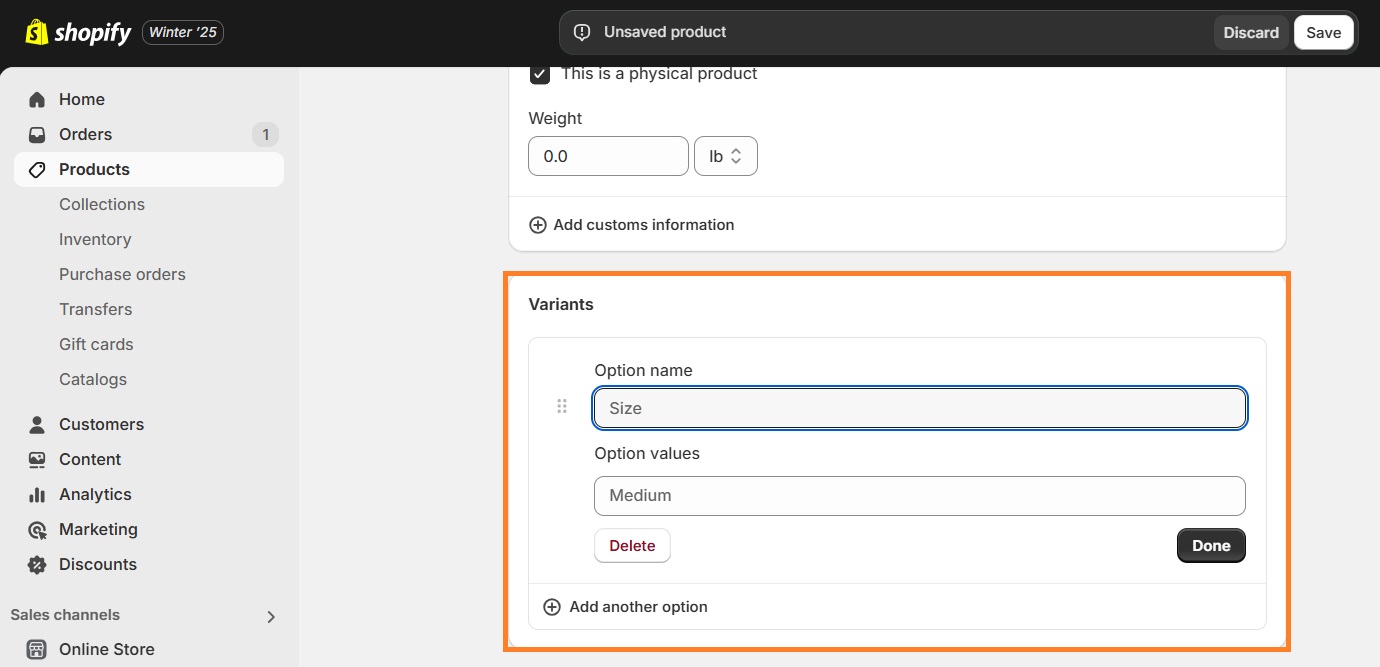
Add product variants
In the product variant tab, you can add such product features like size and color.
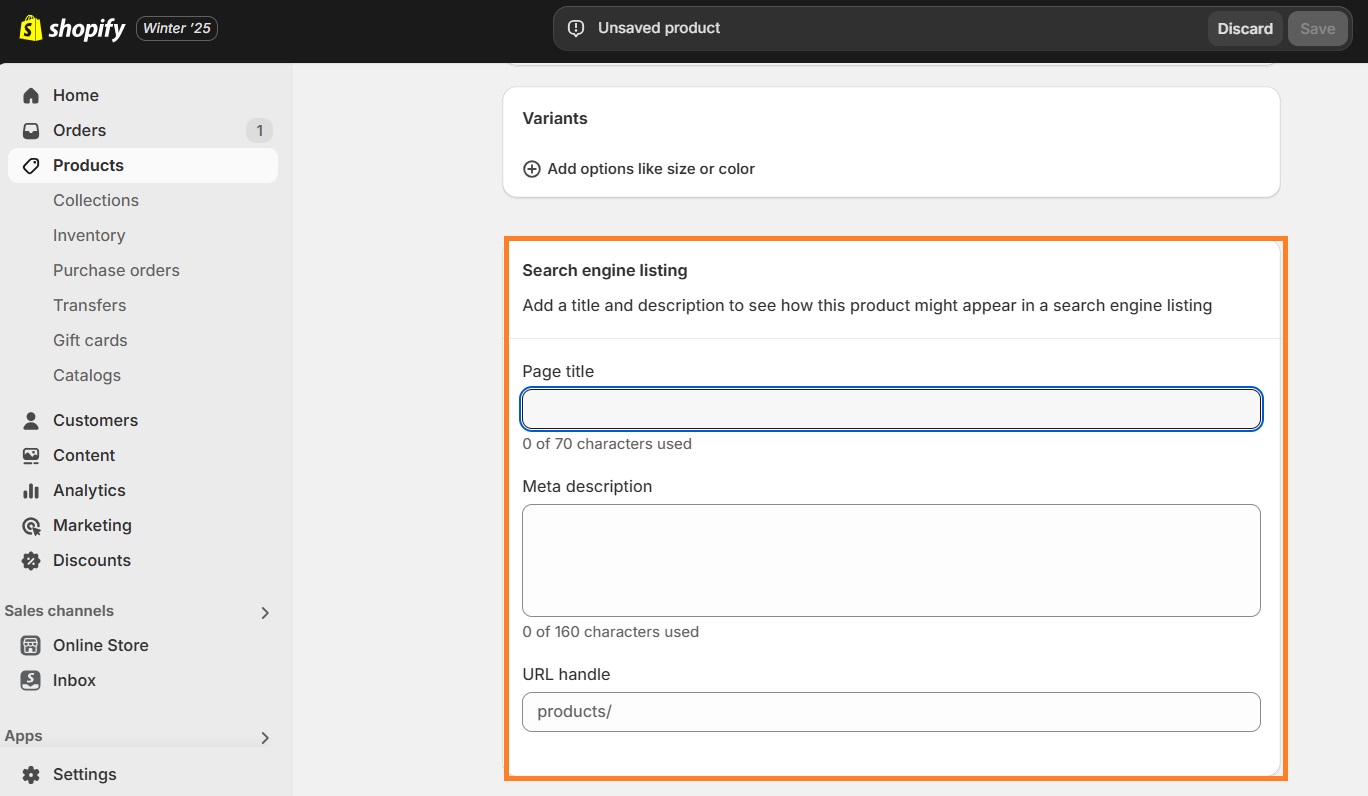
Optimize product page for SERP
In the Search engine listing tab, you can add meta data like the SERP title and description, as well as the page URL. We also have a helpful guide on writing title tags and meta descriptions for Shopify.
Filling out metadata for each product can be very time consuming – let TinyIMG do it for you automatically!
Try TinyIMG todaySelect Sales Channels
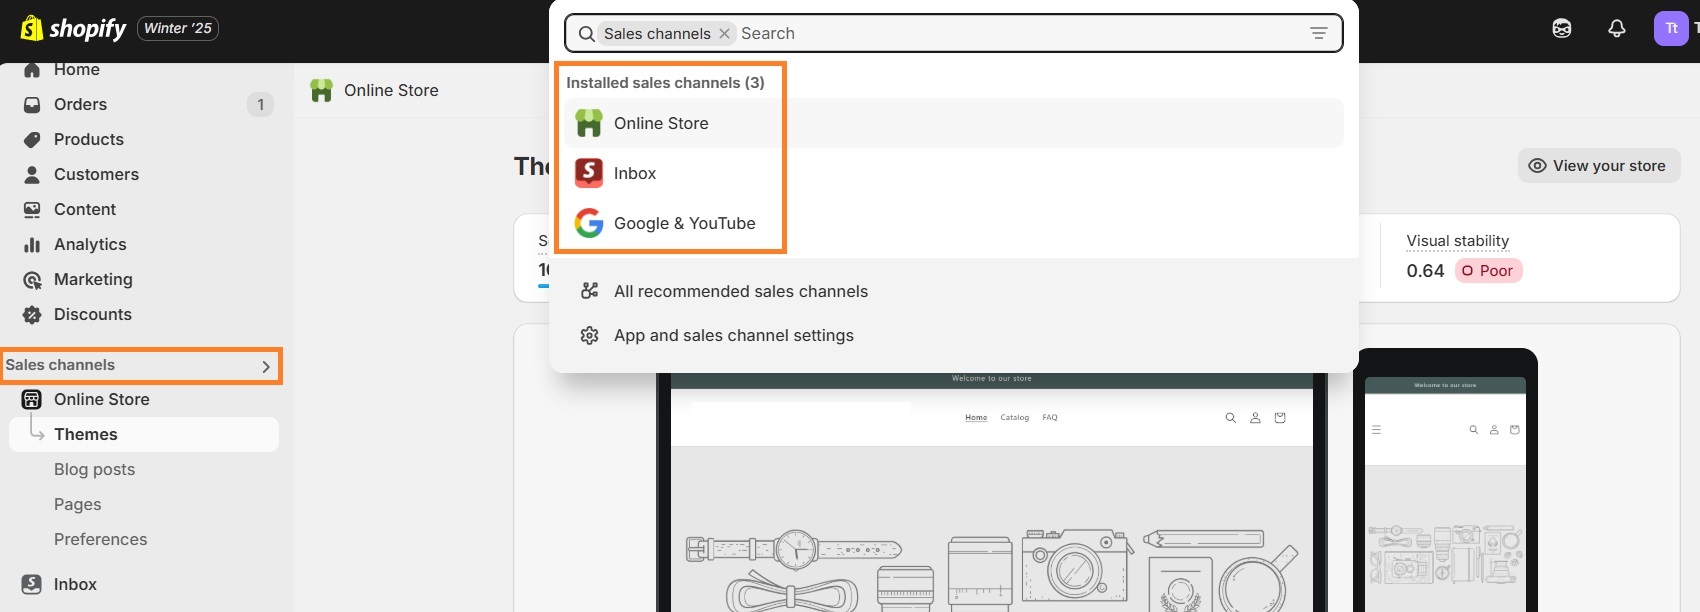
In the tab on the left, select your Sales Channel. If you click on the arrow, a new window will show up where you can choose more sales channels.
This feature allows you to showcase your products on Google, Facebook or Instagram as ads while managing everything from one Shopify dashboard.
Choose product's collection
This is where you can choose, add, and manage your product collections. You can also create a new Shopify collection by clicking the “Create collection” button in the top right corner.
Collections are a great way to organize your products and ease the search and filtering process for your customers. You can create collections by automatically adding existing and future products that match the conditions you set.
Suggested reading
- Learn how to add products to Shopify collections directly
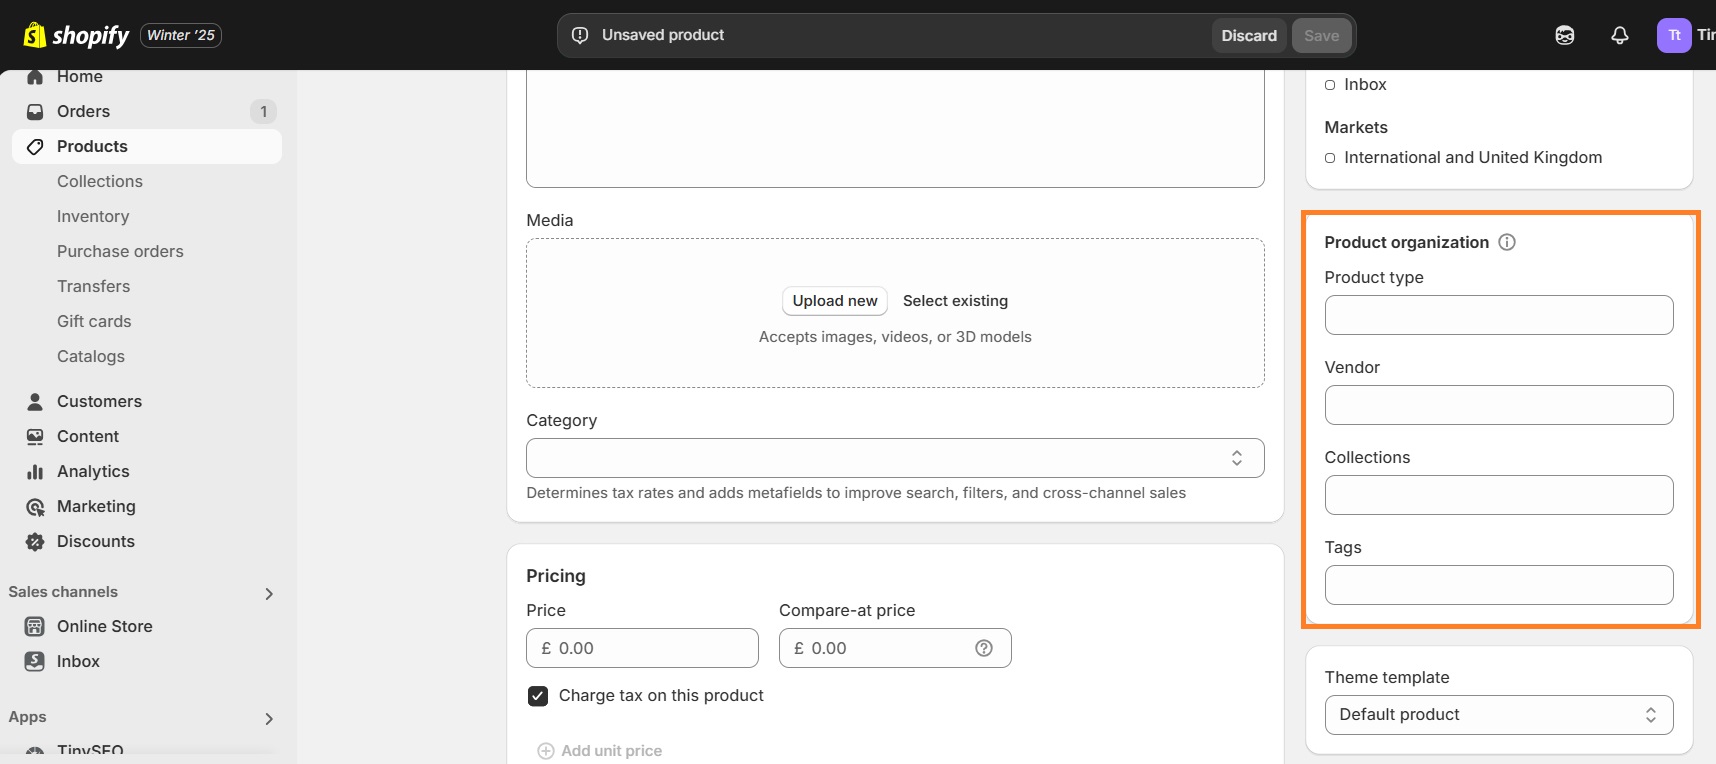
Add product organization information
On the right side, you’ll be able to add all product organization information. It allows you to better manage and organize your products so it’s easier to find them by filtering. This information can also help you ease the process of selling products in channels like Facebook, since they require a standardized product type.
Activate the product
In the top right corner, activate your product by clicking on the drop down input field and selecting “Active”.
Option 2: Duplicate products
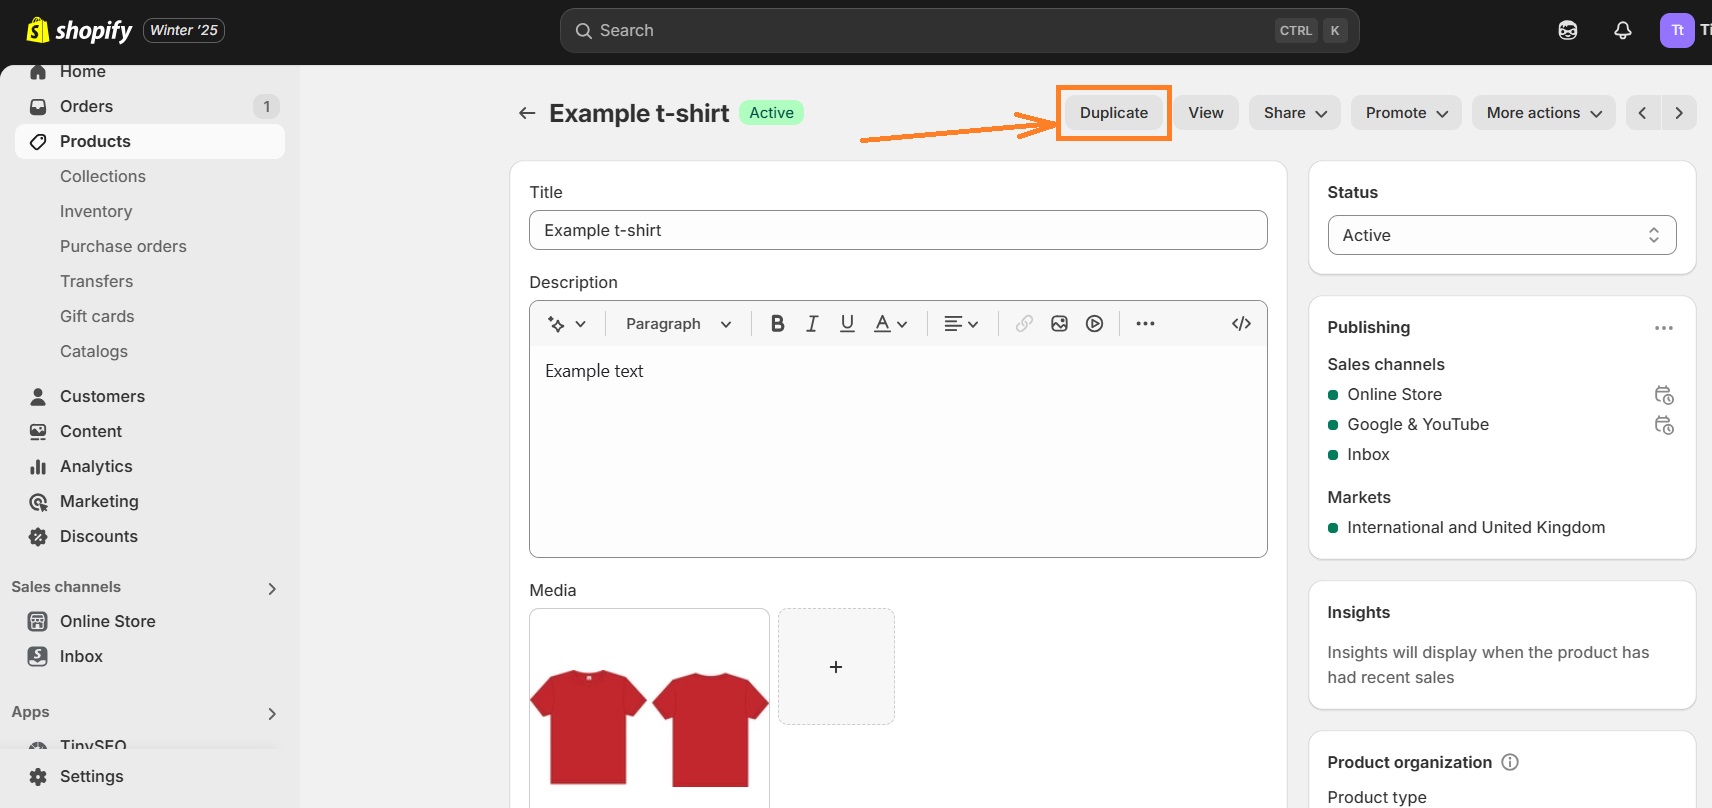
In order to save time creating a new product, you can duplicate similar products and copy properties like images, SKUs, barcodes, and inventory quantity.
We have a step-by-step guide to creating product duplicates on Shopify, but here's a short version of it:
1. Go to Products in your Shopify admin panel and click on the product you want to duplicate.
2. Click Duplicate.
3. Edit properties and click Duplicate product.
Tip: Make sure to check that your product is not in drafts!
Option 3: Import new products
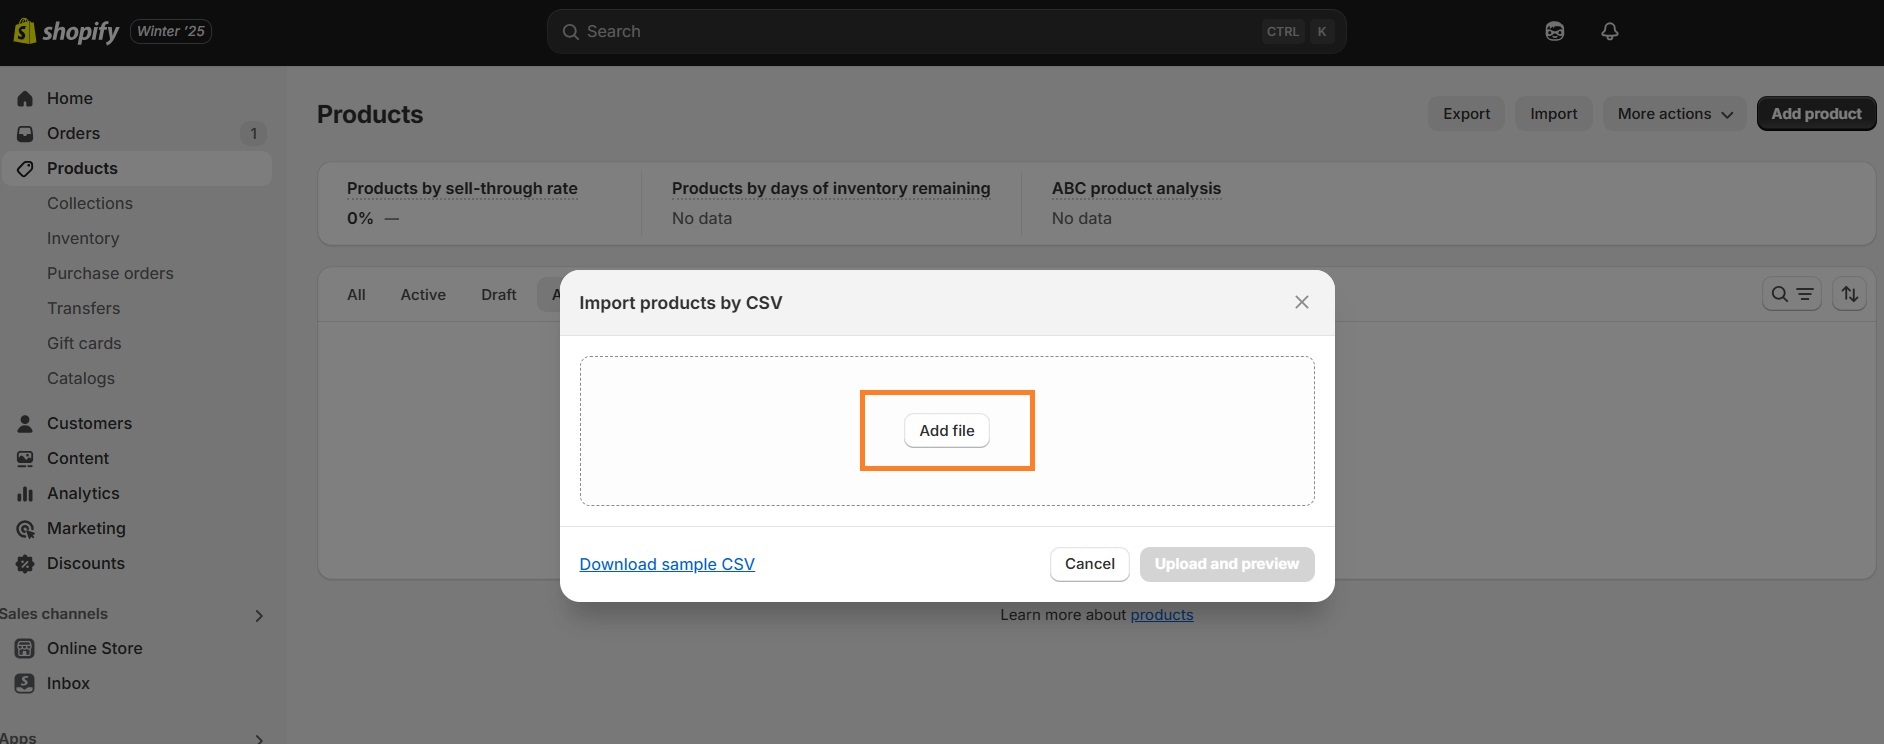
There’s a possibility to import products via CSV files. This is helpful if you want to import a lot of products at the same time, or if you’re importing products to your Shopify store from another platform.
If you’re unsure how to format such a document, Shopify offers a sample CVS template that you can download.
Here’s how to import products:
1. Go to Products in your admin panel and click Import.
2. Click on Add file and choose your CSV file.
3. Then, click Upload and continue.
4. Check the details and click Import products. It can take a bit, so wait a few minutes until it’s finished. After the import is complete, you’ll see all the new products in the Products section of the admin panel.
Tip: If you’re dropshipping, we highly suggest checking out our guide on Shopify apps for dropshipping. With these apps, you’ll be able to import products from suppliers on Aliexpress and other vendors to your stores.
Option 4: Scan products with a camera
You can scan product barcodes with your iOS, iPadOS or Android camera. Here’s how to do that:
- Go to Products from your Shopify app.
- Add a new product or edit an existing one.
- Click on Inventory.
- Click on the barcode icon to open your device’s camera.
- Position the camera so it can fully scan the barcode.
- After Shopify recognizes the barcode, you’ll be taken back to the Inventory where the barcode number will be automatically applied.
Option 5: Add New Products with Shopify POS
If you want to move your store from an online shop into a physical business, you need to get Shopify POS for iPhone, iPad, or Android device.
Here’s how to add new products using Shopify POS:
- Click the + button on the Shopify POS checkout screen.
- Select Add new product.
- Add product details, like the title, description, price.
- Add product photos by clicking the image button.
- Click Save.
Managing products on Shopify
To keep your inventory and product availability up to date, you’ll need to manage your products. You can always edit product details, archive and delete products using your Shopify admin panel.
To manage products, go to the Shopify admin panel > Products.
To manage the inventory, go to the Shopify admin panel > Inventory.
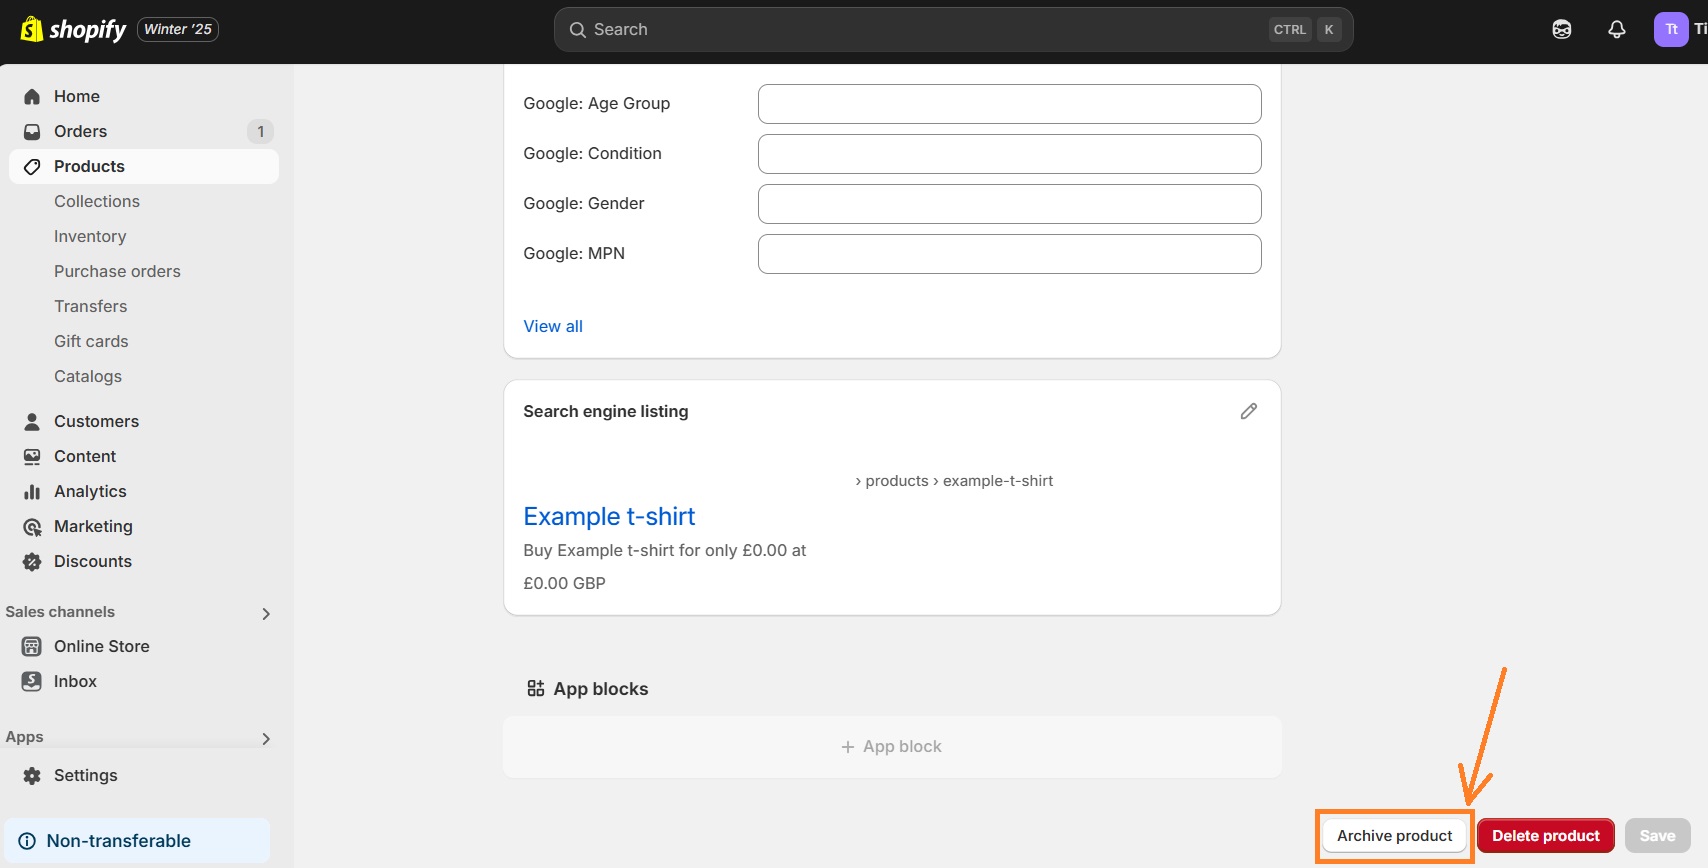
Archive products on Shopify
In order to archive the product, follow these steps:
1. Go to Products in your Shopify admin panel.
2. Select any product you want to archive.
3. Scroll all the way down and click Archive.
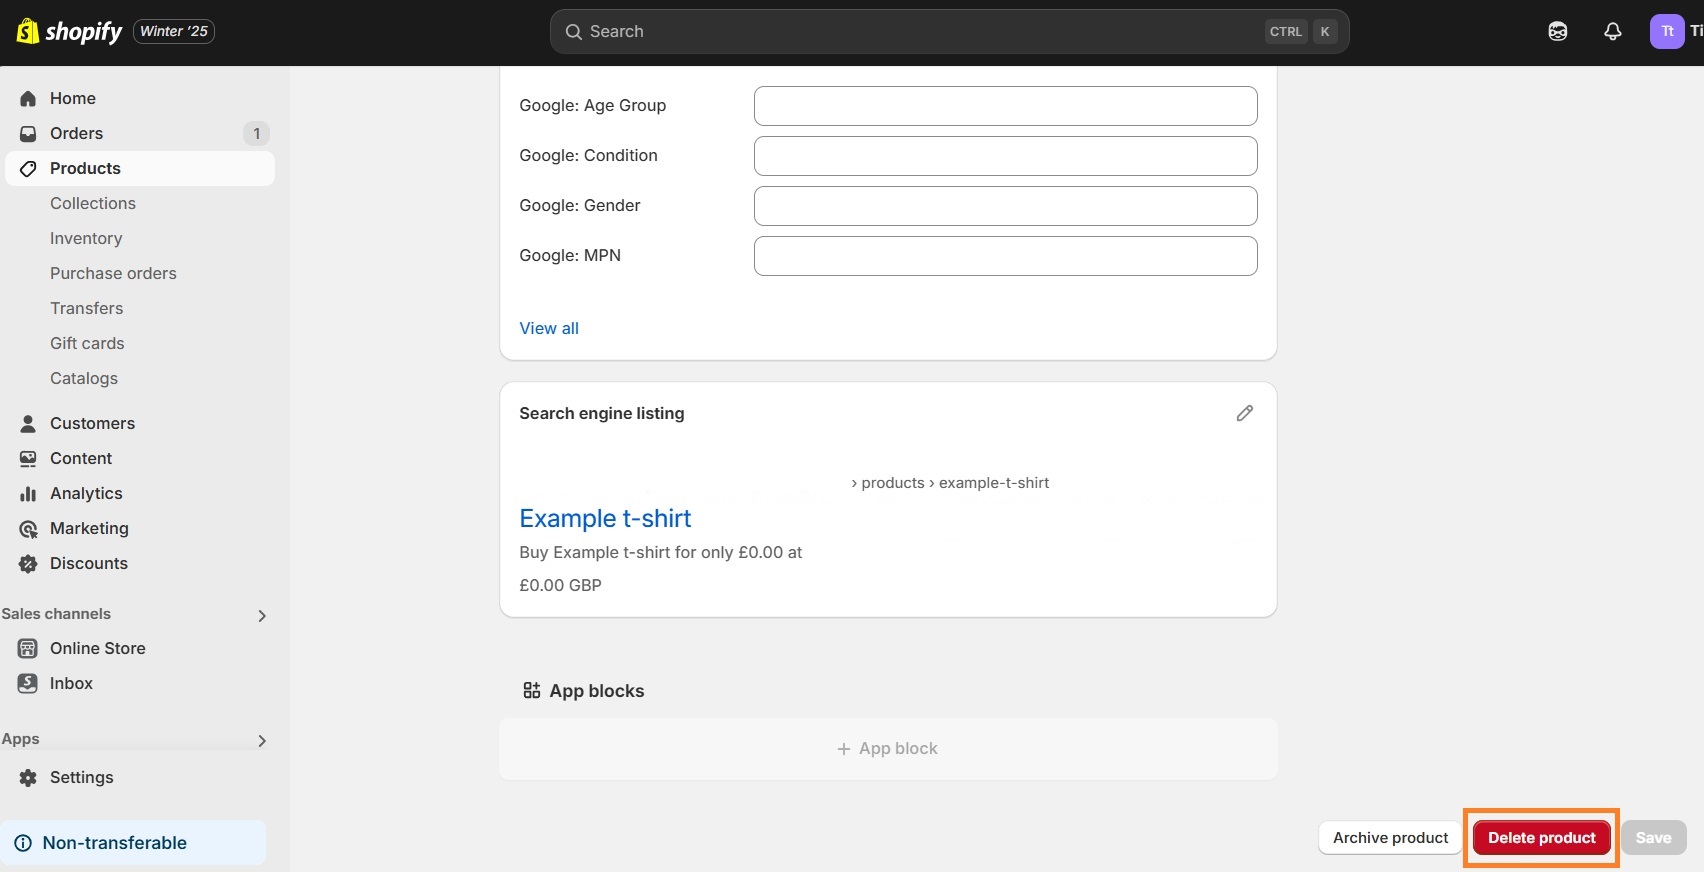
Delete Shopify products
In order to delete any product in your shop, follow these steps:
1. Go to Products in your Shopify admin panel.
2. Select any product you want to delete.
3. Scroll all the way down and click Delete product.
Summary
Adding new products to your Shopify store is not very complicated – everything is accessible through the main Shopify admin panel that you land upon after creating a Shopify account.
There are several ways of adding products to Shopify, the most common being the manual option. If you have tons of products or you want to transfer them from another shop, importing a CSV file is the best option.
Adding new products to your store is a big step towards a successful business but it’s just the beginning. Don't forget to optimize your pages for SEO, improve your images, and ensure high page load times.

Frequently asked questions
You can add multiple products to Shopify by importing a CSV file. This way, you can add as many products as you want at once.
You can add your own products manually by going to your Shopify admin panel > Products > Add product.
In order to move products from other websites to Shopify, you need to export your products into a CSV file and then import it into Shopify. To do that, go to the Shopify admin panel > Products > Import.


