Sub-collections in Shopify. When you’re a store with a large number of products, this kind of subdivision makes sense, and yet it’s not an out-of-the-box function in Shopify.
If it’s something you want in your online store on Shopify, you’ll need to find a workaround to have a user-friendly Shopify sub-collection structure.
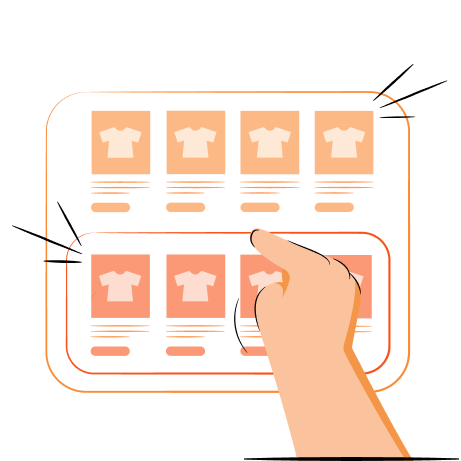
Why is sub-collection a good idea for a Shopify store?
Sub-collections are one of the key strategies for organizing your Shopify products. But that’s not it, as we also found that it’s beneficial to have a subset of collections (rather than one big collection) for SEO.
During our in-house tests, these super-specific collections did well in search results, even when they didn’t have detailed collection descriptions. To really get a leg up on other companies in your niche, you can take that a step further and both create and fully optimize your sub-collections by:
- Including a collection-specific description, generally either at the top or the bottom of the page.
- Create collection URLs that match the product relationship and hierarchy.
- Create unique meta titles and descriptions
If your Shopify store is new, creating sub-collections for a specific product search could give you an advantage and help you generate your first Shopify sales.
Store SEO and speed optimization takes too much time? Automate the process with TinyIMG
Start optimizing todayHow to create a sub-collection on Shopify?
You can create Shopify sub-collections in two most popular ways: via the navigation menu or by adding collections within collection pages. The former method is a more user-friendly one, as it’s basically changing the structure of your website using the admin panel. Additionally, through the collection metafield, you can even add custom images for each navigation menu item.
However, creating sub-collections by adding collections within collections requires having at least basic HTML knowledge. Although this way is more technically challenging, it allows you to expand the functionality of a sub-collection. And it also has two options to create a sub-collection:
- Creating the page and page.list-collection.liquid template.
- Creating the collection.sub-collections.liquid template.
The first option involves creating a separate page in the Pages section that will function as a parent collection. As for the second option, you will need to manually write the code for the whole structure to present it on the site.
Add sub-collections to the navigation menu
Adding sub-collections to the navigation menu is one of the more manageable ways if you are less than familiar with theme.liquid files, HTML and how to edit the code of your website.
As we mentioned above, this is all assuming you’ve already created all the collections you want to create, and have all the conditions, names, and all that already set the way you want it.
1. Under Content, click Menus.
2. Choose your main menu, or if you haven’t created it yet, choose Create menu.

3. Add the sub-collection you want to nest within your navigation. Make sure you link the pre-created collection as well.

4. Hover your mouse over the left-hand dots, click and drag so the sub-collection becomes a subset of the menu item you want it nested under.

5. Once you do this once, you’ll be able to add more sub-collections directly to that collection by clicking “Add menu item to _____”.
6. Repeat these steps as many times as necessary.
7. Click “Save Menu”.
This process will only change the visual hierarchy of the website, the flat collection URL (/collections/product-group) won’t automatically nest when you do this process. If you want that, you’ll need to go into the theme.liquid files.
Suggested reading
Add sub-collection to the parent collection page
You can add sub-collections as a list to the parent collection page, too. To do this, you’re creating a new template type in your theme.liquid files from scratch, essentially, so it’s a good method if you’re comfortable (or work with someone who is comfortable) with HTML. Before you get started, then, it’s a good idea to create a backup copy of your store, so if anything goes wrong, you can roll back quickly to the most up-to-date version of your site.
1. Once you’ve backed up your site and are ready to make changes, go to Online Store > Themes.
2. Choose your active theme, and Edit Code.

3. Under “Templates” click Add a new template.

4. Choose the parameters:
- Select new template to create: collection
- Liquid
- Collection.sub-collections.liquid

5. Click Done.
From here, you have a blank slate, and you’ll probably want to create a custom template to line up with your brand colors, the rest of the website design, and other considerations.
A place to start is the code:
{{ collection.title }}
{% assign collection_handle = “collection-” | append: collection.handle %}
<ul>
{% for link in linklists[collection_handle].links %}
{% assign sub_collection = link.object %}
<li><a href=”{{ link.url }}”>{{ link.title }}</a></li>
{% endfor %}
</ul>For some themes, you may need to take the added step of creating a sub-collections.liquid section where you code the design. You’ll want to review your other templates and theme documentation to confirm.
Once you’ve created a sub-collection list template to your satisfaction, you’ll want to go in and replace the collection template with the subcollection template. This replacement, again, will depend on your theme setup. Regardless, it’ll likely include going into your collections in your Shopify admin and changing the default theme template:

Once you’ve sat down and created all the Shopify collections and sub-collections you want to have on your website, it’s time to create your collection tree.
Creating a collection tree means structuring your collections based on a hierarchy and considering the future growth of your Shopify store. This structuring method will help your customers navigate better, and you will avoid adding duplicate pages.
Adding Shopify sub-collections the easier way
There are ways to make this process a bit easier or quicker if you’re willing to spend a bit of money. Stepping into the code of your website can be a scary and strange experience, particularly if you’re concerned about hitting the wrong button and your whole site going up in (metaphorical) flames.
If you want to be on the safer side or are less than confident in your ability not to break your store, there are a lot of Shopify developers out there who would be able to help you with the project for a fee.
If you’d rather not tie yourself to a developer because you’ll be adding a lot of sub-collections ongoing, or want to be able to manage it yourself long-term, consider looking into an app. A few themes also say they have sub-collections set up, of course, it’s worth doing your own research on how each theme builder defines that before purchasing one.
How to delete sub-collections in Shopify
Deleting sub-collections in Shopify is the same process as deleting collections.
1. Before you delete the collection, make a note of the collection URL.
2. Navigate to Products > Collections.
3. Choose the collection you want to delete.
4. At the bottom of the page, click Delete collection.

5. You’ll be prompted to confirm your choice.

6. Click Delete collection.
As you need to manually create a 301 redirect, go to Content > Menus > URL redirects (in the upper right corner on the desktop).
Follow the process to create a 301 redirect.
Final suggestions
Creating sub-collections using Shopify is best done when you have the time and focus to sit down and really plan it out, thinking potentially even a few years ahead, in terms of where you’d like to see your business going.
Give it the time and planning it deserves, and try to do this at least a few months before your busy seasons — for eCommerce sites, this may be a good project for April or May, ahead of a busy November or December. This way you’ll have the time to do the work and to give Google and other search engines time to see your website.
Curious to read more? Check out these articles:


Frequently asked questions
Yes, you can. Nested collections and sub-collections are used to mean the same thing in this article.
You can definitely show multiple collection pages on one page in Shopify, it will require changing the list view of the page, like we go through when we go through adding sub-collections to the parent collection page.
You can create up to 5,000 automated collections on Shopify, and there’s not a publicly shared limit on manual collections.