TinySEO is your go-to tool for optimizing images, accelerating your store, and reaching high positions in search results – all from your Shopify Admin.
Whether you’re just a beginner or a seasoned Shopify store owner, TinySEO’s features will help streamline your work and save time for more important tasks.
Continue reading to learn all about TinySEO and how to get started. You’ll find out how to leverage all of the app’s features to maximize your store’s results.
1. Get inspired by success stories
Before we dive into TinySEO features and plans, let’s take a look at a few examples of what we already help achieve for others. Here are a few success stories of our clients:

If you want to read more about the app's results, check out our TinySEO success stories.
Want to be featured as another successful TinySEO client? Reach out to Nikoleta at [email protected] and let’s see if we can make it happen!
Now, let’s create a success story for your store.
2. Choose the right TinySEO plan for you
TinySEO offers 5 flexible pricing options, so any store owners can find what they need. There are 3 monthly plans, one yearly plan, and a free option for testing things out.
All plans come with image optimization, asset preloading, 30-day image backups, automatic filename and alt text optimization, homepage audit, and 24/7 in-app support.
Here are the plans and their differences:
| Beginner | Advanced | Yearly | Pay as you go | Expert | |
| Price | $14/month | $23/month | $8/month | Free (billed for extra optimizations) | $49/month |
| Free images | 1500/month | 5000/month | 10000/year | 50/month | 15000/month |
| Free AI optimization credits | 100 | 300 | 500 | 10 | 1000 |
| Image resizing | ✔️ | ✔️ | ✔️ | ❌ | ✔️ |
| Script control | ❌ | ✔️ | ✔️ | ❌ | ✔️ |
| Lazy loading | ✔️ | ✔️ | ✔️ | ❌ | ✔️ |
| CSS/JS minifier | ❌ | ✔️ | ✔️ | ❌ | ✔️ |
| Site audit | ❌ | ✔️ | ✔️ | ❌ | ✔️ |
| Metadata editing | ❌ | ✔️ | ✔️ | ❌ | ✔️ |
| JSON-LD | ✔️ | ✔️ | ✔️ | ❌ | ✔️ |
| Sitemap | ❌ | ✔️ | ✔️ | ❌ | ✔️ |
| IndexNow | ❌ | ✔️ | ❌ | ❌ | ✔️ |
| LLMs.txt generation | ❌ | ✔️ | ✔️ | ❌ | ✔️ |
Please note: If you activate automatic image optimization, it will not stop until all images are compressed, even if you exceed the free limit. To prevent that, message our support before you begin the optimization and ask them to cap your images.
Now, let’s take a look at what you get with each of the TinySEO plans and which one is the most suitable for your store.
Beginner – $14/month, billed monthly
Best for: small Shopify stores and beginners looking for image optimization and basic SEO tools.
The Beginner plan allows you to optimize 1,500 free images per month. If you want more optimizations, each image will cost you just 2¢.
Let’s take a look at what you get with the Beginner plan:
- 1,500 free monthly image optimizations
- 100 FREE AI Credits every month
- Image resizing
- Homepage site audit
- Homepage script control
Whether you’re resizing or compressing images, these features are made to optimize your files without visible quality loss. Even if you want the original version back, you can restore images in one click using the 30-day image backup.
With the Beginner plan, you can manage third-party scripts or audit the home page. However, if you want to do it on other pages or get SEO tools like JSON-LD setup, broken link fixing, or automated metadata, you’ll have to upgrade to the Advanced plan.
Advanced – $23/month, billed monthly
Best for: mid-size or large stores with a wide product selection that want to optimize store speeds and SEO & GEO.
The Advanced plan is the most popular solution of TinySEO that gives access to all the main features. It comes with 5,000 free image optimizations per month, and any extra compressions will cost you just 1¢/image.
Here are all the features you get to use:
- 300 free monthly AI credits
- Image resizing
- Site audit
- Automatic SEO metadata
- AI metadata generation
- Lazy loading
- JSON-LD
- Script control
- Manage sitemap
- Google Search Console
- IndexNow (instant indexing for Bing, Yandex, etc.)
- LLMs.txt generation
Unlike the Beginner plan, this tier comes with extensive SEO audits for your whole store and ensures faster indexing on search engines like Bing with IndexNow. You can also optimize AEO & GEO by generating LLMs.txt files, which guide AI language models on how to understand your site’s content.
Yearly plan – $8/month, billed yearly
Best for: Shopify stores that don’t have many images but want to leverage SEO features for the long term.
The yearly plan is similar to the Advanced one, except you can optimize 10,000 images per year. After you reach the limit, you can optimize visuals for just 1¢/image.
With the yearly plan, you get:
- 500 FREE AI credits per year
- Image resizing
- Site audit
- Automatic SEO metadata
- AI metadata generation
- Lazy loading
- JSON-LD
- Script control
- Manage sitemap
- LLMs.txt generation
It’s the perfect option if you’re not planning to overfill your site with images but want access to all the advanced audits and SEO & GEO features.
If you need more image optimizations, AI credits, or a dedicated manager to help you out, you’ll need to upgrade to the Expert plan.
Expert plan – $49/month, billed monthly
Best for: large stores and enterprises with hundreds of products and thousands of images.
The Expert plan gives you 15,000 free image optimizations every month, with extra images costing 0.8¢ each.
You get access to all of TinySEO’s features, including site audits, automated SEO features, speed optimization functionalities, and more.
The Expert plan stands out because it’s the only one that offers one-on-one calls with a dedicated manager. It’s a great way to troubleshoot issues faster and find tailored solutions to your business needs.
Pay as you go – free, charged for extra optimizations
Best for: testing the app’s interface and basic functionalities
The “Pay as you go” plan is the perfect way to test the TinySEO app without committing or being limited to a trial.
With this plan, you get:
- 50 free image optimizations per month
- Extra optimizations - 3¢/image
- Asset preloading
- Image backup for 30 days
- Automatic filename optimization
- Automatic alt text optimization
- Homepage site audit
- 10 free AI feature credits
Important: You need to select a payment method even for the “Pay as you go” option. You will not be charged unless you use one of the paid services or exceed 50 free image optimizations.
However, if you want access to useful SEO, AEO, and speed features like JSON-LD, LLMs.txt generation, broken link fixing, or script control, you can try out any of the paid plans.
3. Setting up TinySEO
TinySEO offers a simple and intuitive 5-step setup process. Here are all the tasks:
- Turn on Automatic image optimization – if you don’t turn it on, automatic optimization won’t start until you manually refresh images and start it. However, you can enable it later in the TinySEO Settings.
- Create an alt text template – you can create a template to update all your alt texts automatically. Alternatively, you can do it later in the TinySEO Settings. You can learn more in the Alt text automation section.
- Create filename template – you can create a template for automatic filename creation, or you can do it later in the TinySEO Settings.
- Set up Advanced image reduction – select the size you want your oversized images to be reduced to. You can also do it later in the TinySEO Settings. To learn more, jump to the Image resizing section.
- Pick a plan – all you need to do is choose a paid plan or scroll down to select the free one.
That’s it! Your journey with TinySEO begins with the Dashboard. This page is designed for convenient access to TinySEO’s main features and recommendations to help your store.

You can also conveniently navigate all feature sections in the left-side menu of your Shopify Admin.
Most sections come with a useful FAQ section at the bottom of the page in case you need more information on what the feature does or how it works.
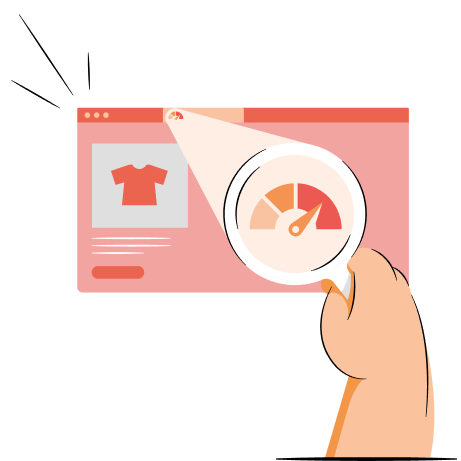
4. TinySEO speed optimization features
TinySEO can help you visibly increase your store’s performance score and speed index in speed test tools. This can help enhance the user experience and eventually lead to better search engine rankings. Let’s take a look at how to use each feature to your benefit.
Image optimization
| What it does: | Compresses images without visible quality loss |
| Good for: | Speed optimization |
| Where to find it: | TinySEO > Optimize images |
Automatic image optimization is one of the most significant TinySEO features for improving your store’s speed. You can compress images up to 94% or more, helping you save loads of space with just a click of a button.
At the top, you’ll see an overview of lifetime image optimization statistics. If there are any new unoptimized images in your store, the scheduled optimization with the total number of images will appear below.
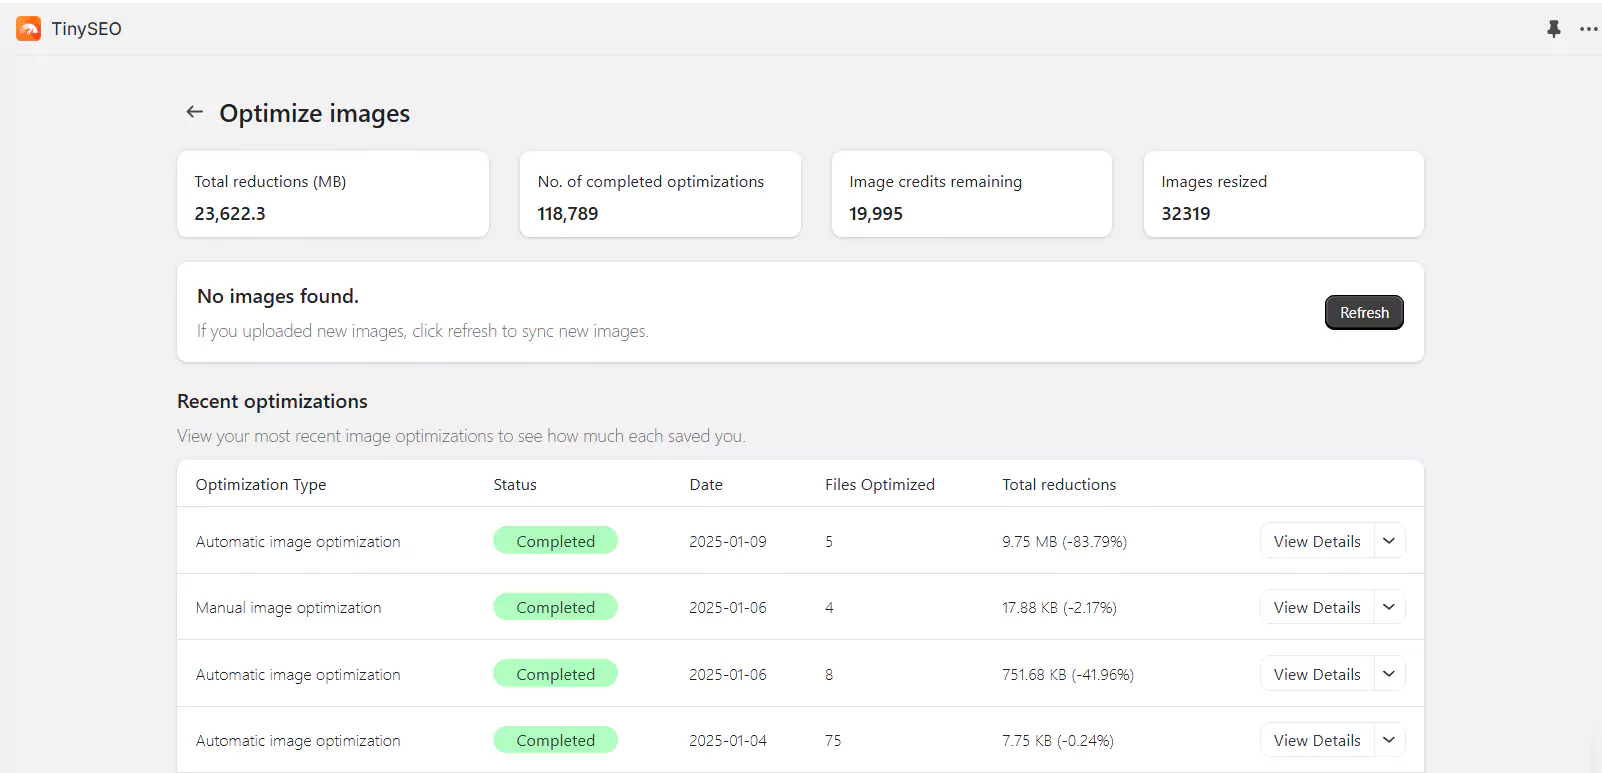
Under the “Recent optimizations” section, you’ll find a list of image optimizations performed on your store in the past. You can review their status, date, how many files were optimized, and how much space was saved.
To check the statistics of individual images, you can click the “View Details” button.

Here, you can check the original and optimized size of individual images as well as total reductions. If you want to restore any of the images to the original version, just click “Restore.” Alternatively, you can also download the optimized image.

Please note that TinySEO cannot reach and optimize some image types automatically (e.g. banner images). In such cases, you can upload the image manually to our in-app Manual image optimization tool.

The tool supports both .jpg and .png files. You can see the total reductions and download images as soon as compression is completed.
Image resizing
| What it does: | Automatically reduces oversized images |
| Good for: | Speed optimization |
| Where to find it: | TinySEO Settings > Overview > Advanced image reduction |
The TinySEO advanced image resizing feature is beneficial to reduce the size of your images without visibly affecting quality.

You can choose from various size options, however, here are a few pointers to help you make the right choice:
- For zoomable product images – at least 2048px
- For non-zoom product images – 1200px
If you need more recommendations, you can read our guide to Shopify image sizes.
Asset preloading
| What it does: | Loads critical resources in advance |
| Good for: | Speed optimization |
| Where to find it: | Improve speed > Set up asset preloading |
Asset preloading is an impactful trick to help browsers load content faster. It means that your web page resources (images, code, etc.) are organized by priority, and the critical assets are loaded early.
The preloading process can be triggered by users hovering over links or if preloading tags are included in the HTML. It significantly cuts your page load time, giving visitors the impression that the page loads instantly.
All you need to do is click the “Activate" button and check your images.

Please note that if you activate asset preloading and it messes up your images, it means asset preloading was already applied. To fix it, simply come back and deactivate the feature the same way you activated it.
Script control
| What it does: | Allows managing app scripts on different pages |
| Good for: | Speed optimization |
| Where to find it: | Improve speed > View script control |
Script control allows you to manage third-party app loading on different pages. Since every app you install adds scripts to your store, they slow down the loading time. However, most of the apps you use are usually needed on one or two pages.
So, the script control feature lets you disable unnecessary scripts, optimizing your store’s speed.
All you have to do is toggle the scripts on or off in the TinySEO Script control panel.

If you’re unsure how to determine script necessity, explore our FAQ section at the bottom of the section. For additional help, don’t hesitate to contact our in-app support via the orange bubble at the right-bottom corner of your Shopify Admin.
Lazy loading
| What it does: | Loads content only when the user needs it |
| Good for: | Speed optimization |
| Where to find it: | Improve speed > Set up lazy loading |
Lazy loading delays loading non-essential resources, such as images, until the visitor needs them. It reduces the initial browser requests, resulting in a faster page load time.
To implement lazy loading, web page resources are divided into two types:
- Critical – resources that are loaded immediately and are necessary for the page to show up, like above-the-fold content.
- Non-critical – resources that are loaded only when needed and show up only after the user scrolls to it.
To activate lazy loading on Shopify, just pick the theme you want to enable it on and press “Activate.”

CSS/JS minifier
| What it does: | Removes unnecessary code to improve loading times |
| Good for: | Speed optimization |
| Where to find it: | Improve speed > Minify CSS/JS resources |
Minification is the process of deleting unnecessary code without changing its function. This includes using shorter variable names and deleting extra characters, like spaces, line breaks, or comments.
When you optimize your CSS and JavaScript code with a minifier, it reduces the file size. Such scripts are faster to download, resulting in faster page load time.
With TinySEO, all you need to do is pick the theme you want to minify code on. You can opt for CSS minification, JavaScript minification, or both. As soon as you press “Activate,” your files will be ready in a few minutes.

5. TinySEO SEO features
SEO optimization is crucial for increasing your store’s visibility on search engines and driving more organic traffic. With TinySEO, you can automate many time-consuming or challenging tasks, letting you focus on more important aspects of your store. Here are all of the features in detail:
Product SEO optimization
| What it does: | Analyzes your product page SEO |
| Good for: | SEO optimization |
| Where to find it: | Improve SEO > Improve product SEO |
Shopify product SEO is crucial for ranking higher in search engines, boosting visibility in AI search with best GEO practices, and attracting customers with high purchase intent. The TinySEO product SEO optimization feature gives you practical steps for each product page on what to improve.
Just go to Improve SEO > Improve product SEO and click “Edit” by the product you want to improve.
Here, you can add a focus keyword to get better SEO recommendations. You’ll receive an overall SEO score that you can improve by going through recommendations and editing content in the same page.

TinySEO will present you with suggestions on how to improve your product title, description, metadata, and image alt text. With search analysis, TinySEO will also review page indexing, JSON-LD details, product category, and the URL handle.
If you have loads of products that need optimizing, you can also leverage the AI content generation feature. Just click the sprinkle icon by the product information or metadata and create content in seconds.
Metadata editing
| What it does: | Allows optimizing or bulk editing metadata |
| Good for: | SEO optimization |
| Where to find it: | Improve SEO > Update metadata |
Metadata refers to meta titles and meta descriptions that provide users with information about page content on search engines.
Crafting descriptive and unique metadata allows search engines to understand your content better, helping achieve better search results visibility and attract more clicks.

With TinySEO, you can update metadata one by one by clicking “View Details” or choosing the “Bulk Mode Edit.”

The single-entry metadata editing mode is great for beginners who are unfamiliar with the best meta title and meta description practices. It helps you optimize each page’s metadata based on the provided checklist and score, starting from the lowest to the highest.
To start improving your metadata, click the “Edit” button by the product of your choice.
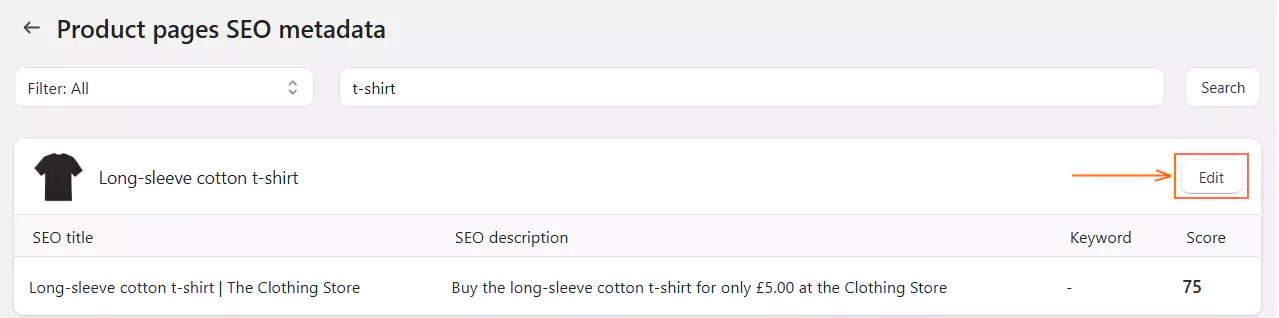
Here, you can start by adding your target keyword for the specific page. Then, edit your metadata until you reach the perfect score and all the check mark suggestions become green.

Once you’re done editing, don’t forget to click the “Save” button.
If metadata optimization is nothing new to you and you want to speed up the process, switch to the Bulk Mode Edit. It lets you update the metadata of different pages in one place, and all you’ll see is the character length.

SEO metadata automation
| What it does: | Automatically creates metadata from templates |
| Good for: | SEO optimization |
| Where to find it: | TinySEO Settings > SEO Metadata |
If you have too many products and not enough time or confidence in your SEO skills, you can automate the process with our metadata automation tool.
This feature is not activated by default but you can easily turn it on by going to the TinySEO Settings > SEO metadata.

NOTE: If you enable this feature, all your metadata will be regenerated except for the ones you updated using TinySEO.
ALT texts
| What it does: | Enables bulk alt text edits |
| Good for: | SEO optimization |
| Where to find it: | Improve SEO > Update ALT texts |
Alt texts, or alternative texts, are brief descriptions used to convey the contents of an image. They appear in the place of an image when it doesn’t load on the user’s screen. However, they’re also valuable for search engines to understand your content better and potentially improve image search result rankings.
Image alt texts must be brief but descriptive. They should read like a short sentence and include the main keywords.
However, updating alt texts for each image on your site can be overwhelming. TinySEO simplifies the process with the bulk alt text edit feature.
You can choose what pages – product, collection, or blog – you want to edit. The product section will come with a table that shows which products have images that require attention.
To start editing, click “Edit” by the product you want.

Here, you can see all images in one place and edit the alt texts. You can monitor the live character count and click “Update” as soon as you’re done optimizing.

If your store has thousands of images, you can save time by creating alt text templates.
Alt text automation
Creating an alt text template will allow you to save time on manual alt text updates and automate the process.
Just go to TinySEO Settings > Alt text.

Our recommended template for ALT texts is #product_name# – #shop_name# and #product_name# for filenames.
Example: If your store is called “The Clothing Store” and you’re uploading a photo of a product called Red One Shoulder Dress, your result would be:
- Alt text: Black One Shoulder Dress – The Clothing Store
- Filename: black-one-shoulder-dress.jpg
If you have something else in mind for your store, use other template variables or contact our support and we’ll be happy to create custom ones.
JSON-LD
| What it does: | Structures data for a better search engine understanding of your website |
| Good for: | SEO optimization |
| Where to find it: | Improve with SEO > Set up JSON-LD |
JSON-LD (JavaScript Object Notation for Linked Data) is a simplified means for adding structured data to your website. It helps you organize and share website data so that search crawlers can index your content more easily.
Adding structured data to Shopify can enable rich results – Google search results that stand out with extra information about the page, like ratings, pricing, availability, and more.

Setting up JSON-LD is a difficult and technical process. However, with TinySEO, all you need to do is provide information about your store in the dedicated fields. You can add three types of JSON-LD type manually – general information, shipping details, and return policy.
Click “Save” once you’re done filling in the information. After that, locate the “Add theme extension” beside the activation button and click it.

You’ll be redirected to the Theme editor, toggle the theme extensions to turn it on, and click Save.

That’s it – your JSON-LD is set up. You can test whether your page supports rich results using Google’s Rich Results Test.
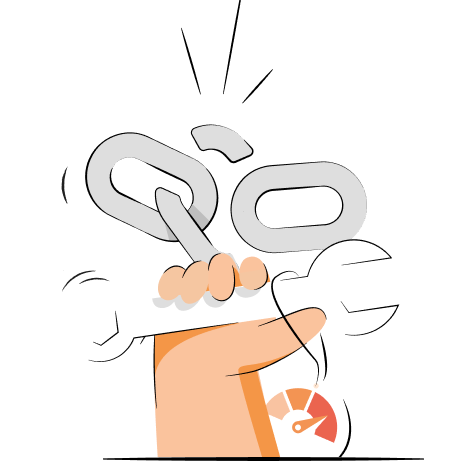
Broken links
| What it does: | Lets you create redirects or get broken link reports |
| Good for: | SEO optimization |
| Where to find it: | Improve with SEO > Fix broken links |
Broken links return “404 not found” errors which can frustrate your site visitors and cause them to leave the site. Moreover, broken pages cause crawl errors when search engines encounter them, so they can’t be fully indexed.
The easiest way to fix broken links is to create redirects. TinySEO simplifies the process by letting you do it all in one place.
If you haven’t already, click “Add Theme Extension” and embed the app before proceeding. Then, click the “Create URL redirect” button.

Here, you need to provide the broken link in the “Redirect from” part and the new URL in the “Redirect to” section.

Down below you’ll find a list of broken links on your store. You can manually add redirects to the most relevant live pages by clicking “Edit.”

Additionally, you can head to TinySEO Settings > Broken links and choose automatic broken link redirection. Place the URL you want 404 pages to be redirected to and click “Save.”

Lastly, you can set up the broken link report feature. It will automatically alert you about any broken pages to your email based on the frequency you set.
Google Search Console
| What it does: | Lets you examine the Search results report and identify optimization opportunities |
| Good for: | SEO optimization |
| Where to find it: | Improve with SEO > Use Search Console > Explore reports |
The Search results report on Google Search Console (GSC) can help identify low-CTR (click-through rate) queries that get high impressions but few clicks or low-ranking pages. This helps you identify opportunities for targeted optimization.
With TinySEO, you can easily connect to your GSC and explore the Search results report straight from your Shopify Admin.
The top bar shows your main statistics, such as clicks, impressions, average CTA (click-through rate), and average position.

Below the graph, you’ll see a table where you can analyze three dimensions. Here’s what each of them shows:
- Queries – keywords or search terms that visitors type in Google to find your website
- Pages – pages that received the most traffic from Google Search results
- Countries – what places the traffic in your store originated from
Sitemaps
| What it does: | Allows submitting or managing sitemaps |
| Good for: | SEO optimization |
| Where to find it: | Improve with SEO > Use Search Console > Sitemaps |
A sitemap is a text file with your Shopify website’s information, including page URLs, images, videos, other files, and the relationship between them. It’s generated automatically and helps search engine crawlers discover and understand your site’s structure more easily.
It means your pages can be found faster and crawled faster. So, if you make a lot of page edits, the updates will be crawled quicker.
TinySEO makes it easy to add, view, and manage Shopify sitemaps without jumping to Google Search Console. All you need to do is insert the sitemap’s URL and click “Add.”

Once your sitemap is added, you’ll be able to view all the important information about it. This includes its status, discovered pages, and most importantly, discovered errors.
IndexNow instant indexing
| What it does: | Helps communicate website updates to search engines faster |
| Good for: | SEO optimization |
| Where to find it: | Improve SEO > Set up IndexNow |
IndexNow simplifies the communication between website owners and search engines, enabling crawlers to retrieve data about the latest website changes faster.
To put it simply, IndexNow informs search engines of any page changes, such as adding, updating, or deleting content, much quicker. Instead of spending weeks waiting for search engines to discover changes, you can update them immediately.
TinySEO lets you enable automatic URL submission so your pages can always be indexed fast. The feature is currently supported by Bing, Naver, Yandex, Yep, and Seznam search engines.

If you’re not familiar with response codes, you can scroll to the bottom of the page and find all of their meanings listed in one place.
6. TinySEO AI features
If writing isn’t your strong point, TinySEO can help you automate metadata and product description writing or even find relevant keywords for your blog posts. Let’s review each feature in more detail.
AI metadata generator
| What it does: | Helps communicate website updates to search engines faster |
| Good for: | SEO optimization |
| Where to find it: | Improve with AI > Generate with AI |
The TinySEO AI metadata generator helps you craft unique and descriptive titles or descriptions for your search engine results. All you need to do is provide simple instructions, the main keywords, and pick a language. Click “Generate” to get multiple suggestions.

The tool can create metadata for any of your product, collection, or blog pages.
AI keyword suggestions
| What it does: | Generates 10 keywords using AI from title or URL |
| Good for: | SEO optimization |
| Where to find it: | Improve with AI > Generate keyword suggestions |
If you want to improve your content but don’t have the time or resources to perform keyword research, TinySEO offers an AI keyword suggestion tool. You can get keywords by adding a URL or inserting the page title you want.

As soon as you insert the URL, you’ll receive 10 keyword suggestions with each of their context. For extra convenience, you can copy all of them by clicking “Copy all.”
AI product descriptions
| What it does: | Generates product descriptions using AI |
| Good for: | SEO optimization |
| Where to find it: | Improve with AI > Generate product descriptions |
Writing product descriptions, especially if you have hundreds of different items in your store, can be overwhelming. TinySEO lets you generate product descriptions in a matter of seconds.
All you have to do is open the feature and locate the product you want to generate a description for. Click “Edit.”

Insert instructions for the chatbot on the right side of the window and click “Generate” once you’re done.

You can review and edit the description however you like or you may instantly click “Save.”
LLMs.txt file generation
| What it does: | Creates a structured website content summary for AI engines |
| Good for: | SEO & GEO optimization |
| Where to find it: | Improve with AI > Generate files |
LLMs.txt files are text files for GEO and AEO optimization that provide a structured summary of your website content so that large language models (LLMs) can understand your store. When you create this file for your store, AI models like ChatGPT or Google Gemini can better discover your content and display it in their responses.
You can generate an LLMs.txt by simply inserting information about your store. Once you click Save, TinySEO will generate the llms.txt and llms-full.txt files for your store that you can view.

In the Settings section, you can also choose what store content you want the LLMs files to include, like products, blog posts, collections, social media, pages, and more.
7. TinySEO site audit
| What it does: | Analyzes your pages and locates issues |
| Good for: | SEO and speed optimization |
| Where to find it: | TinySEO > Site audit |
A site audit gives you comprehensive insights into the state of your pages. It locates technical issues that prevent your site from ensuring a seamless user experience and ranking high on search engines.
Reports are available for every page of your store and grouped into categories by page type.
To access the report, click “Get report” or “View report” depending if it has already been generated.

Here, you’ll see a list of issues on your page, starting from the most important ones. You can fix some of the errors by clicking the “Edit” button.

Yet, other issues will require fixing straight from Shopify Admin. If you need assistance, just hover over the error and click the “Learn how to fix it” button. You’ll find all the necessary information about the best practices in dealing with the specific issue.
8. Bonus free TinySEO tools
TinySEO goes beyond Shopify optimization – we also offer a range of tools anyone can access from their device to optimize their website or analyze competitors.
Here are our 6 free TinySEO tools:
- TinySEO Chrome SEO extension – get comprehensive SEO insights about any page
- WebP converter – store and serve your images in the next-gen format
- JPG compressor – compress your JPG files with no visible quality loss
- PNG compressor – reduce the size of your PNG images without losing any image elements
- Image compressor – compress up to 10 JPG and PNG files at once
- Meta title & description checker – optimize SEO metadata and boost your website’s rankings
9. Join the TinySEO affiliate program
Want to help spread the word about TinySEO’s optimization impact and earn money? Join our affiliate program and let’s grow together!
- Trusted product: With years of experience and a perfect rating on Shopify, TinySEO is a helpful and reliable app that your audience will benefit from.
- Generous commissions: We offer a 50% commission for the 1st month of our partnership and 30% for the following 11 months.
- Support: Need any tips or marketing materials? Our team is here to support you.
Let’s do this, shall we?
Now that you’ve learned what TinySEO can do for your Shopify store, you’re ready to unlock its full potential. We encourage you to dive deeper into optimization strategies with our blog and leverage our free tools to reach maximum results.
If you notice any features that you’d find useful are missing, feel free to share ideas through the “Feature suggestions” section in the TinySEO app.
And remember – if you ever need further assistance, simply contact our support team 24/7 by clicking the icon in the bottom right corner of the app. We hope you enjoy using TinySEO and achieve excellent results!