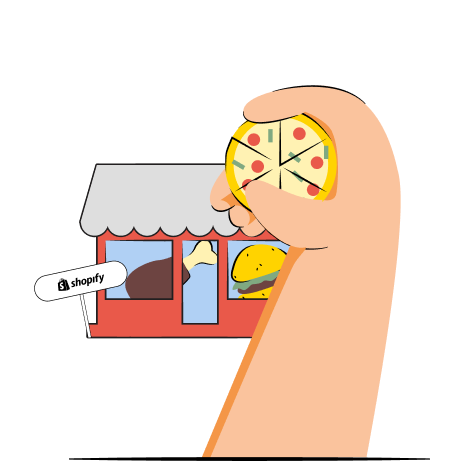
Using Shopify for restaurants is an excellent way to excel in your food business and get more orders. It’s easy to set up, doesn’t have to be expensive, and is definitely going to help you reach a wider audience.
In this article, we’re going to teach you how to set up Shopify for restaurant websites. You’ll also learn the best apps and themes for food services and tips to reach more potential customers.
Optimize your product images, run an SEO audit, and get your restaurant higher in search engines with one app
Try TinyIMG todayPros and cons of Shopify for restaurant websites
Although Shopify comes with many advantages for running an online restaurant, it also has its flaws. So, here are a few things you should evaluate before getting your business online:
Pros
- More sales. Online food delivery revenue has grown by 265% since the start of the pandemic according to Statista, so you’re more likely to reach a larger audience by getting your business online.
- Quick setup. Setting up a website on Shopify is very easy even for people who have no prior knowledge of website building. All you need to do is subscribe to a Shopify plan that’s suitable for you and pick a theme.
- Convenient menu access. You can add a QR code on each table of your restaurant to lead to the menu on your website. This way, your customers don’t need to wait for the waitress and can choose their order more quickly.
- Money-saving. The Basic Shopify plan, which is more than enough for running an online restaurant, costs $29/month. If you want a simple website, Shopify has all the functionality you need to run it without additional paid apps.
Cons
- Requires investing time. Building a website and maintaining it, including processing orders or managing inventory, is going to take up more of your time. However, if you run it correctly, the extra orders you get can pay it off.
- Requires more resources. You may need to hire a designer or photographer to help make your site look professional, but it’s optional. Plus, if Shopify functionalities won’t be enough for you, you may even need to get additional paid plugins.
How to set up your restaurant website on Shopify
Setting up a Shopify restaurant is simple and not much different from getting other eCommerce sites running on this platform. However, there are some important factors to consider, like how to properly include the food menu, set up delivery, and more.
Without further ado, here’s a complete tutorial on how to set up a restaurant website on Shopify from start to finish:
Step 1: Sign up with Shopify
If you haven’t yet, the first step you need to do is create a Shopify account:
1. Head to Shopify.com. You can get 3 days free and the first month for $1 if you click “Start free trial.”

2. Complete the multiple-choice quiz about your Shopify business needs. You can skip it, but we suggest completing it so that Shopify can recommend more specific features for you.
3. Set the location of your business – Shopify will be able to recommend suitable apps and default shipping prices.
4. Create an account.
5. Once you’re in, you can click the “Select a plan” button to choose a plan you find suitable.

There are 4 paid tiers available from $29/month. If you’re just starting, Basic is a great beginner plan. It lets you sell unlimited products, add collaborator accounts, and more.
The difference between the Basic and the more expensive Shopify plan ($79/month) is that the latter also offers USPS discounts, shipping insurance, lower transaction rates, and 5 additional staff accounts. You can see a full feature comparison of different plans in Shopify’s Pricing section.
Step 2: Select a theme
Once your account is set up, head to the Online Store section in the left-side menu of your Shopify Admin dashboard. Then, click the Add Theme button and press Visit Theme Store.

In Shopify’s store, you can browse all kinds of themes and filter them based on industry, including restaurants or food and drink categories, paid and free options, catalog size, and features.
There are plenty of captivating free options that you can customize to your liking, and they include every page you may need, such as a menu, about us, checkout pages, and more. However, if you want something fancier, paid themes for restaurants come at a one-time payment ranging from $160 to $400.
After selecting a theme, you can customize it. To access the editor, simply go back to the Online Store section in your Shopify Admin dashboard and click Customize.
Here, you’ll be able to do all of your needed alterations, from changing typography to adding elements or sections, and so on.
Step 3: Add pages needed for your restaurant
Adding new pages to your Shopify store is very simple. All you have to do is go to the Pages section of the Online Store tab in your Shopify Admin dashboard and press the Add Page button.

Once you add a title, insert content, and set the visibility, click Save.
But what kind of pages should you include? The structure of a Shopify restaurant website won’t be much different than other websites. Here are the types of pages needed for a food service website:
- Menu. Since people aren’t looking for in-depth descriptions of each dish or drink, you don’t have to create separate product pages. A simple list of product items with dish names, ingredients, and prices is just what you need.
- Delivery page. This page includes information needed for the delivery, including the name, surname, address, email address, phone number, and payment method of the person who’s ordering. You may also include the Tip and Promo code sections here.
- About us. This section is dedicated to a brief introduction to your business, its history, values, and mission. Make sure you keep it brief and suitable to your target audience.
- Contact page. Here, you can provide all the necessary information about your restaurant, including location, phone number, social media accounts, email address, and working hours.
- Feedback page. If you wish to gather customer reviews, you can create a page where clients can submit a form with their experiences, notes, or complaints.
- Legal pages. You must create privacy policy and service terms pages to outline your legal obligations to users and establish the scope of your services.
Step 4: Create a menu or upload items as products
There are multiple ways in which Shopify restaurant website owners can integrate a menu. If you’re trying to get people to order online, the best way is to upload products as items that can be added to the cart.
With this approach, you don’t need to create separate product pages, and customers can conveniently add their choices to the order by clicking on the items.
As an example, let's take a look at the menu of the Federalist Pig restaurant:

All of the items include pictures, titles, one-sentence descriptions, and the price. Once you click on any of them, you can select additions (like the sauce or sides) and add the meal to the cart.
There are two methods you can follow to upload products to Shopify – either one by one or by adding a CSV file to upload products in bulk. Here’s how to do it both ways:
- If you’re adding products one by one, simply head to Products > Add product in the admin dashboard. Enter the details about your product and click Save.
- To add a CSV file, go to your Shopify Admin dashboard and head to Products > Import > Add File. Then, select the CSV file and click Upload.
Another way you can upload your menu is by putting it into your website as text. This is useful if you’re taking orders by phone. However, it isn’t the best approach if you want the menu to include images of all dishes and drinks.
You can see an example of how this type of menu looks like on the West End cafe bar below:

Lastly, you can upload your menu by putting a PDF or image file onto the page. Yet, remember that large files can negatively affect your site performance and SEO. So, if you decide to go with this method, choose the right Shopify image size.
Step 5: Set up delivery or local pickup
There are two ways you can set up a delivery or local pickup – straight on Shopify or by using a third-party app.
Here’s how to do it with Shopify:
1. In your Shopify Admin dashboard, head to Settings > Shipping and delivery.
2. Under the Local delivery section, click Set up and then “This location offers local delivery.”

3. Choose whether you want to set a delivery radius or use postal codes. Enter the details accordingly.

4. If you want, set the minimum order price and enter the delivery price. If delivery is free, leave it at zero.
5. Click Save.
You can set up local pickup in the same Shipping and delivery section.
Alternatively, if you need more customizations like scheduling orders, a delivery driver mobile app, or order tracking pages for customers, you can use a third-party Shopify app like EasyRoutes or Zapiet.
Step 6: Set up payment methods
You can set up payment methods straight in your Shopify admin dashboard settings. When choosing payment method providers, take note of the transaction fees.
Here’s a quick guide on how to set up payment methods for your Shopify restaurant ordering:
1. In your Shopify Admin dashboard, head to Settings and click Payments.
2. Under the Payment providers section, set up Shopify payments or choose a third-party provider and select whichever you want.

3. Fill in the details about your store to create a Shopify Balance account or enter your banking information.
4. To add additional payment methods, return to the Payment section in Settings and click Add payment method under the Supported payment methods.
5. Search the method you want and click on the selected provider. Then, click Install and follow the further instructions.
That’s it! If you want to include a tipping option, you can do that in the Checkout section of your admin dashboard Settings.
Alternatively, if the native Shopify payment setup functionality isn’t right for your store, you can check out custom third-party Shopify apps like COD King or Releasit.
Step 7: Get a custom Shopify domain
New Shopify stores are hosted on a subdomain like example.myshopify.com, so you need to get a custom domain to make your online restaurant look professional. If you don’t have a domain yet, you can buy one on Shopify.
Simply go to your admin dashboard and head to Settings > Domain.

If you don’t have a domain yet, click “Buy new domain” to get one from Shopify.
However, if you bought a domain on another platform or found it cheaper elsewhere, press Connect existing domain. You can click “transfer it to Shopify” to be able to manage your domain on this platform.
Shopify POS for restaurants
Shopify POS is a great app for restaurants that you can use to sell products in person. All you need to have is a Shopify account, a card reader, and a device that connects to the internet.
The reason it’s excellent for restaurants is that you can combine online selling and retail for customer convenience. This can lead to accessing a wider audience and potentially boosting sales. Additionally, you can track your inventory, so you always know when you’re low on or run out of particular products.
Setting up Shopify POS is very straightforward. You can do it by following these steps:
- Pick a device that’s compatible with Shopify POS, like Android or iPhone/iPad with iOS 12.0 or later.
- Get the Shopify POS app from the Apple App Store or Google Play Store.
- Sign in to your Shopify account.
- Connect your card reader to your Shopify POS device.
That’s all – make sure you add all products and their details to your Shopify store if you haven’t already.
Shopify restaurant themes to use
Since 75% of people judge a website’s credibility based on its design, picking a good theme is crucial. The way you design your website will directly influence user experience and may even affect your sales.
Shopify has 99 themes available for restaurants, both free and paid. We looked through the design and features of many food service themes on Shopify’s store. Here are our top recommendations:

- Taste – a free theme for your restaurant that offers a quick setup, quick buy, in-store pickups, mega menu, sticky header, and more.
- Crave – another free option with a mega menu, sticky header, product filtering, recommended products, and many more features.
- Symmetry – a paid theme that comes with color swatches, a quick view, a stock counter, a countdown timer, and more benefits for a one-time fee of $380.
It all comes down to the type of restaurant you’re running. A Mexican restaurant will need a much different design than a bakery. So, choose a theme that fits your brand style and customize it to your liking.
Shopify apps for restaurant websites
While Shopify has many native functionalities for restaurants, there are plenty of apps you can use to take your services on Shopify to the next level.
Here are some of the apps we found useful while testing them out for a restaurant website:
- Zapiet. With this app, you can set up local delivery or store pickup and manage order limits, rates, and delivery zones. It also integrates with Shopify POS, and the prices start from $29.99/month.
- Pagefly. This app is a landing page builder that’s intuitive and easy to use for restaurant owners. It comes with 100+ free page templates, includes conversion-oriented elements, and lets you add your own sections. You can use the free version to update 1 page or section. The paid plants start from $24/month.
- ServeUp. Instead of regular product listings, this app allows you to add a menu with a compelling layout, badge collections, and categories. You can also customize the design to your own needs. The app costs $9.99/month, and there’s a 14-day free trial available.
How to promote your Shopify restaurant website?
Promoting your Shopify restaurant involves optimizing your pages and their content, and spreading the word. You can see some practical tips down below:
- Optimize for SEO. Make sure you include relevant keywords, metadata, unique content, SEO-friendly URLs, a mobile-friendly design, and other important SEO practices to get your website higher in search engines and reach more people. Check out our complete Shopify SEO guide for more tips.
- Optimize images. While there might not be as many images on a restaurant site as a photographer's Shopify website, it’s just as important to optimize them correctly. Your food images being unique and the correct size and file format can not only attract customers to order but also improve site speed.
- Create a mobile-friendly site. Considering that around 14% of restaurant revenue comes from mobile orders, making sure your website is responsive on these devices is crucial.
- Ensure your site has trust badges. Trust signals are important to ensure potential customers feel safe buying from your website. They include SSL certificates (they come with Shopify by default), trustworthy payment methods, and a money-back guarantee or free shipping icon.
- Share on social media. If your restaurant already has social media accounts, use them to announce that you started taking online orders and share the link to your new website.
Conclusion
Using Shopify for restaurant websites is very convenient and can boost your sales or even get you more loyal customers. Considering Shopify is a beginner-friendly platform, you won’t have trouble creating a basic website on your own.
All it takes to get your business running online is creating a Shopify account, selecting a theme, creating pages, uploading the food menu, setting up delivery and payment methods, and getting a domain.
However, remember that building a website is not enough – you need to promote it. Make sure you optimize your pages for SEO and share the news on your social media accounts or even at your physical business location.

Frequently asked questions
Shopify is a great platform to build a restaurant website. It comes with a simple drag-and-drop editor and an easy payment method or delivery setup. Shopify also offers a POS system which is excellent for selling restaurant products in person.
If you have a permit, you can definitely sell food on Shopify. All you need to do is create a website, add products, pick a payment method, and you’re good to go.
You can create a food menu in Shopify by adding products to your menu page. Alternatively, you can use a third-party app like ServeUp to create menus with more distinct layouts.