Transferring your domain to Shopify can be useful whether you have already built a website on the platform or are planning to migrate your whole site to Shopify. While you can simply point a domain to Shopify for it to work, transferring ensures convenient management in one place.
Although domain transfers can seem tricky, it’s not difficult if you know the correct steps. Continue reading to learn how to transfer your domain to Shopify step by step. I’ll also provide you with extra tips and tricks for pre- and post-transfer tasks.

Before you transfer your domain to Shopify
Prior to domain transferring, you need to prepare an active Shopify account, understand the requirements for transfers, and review domain transfer policies and eligibility. Let’s take a look at everything you need to know.
Prepare a Shopify store
Before you transfer a domain, you need an active Shopify account. You can leverage the free Shopify 3-day trial to help you get started, which also comes with 3 additional months for just $1/month. Here are the quick steps to help you prepare:
- Choose a Shopify plan based on your business size and needs.
- Pick a design, whether free or paid, through the Shopify theme store.
- Configure tax information and set up shipping rates through Shopify Settings.
- Go to Shopify Settings > Payments and set up payments (Shopify Payments has lower transaction fees).
- Use the Bogus Gateway on Shopify Payments to place a test order, ensuring everything works as intended.
Understand the domain transfer requirements
When transferring a domain, there are a few requirements you should be aware of. Here’s what you should note down:
- Domain transfers take up to 20 days, but it still works during the process.
- The domain you want to transfer must be owned by you – you have to have access to the account used to get it and your email.
- You need to wait 60 days from the registration of your domain to be able to transfer it.
- When transferring a domain, you’ll have to renew it for an additional 12 months.
- You shouldn’t use an email address under your domain name (like [email protected]) during domain transfer. That’s because you’ll get emails related to the transfer process that you have to respond to, and emails connected to the domain name will be deactivated during transfer.
- Make sure you get a third-party email hosting service, like Google Workspace or Zoho, because the Shopify platform doesn’t come with it built in. Once you transfer the domain, you can use unlimited email forwarding accounts on Shopify.
- Save a copy of your custom DNS records so you can insert them into your domain after the transfer is complete. You can add DNS records by going to Shopify Settings > Domains > Domain settings > Edit DNS settings > Add custom record.
Check your domain registrar’s transfer policy
You must also check your domain registrar’s transferring policy so you understand platform-specific requirements and eligibility. You can see some of the transfer policies for popular domain registrars below:
If you can’t find the transfer policy for your hosting provider, contact their support for help.
Review domain transfer eligibility
Shopify only lets you transfer apex domains, like yourdomain.com, but you’ll need to recreate subdomains after the process is completed. Meanwhile, some ccTLDs, like .co.uk, cannot be transferred. In such cases, your only option is to point the domain to Shopify.
Here are the quick steps to see if your domain is eligible for transferring:
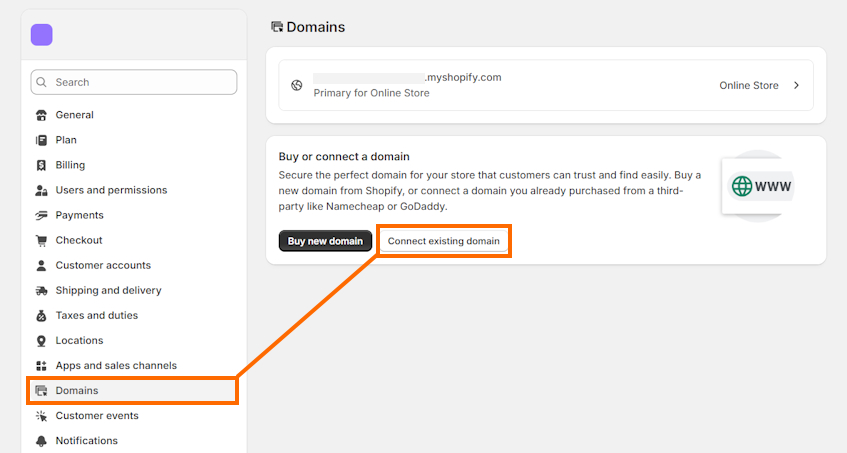
- Open your Shopify Admin > Settings > Domains.
- Press “Transfer domain” or “Connect existing domain,” depending on whether you have or don’t have additional domains.
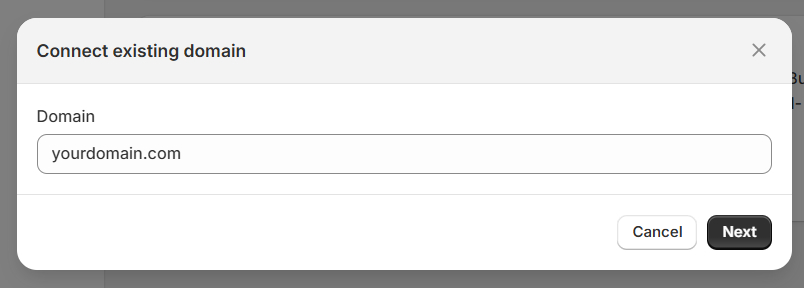
- Once you’re in the “Transfer an existing domain” page, insert your domain name without the “www.” part.
- Press Next. If the domain is eligible, you’ll be able to follow the transfer process steps.
How to transfer your domain to Shopify
The domain transfer process is simple if you know the proper steps to do it. You first need to point your domain to Shopify, prepare your domain by unlocking it in your current registrar, and only then initiate the transfer. Here’s how to do it step-by-step:
Step 1: Connect your domain to Shopify
The very first task when transferring your domain to Shopify is to connect it first. If you have a domain purchased from Cloudflare, GoDaddy, or IONOS, you can connect it automatically. For other domain providers, you’ll need to do it manually. Here’s a quick guide:
- Open your account on the domain provider’s website and find the domain or DNS setting management area.
- Point the A record to the “23.227.38.65” Shopify IPv4 address and delete any other A records on the domain.
- Change Host to @ if needed.
- Point the AAAA record to the “2620:0127:f00f:5::” Shopify IPv6 address.
- Change Host to @ if needed and delete any other AAAA records on the domain.
- The CNAME record (with the www name) should be pointed to “shops.myshopify.com.” (including the last period). Save the changes.
- Go to Shopify Admin > Settings > Domains and click “Connect existing domain.”
- Insert your domain name without the “www.” part, like “yourdomain.com,” and press Next.
- Click Connect.
Please note that domain connections can take up to 48 hours. In some cases, when delays happen, it can take up to 20 days.
If you’re unsure how to change DNS settings on your domain provider, refer to Shopify’s domain connection guides.
Step 2: Prepare your domain for transfer
To prepare your domain for transfer, you should first log into your domain provider account and make a copy of all domain records that you may need for later configuration post-transfer. Then, you should also unlock your domain. Here’s how you can unlock it on different platforms:
- Squarespace: Sign in to your account, go to Domains, click the domain you want, and toggle the button under the “Domain lock” section.
- GoDaddy: Go to Advanced DNS Settings, take your name, password, and PIN, and click “Sign in to DNS console” to sign in with it. Find the domain, click the More (...) > Domain Settings. Under Additional Settings, turn off the “Domain lock.”
- Namecheap: Head to your account > Domain List and click “Manage” by your domain name. In the “Sharing & Transfer” tab, click Unlock under the “Domain Lock” section.
- Bluehost: Go to your Bluehost account > Domain Manager > Domain name, open the “Lock” tab, and click Unlock.
Once you unlock the domain, check your email – you’ll receive an authorization code through it.
Step 3: Transfer your domain to Shopify
Once your domain is ready, you can start the transfer process. Here are the steps to complete on Shopify:
- Open Shopify Admin > Settings > Domains.
- If you don’t have connected domains, click Connect existing domain > Transfer it to Shopify. If you have other domains connected, click Transfer domain.
- When the Transfer domain page opens, enter your domain name like this: “yourdomain.com” – don’t include the “www.” part. Click Next.
- Insert the authorization code you received from your domain provider in the “Authorization code” field and click Verify domain.
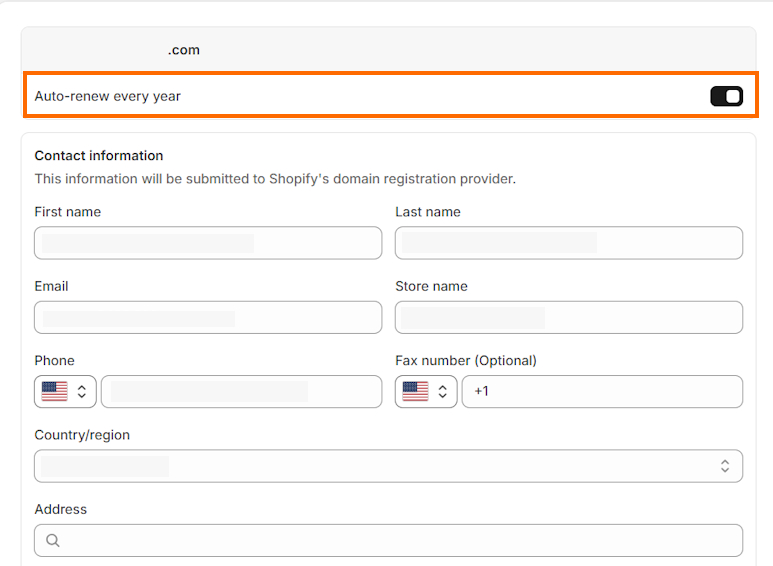
- You’ll be taken to the “Approve charge” page. Review the “Domain to be registered” section and enable “Auto-renew this domain every year.”
- Now, review your Contact information to check if everything is correct.
- Review the ICANN policy and the Domain Registration Agreement provided at the bottom of the page.
- Click Approve.
- Check your email account for a transfer-approval message and follow the received instructions to approve the transfer.
Please keep in mind that domain transfers can take up to 20 days. Shopify will send you a confirmation email once the transfer is complete. Don’t forget to check your Spam email folders. If you haven’t received confirmation after 20 days, contact Shopify support.
Step 4: Manage your data use consent preferences
Once the transfer is complete, Shopify will send you an email: “Control how your data is shared.” Here, it will take you to Tucows Inc's Data Use Consent Settings, where you can give consent or not – it’s optional.
Post-domain transfer tasks
After the transfer is complete, you can start thinking ahead. Here are some useful tasks that you can complete:
- Set up email forwarding. Shopify doesn’t offer email hosting services, so you’ll have to forward emails to a third-party email address. For example, messages sent to [email protected] can be forwarded to your personal Gmail or Outlook email.
- Get third-party email hosting services. If you want to continue using domain-based email addresses, you should get a third-party email provider. Shopify supports Google Workspace or Zoho.
- Enable auto-renewal for your domain. It’s important not to forget to renew your domain, or you may lose access to it. That’s why it’s beneficial to turn on auto-renewal. Go to Shopify Settings > Domains and click the domain you want. Select “Auto-renew this domain every year.”
- Include subdomains. If needed, you can also create subdomains or edit the CNAME record to point your domain to another site.
- Set up international domains. While optional, you can create domains for specific countries if you’re selling internationally. For example, if you’re selling in the UK, you can also get a .co.uk domain.
Final thoughts
Transferring your domain to Shopify is about convenience and being able to manage your business in one place. While you can connect a domain instead, transferring it gives you simpler management directly through your Shopify Admin.
Domain transferring is a straightforward process that takes preparing your domain through your current registrar and initiating a transfer through Shopify. Once complete, you can further optimize your store by creating email forwarding or adding subdomains, or even creating international domains.

Frequently asked questions
To transfer a domain to Shopify, you’ll need to pay the domain renewal fee, which will add an additional year to your domain subscription. Beyond that, Shopify explicitly states there are no additional fees from Shopify.
You can put your domain on Shopify by going to your Shopify Admin > Settings > Domains, clicking “Connect existing domain,” inserting your domain name, and following the instructions to change the DNS records at your domain registrar.
Domain transfers usually take up to 48 hours to complete. However, if delays happen, it can take up to 20 days to complete. You receive a confirmation email once the transfer process is done.


