When selling online, a picture is worth at least a thousand words. Well-taken images, showcasing the product from several angles, and highlighting its strengths, are amazing tools for selling and raising your brand’s recognition.
However, not all of us are pros. We don’t have access to fancy studios, and top-of-the-line cameras to do a photoshoot for products. However – we all have a mobile phone in our pockets. With the right preparation, your smartphone can be all that you need to take amazing product photos!
In this article, we’ll show you how to take pictures of products to sell online, using only your phone – and give you some tips on how you can do it at home, or at your own DIY home photo studio!
How to take quality product photos: checklist
It’s possible to take high-quality product pictures using nothing but a smartphone – but to do that, you need to follow a certain set of rules. Here’s what you’ll need to do:
- Use a good smartphone with a high-quality camera. You are as strong as your weakest link. Make sure you take pictures with the best phone you can get.
- Be consistent with your style and settings. Good product pages have pictures following the same style. Automatic phone settings might make two similar pictures look entirely different.
- Make sure there’s plenty of light. Natural light is best: make use of sunshine, or have several light sources on your product.
- Reduce camera shake; use a stabilizer or a tripod. A stable camera can get in more light, making the pictures more detailed and less fuzzy.
- Get pictures from plenty of angles. Give your visitors a solid 360-degree look at your product and all it can offer.
- Capture different types of pictures: closeups, action shots, and more. Detailed images increase trust in your product and help position your brand better in the market.
Suggested reading
What smartphone to choose for product photography?
Gone are the days, when most smartphone cameras were okay at best – now, the market is full of models that are excellent for many uses, including product photography.
Every phone you choose should have:
- The main camera of at least 12 megapixels
- A big sensor that can bring in a lot of light
- A solid video mode, if you’re looking to add supporting clips as well
- Manual white balance, ISO, exposure, and focus controls
- Solid image stabilization features
- A capable macro mode for detailed close-up shots
- A RAW photo mode for high-quality images and in-depth editing
Depending on the time you’re reading this, and the budget you have, your phone of choice will differ. However, there are plenty of ways to see which models are the best performers in photography. Independent testers at DXOMARK compare major models using a standardized testing model.
Top-of-the-line models from Apple, Google, and Samsung frequent the top of this list. However, you can also find some budget options there, too.
Taking good product photos on a phone: best practices
With your phone firmly in your hands, it’s time to start shooting! Or…not really. Here’s how to take good product photos using only your phone, so you get the best results for your work.
Clean camera lenses
This one is incredibly obvious: but so many great photos have been ruined by one single water drop or a stray fingerprint. A photo taken with a dirty lens can rarely be salvaged, so make sure to do your prep before shooting.
And don’t just rub the lens into your jeans. Use a microfiber cloth and alcohol-based cleaning liquid. Avoid touching your camera lens and redo the cleaning process if you happen to touch it any time throughout the shoot. This way, you’ll avoid any residue and will avoid fatal smudging issues.
Use good lighting
Light is the most important thing when taking pictures – especially when using a smartphone, as they have smaller sensors that don’t capture as much of it.
Shoot in a well-lit room. Natural light from the window is best – just make sure it’s consistent, and you don’t end up having half of your shot in the sunshine, and half in rain. Placing a product at a 90-degree corner next to a window will give it a nice and consistent fill.
Hard sources of light, such as a table lamp, will only cover a part of the product and highlight more of its flaws than a naked eye can see.
If there’s no natural light available, you can use several different artificial light sources, placed at different angles.
Use manual photo settings
Every time you take an image on your phone, its processing software does its absolute best to make the photo “as good as possible”. You might see dramatically different results on seemingly similar pictures. Varying white balance, ISO, shutter speed, exposure, and more, gives you practically no consistency.
Your product pictures should be consistent – to get that, enable your phone camera’s manual settings. This way, the control is in your hands and you can adjust everything to get the perfect shot that you want. Here are the best camera settings for product photography:
- Go for the low ISO that will reduce the noise in the picture.
- Choose the best exposure that retains all detail of your product.
- Set the white balance using a white sheet to set it up – or use an all-white background for all your backdrops.
- Shoot in RAW mode, if possible. This gives you a lot more editing freedom later on.
Depending on your phone model, the stock camera app may limit the manual setting options. Check the app stores for apps allowing such changes that are compatible with your device.
Take multiple product photos
A small phone screen can be deceiving. Often, the perfect picture turns out to be slightly blurry, miscolored, or missing some of the required details. Even if you know how to take product photos, that can still happen.
Sorting through dozens or even hundreds of images can be painful – but it’s incredibly important that you do just that. Do several photos from each angle. If you have time, go through the pictures before changing your setup. Good prep work can help you a lot.
Show product from different angles
You know exactly how your product looks – but your visitors are completely in the dark. A good variety of angles will help them get a better look, potentially turning them into buyers.
These right here are the main product angles, used by many major successful online brands:
- Front. The most obvious one is the hero shot. Where your product is front and center.
- Angle shot. Either from the side or at a 45-degree angle, giving your product a second shot is a good way to show its scale.
- Back. Is there anything at the back of the product that wouldn’t be obvious from the hero shot? Don’t leave your visitors hanging and include this shot.
- Top shot. The bird’s eye view is excellent for showing off everything that comes in a package. This is a challenging shot to pull off, but it’s very important if you have one product coming with many different pieces.
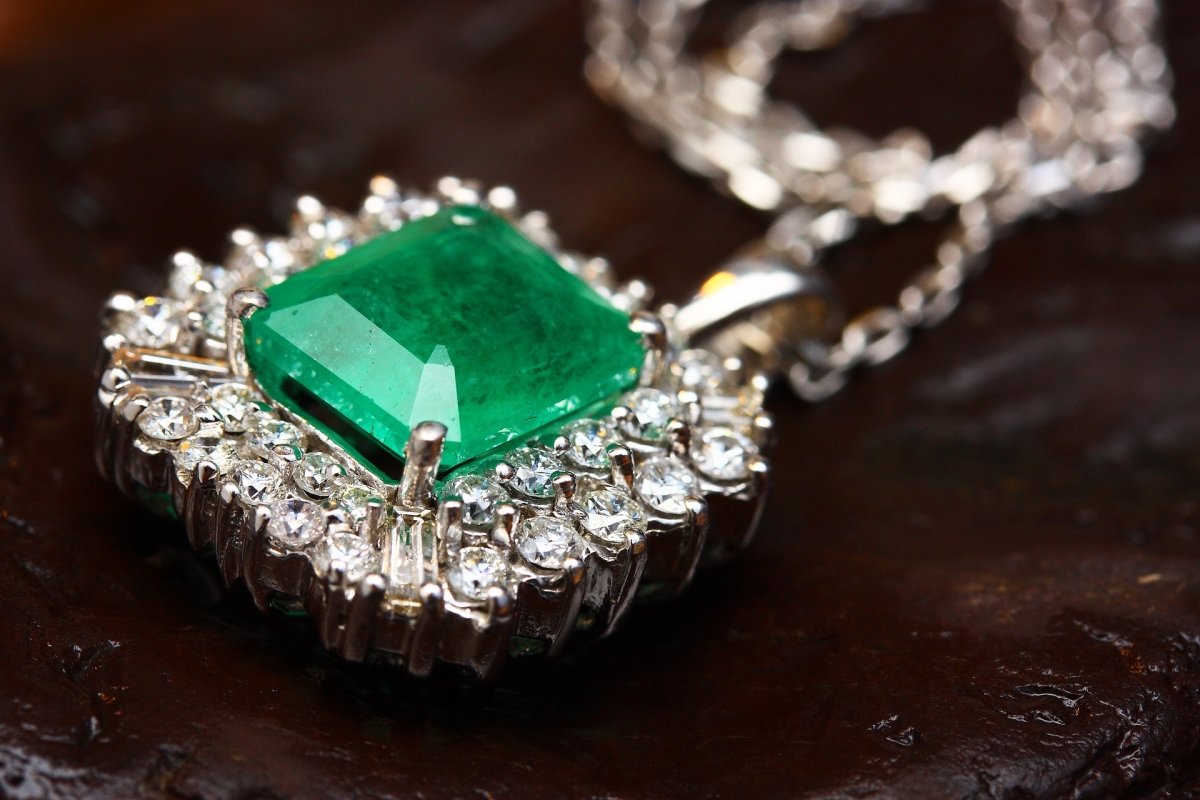
- Macro/details. Macro shots are where you can show off the true quality of the product. Show off materials and craftsmanship.
Add photos of product details
The detailed shots help your customers understand what exactly they’re paying the money for. While the hero shot gives a whole look at everything your product has, zooming in on the details will help reduce the confusion of people who may have questions.
Image source: Pixabay
This is where a reliable macro mode on the phone comes right in. Being able to capture even the smallest details is a good way to increase trust, and to do so with a standard-issue smartphone is incredibly convenient.
Make real-life product photos
Can you take pictures of your product in action? Excellent, if you can – such shots now only look great next to simple product photos, they also increase the overall trust in your brands and product.
Image source Pexels
If shooting indoors, make sure there’s plenty of natural light. If shooting outside, pick a nice day with consistent lighting. Shoot in non-windy conditions, or make sure your models’ hair won’t be affected by it. Both ways, remember to keep your product unobstructed and fully visible at all times. It’s all about the product, after all!
Create product flat-lays and group images
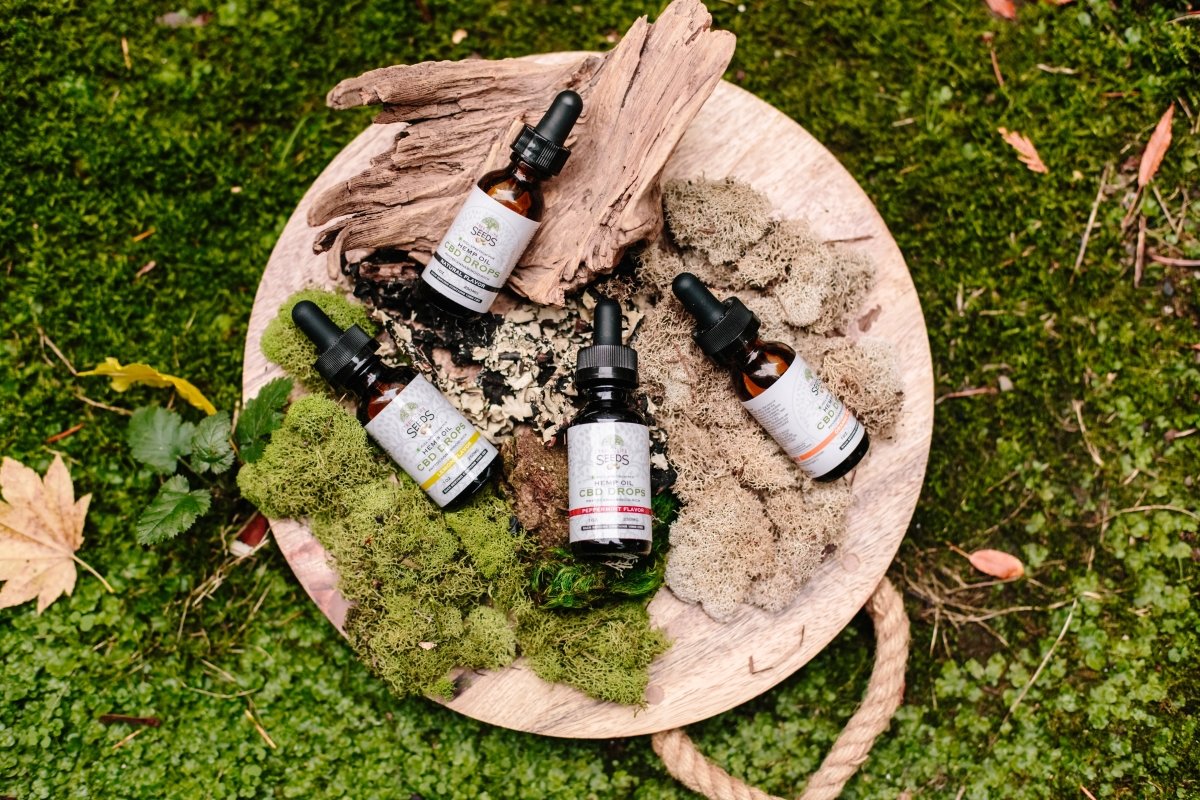
Flat lays and group images are excellent media pieces for your online store. Use them for home and collection pages to show off everything that you can offer.
Image source Pexels
Generally, they’re created by putting several products together in one backdrop. In flat-lay images, the picture has to be taken from the top down. In group images, they can simply be put next to one another.
Whichever option is best, depends on the products that you’re selling: choose an option which shows the most of the product – it’s the star of the show, after all.
It’s worth remembering that such images don’t have to be taken in front of a white background. Use additional details and accessories to populate the image – think of it as a still-life art piece, and let your creative juices flow free.
Take photos of the package
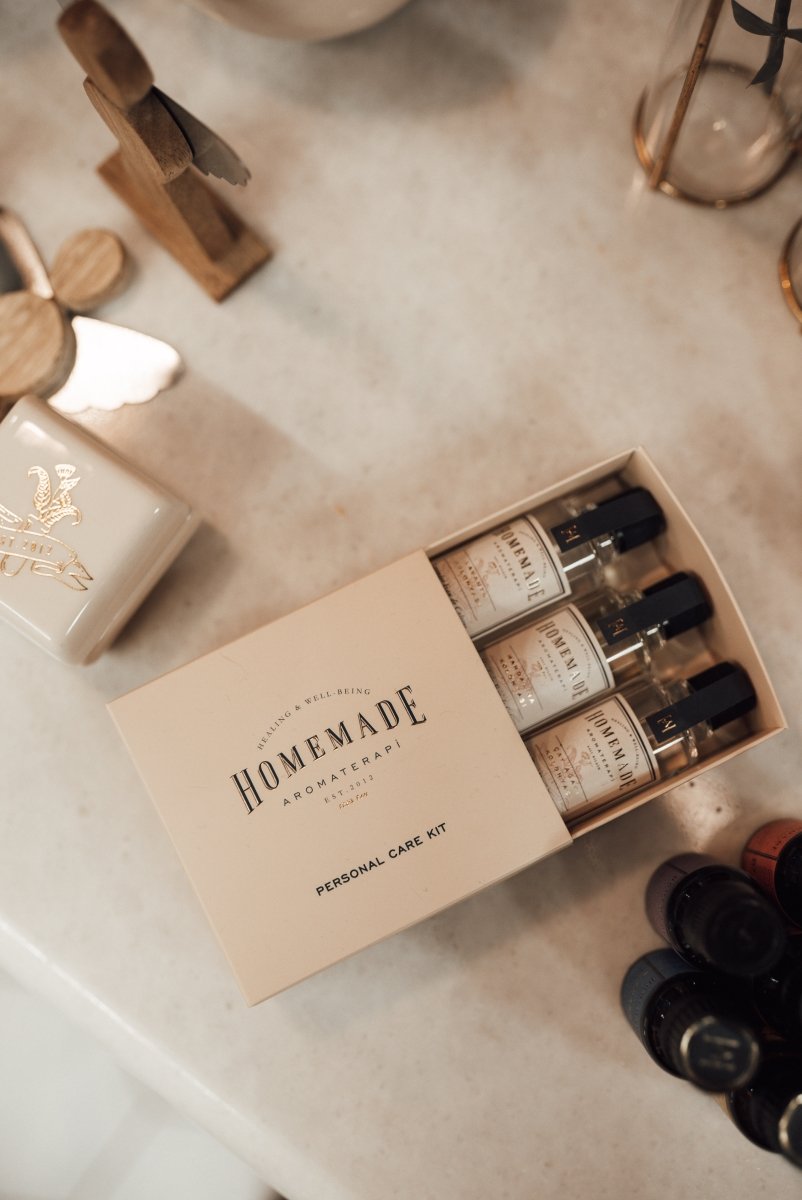
Packaging is a very important part of your brand’s recognition. By taking and uploading pictures of everything related to the product, you can give your customer a complete shopping experience and build your business’ credibility.
Image source: Pexels
If you have lovely, branded packages for your products, you should definitely feature them on your website. A classic shot of the product, placed right next to the box is one of the most popular types of product images out there – for a good reason.
Keep photo style consistent
Each product should have several images – and if you wish to look professional, they all should follow a similar style. One glance at the top online stores in the market will tell that all the product shots look pretty much identical, except for the angle.
Make sure the colors are consistent, and the backdrops are alike. Make sure your product looks exactly the same on all images – different camera setups and light can make the same product look drastically different, which in turn can make potential buyers reconsider their purchase.
More product photography tips
There are several things we still haven’t covered – but we’re trying our best! Here are some of the other dos and don'ts of taking product photographs.
- Don’t zoom in. While optical zoom on your phone is not a dealbreaker, zooming in more is going to negatively affect your picture quality.
- Don’t use phone flash. Light is very important, but the flash on your phone is just a burst of direct light that will bounce awkwardly off your product. Phone flash is not the right way to go.
- Don’t use a selfie camera. Especially when making real-life or action shots, we might be tempted to turn on a selfie camera and show it all ourselves. Let’s not – a selfie camera will always be inferior, as it has a much smaller sensor and limited features.
- Don’t use a filter. True product colors are very important. And while a filter might make the image look just right on your phone, it’s best to go for natural colors rather than full sepia.
- Edit photos all at once. Consistency is key. Make sure the photos look consistent next to each other – you can achieve that by editing the photos all at once, on your computer.
Keep the images on your Shopify site optimized – get the best image compression with TinyIMG.
Install TinyIMG now!Equipment you might need for product photography setup
If you’re looking for the best results, you might need more than just your phone. With some affordable additions, your phone photography can go to the next level.
These right here are the main accessories to consider, if you’re looking to build a product photography setup at home.
Tripod
A steady hand is good, but a tripod is better. A tripod will hold your phone in one place, giving you consistency and letting you worry less about camera shake and blurry photos.
Plus, with a steady camera, you can reduce your shutter speed and ISO way down, getting better photo quality with the same setup.
A simple phone tripod can cost about $20-40. Or you can go for a DIY phone tripod instead, using basic office supplies.
Lightbox
A lightbox is a great tool for product photography. With a white background and light all over, it gives you both perfect lighting and an ideal background. Plus, it’s much easier to set up than a whole makeshift studio.
A simple lightbox, depending on the setup, can cost around $40-100. Alternatively, make a DIY lightbox, using a cardboard box, white paper, and some lights.
Photography lighting
You can’t always trust your window to provide the perfect conditions. If you’re looking for consistency, you need to have a full controller light setup, with at least 3 main lights.
Depending on the manufacturer, the basic 3-point light costs start at around $70-150.
Reflectors
Reflectors are very helpful in product photography, as they help soften the shadows and the lights on the product’s surface. When placed opposite to the light source, it gives a product better-rounded overall lighting.
A set of reflectors is pretty cheap, costing around $15-30, depending on the size and manufacturer. If you’re in a pinch, you can make a DIY reflector with cardboard, duct tape, and some aluminum foil.
Photo-backgrounds
Your product on a rustic table, or on a wonderful festive setup might look great – but setting everything up can be a pain. Product photography background and various backdrops can help you get the same look, but save a lot of time and money. There are vinyls for flat-lay images and full backgrounds for other types of shots.
Photo background prices rarely exceed $50 a piece. Or you can go full creative mode and make a DIY background for photoshoot at home!
Remote shutter
A remote shutter lets you be more in the action, working with the set and the image, instead of clicking the shutter button. Plus, with a sensitive setup and a tripod – it’s best to not touch your phone at all!
A remote shutter can be purchased for less than 10 bucks online – and it works better than any DIY solution we could find.
Additional lenses
A different lens can make a world of difference to your pictures. A phone camera isn’t perfectly equipped to take product images – but attach a 50mm lens to it, and it’s a whole different deal now.
Additional lenses can be purchased from many different vendors – but they also have to work with your specific phone model. High-quality phone lenses from top brands start at around $100.
Editing product photos
With your pictures all taken, the next stage of work begins. It’s time to edit these images, so they can be fully prepared to be on your online store. Here are some of the main tips and tricks for getting the best results:
What to edit in product photos
Your product shots should be simple and very consistent. In order to achieve that consistency, you need to remove a lot of variables. Here are some of the main things you need to change in your pictures to get the best result:
- Background. Especially when it comes to bigger items – a consistent background on all images might not be possible. Even on your perfect white backdrop images, there may be some wrinkles, tears, or discoloration. If you’re looking to have a clean background – editing is your chance to get it. You can use an online background removal tool or one of the photo editing apps we suggest further.
- Colors. The colors of the image need to be as close to the product as possible. Image editing apps can help you get there, especially if you shoot in RAW.
- Blemishes. Scratches, dust, fingerprints, you name it – if your photos capture every single detail, they’ll capture the bad ones, too. Remove them for the best results.
- Reflections. Some products have reflective surfaces – making sure the reflections are not distracting or displaying something else entirely is key.
Photo editing apps to use
These right here are the top photo editing apps to use – giving you excellent features and value, with both their free and premium plans:
- Adobe Lightroom. An excellent photo editing app from Adobe, Lightroom is perfect for editing batches of images all at once: a very common scenario for product images. Being able to group photos for specific projects, batch-edit them with Lightroom presets, and manage them from your smartphone makes Lightroom a perfect photo editor for online store pictures. It’s a premium app – with prices starting at $9.99/month.
- Pixlr. This photo editing app is one of the best free image editors out there. With full customization, including blemish and background removal, clone stamp, and two different editors, it’s an excellent all-around option. The premium plan, starting at $4.90 a month, will include even more editing tools and graphic design templates.
- Canva. Canva is a platform for presentations and posters – making it excellent for creating promotional content for your store. Plus, it has a powerful free photo editor, including background removal, product mockup features, and more. For $12.99/month, the Pro plan adds collaboration features, branding tools, and premium templates.
- Adobe Express. Coming from one of the world’s biggest software companies, Adobe Express is a beginner-friendly photo editing solution. You can sign up for free – the free plan includes background removal features, options for color correction, and more. However, for premium templates and better photo editing features, you’ll need to sign up for a premium plan, costing $9.99 a month or $99.99 a year.
Suggested reading
Professional photo editing services
If you are not confident enough in your own skill, you can always use the skills of a professional. Look at various freelance worker platforms, like Upwork or Fiverr, and look for experts with solid reviews and portfolios.
Alternatively, consider purpose-made photo retouching services if you’re not feeling like screening people. There are plenty of businesses specializing in doing exactly that – search for them, see the work that they’ve done, and if you like what you see, get them onboard. Sometimes, it’s best to just send your images to the pros, kick back, and relax.
Getting product photos ready for the upload
With everything in order, the fun part is about to begin! You need to take your finished images, and get them nice and uploaded. Here are some of the main things to consider at this final stage of the process:
- Adjust size. Your Shopify product image size shouldn’t exceed 2048x2048 pixels in size for a Shopify store. An image any bigger won’t be better – instead, it will just take up all the precious space on your server, slowing the site down. Make sure to scale them down.
- Watermarks. Good-looking product images can become a target for scammers, trying to lure people into buying possibly fake products. Your images used for that can be bad press for the brand – add your brand watermarks via your image editing apps if you want to avoid such issues.
- Quality of your images. How does the image look? This is your last chance to really ponder about it. Depending on the software you used, the file format, and existing image compression, the overall quality of the picture can be reduced from the original.
- Compression. Your images have to look good – but they also need to load well. Try to strike a perfect balance between the visuals and the image size. Professional image compression apps can do just that, making them small enough to load quickly for the visitors, without losing any quality.
Get the best look and the best performance on your Shopify store – compress your product images with TinyIMG

Frequently asked questions
Top-of-the-line models from Apple, Google, and Samsung are some of the best mobile devices for taking product photos. However, your product photo quality will also depend on your preparation and the accessories used.
Yes, smartphone photos are commonly used in Shopify stores. With the right photo editing apps and enough preparation, most modern smartphones can be used to take high-quality product images.
You can get a white product photo background by setting up a lightbox or a plain white background yourself. Then, use the photo editing apps to remove any imperfections that happened in the process.
For product photography, you need a solid photo editing app. Options like Adobe Lightroom, Pixlr, Canva, and Adobe Express are all excellent options for elevating your product pictures to the next level.
