Reducing the image file size can help seamlessly send them as attachments, improve website loading times, and optimize resource usage. Even something as simple as changing the file format can lower your file size. For example, JPEG files weigh less than PNG, resulting in lower sizes at a similar quality.
There are different ways to reduce and compress your image file size without compromising quality. All of the methods are explained below, along with extra tips for image optimization.
How to reduce the image file size: 3 ways
The fastest way to reduce the image file size is by using an online image compression tool like TinyIMG. It enables you to drag and drop multiple files to compress them in bulk and save time. However, you can also reduce image file size manually. Let’s review all methods in detail.
1. Use an online compression tool
Image compression reduces the file size in bytes without changing dimensions or degrading quality below the acceptable threshold.
For fast bulk compression, you can use an online tool like the free TinyIMG image compressor. It supports JPG and PNG files and allows compressing up to 10 files (max 3MB each) at once.
Here’s a quick guide on how to reduce the image file size with compression tools:
- Open the TinyIMG image compressor.
- Upload (or drag and drop) the PNG or JPG files that you want to compress.
- Download the images one by one or click the “Download All” button once the compression is complete.
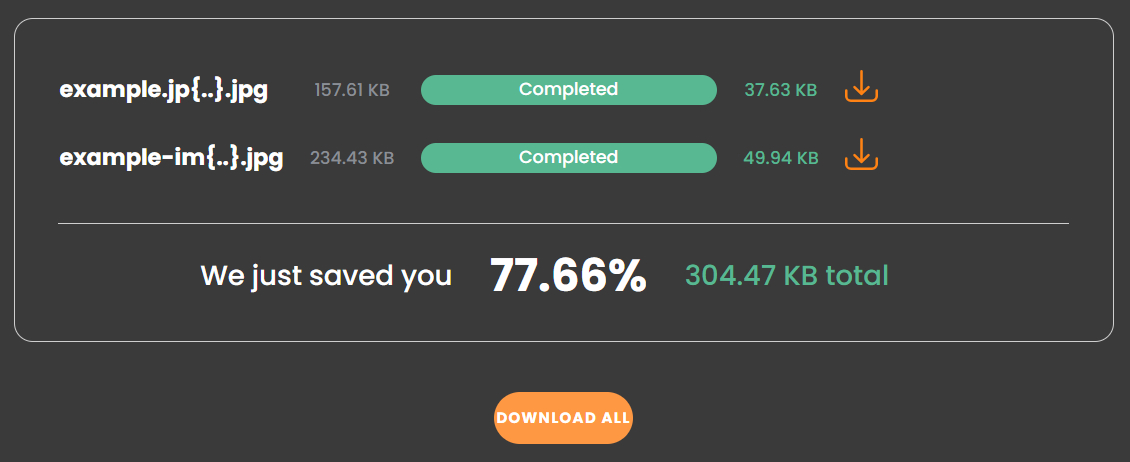
Most compression tools, including the TinyIMG image compressor, will usually show you how much storage the compression process saved.
Suggested reading
2. Resize the image to a smaller size
Many images, especially RAW files or high-resolution photos, often have much larger dimensions than needed. Choosing a smaller width and height for an image helps significantly reduce the file size by removing unnecessary pixels.
To resize the image size, you can use plenty of tools depending on the device or software you have.
Here are a few tools to resize images and how to use them:
- Windows Photos: Open the image > See more > Resize image and adjust the dimensions. Click Save.
- Mac Preview: Open the image > Tools > Adjust size > Resample image and set smaller dimensions.
- Microsoft Paint: Open the image > Home > Resize and choose smaller dimensions.
- Photoshop: Open the image > Image > Image size and adjust the width and height.
If you’re a website owner, you can use tools that automatically optimize your images. For example, Shopify users can leverage the TinyIMG app to set automatic resizing of oversized images.
3. Select the correct file format
Image size can also be affected by the chosen file format. There are different use cases for every image format. Here are the most commonly used ones:
- JPEG – great for web photos, photographs, and wide compatibility. It offers great compression rates but can result in barely visible quality loss.
- PNG – best for transparent images. It retains high quality but must also be compressed to reduce the file size.
- WebP – ideal for website images and offers the best compression rates. According to Google Developers, average WebP files are 25%-34% smaller than JPEGs at a similar quality.
- RAW – should be used for photo editing only as the file size is extra large.
- SVG – excellent for icons, vector graphics, or logos as it’s a lightweight format.
- AVIF – great for cutting-edge website performance and high compression rates while maintaining excellent quality. However, it’s not yet widely supported.
You can use any online converter tools, like the free TinyIMG WebP converter, to save you time and convert images in bulk. It can convert your PNG or JPEG files to WebP and vice versa.
4. Clean up hidden image metadata
Images often contain unnecessary, non-visual metadata, like camera settings, application-specific data, GPS, or timestamps. Removing them can help reduce the file size without affecting the quality.
The fastest way to clean up hidden image metadata is to use a reputable online bulk image compression tool, like the free TinyIMG compressor, which does it automatically.
If you’re using Photoshop, GIMP, or other image editing software, you can also export images using the “Save for web” feature and disable the metadata option.
Tools to reduce the image file size
There are plenty of tools you can use to reduce the image file size. Here are our top recommendations that we’ve tested:
1. Online compression tools (no installation needed)
Browser-based online image compression tools make it super fast and easy to reduce image file size. There’s no need to install programs or follow complex processes for individual images. Here are a few online compressors you can use:
- TinyIMG – allows drag-and-dropping JPG and PNG images in batches without significant quality loss.
- TinyPNG – lets you upload, resize, and change the file format for multiple images at once.
- Optimizilla – allows compressing JPG, PNG, and GIF files and controlling compression levels.
2. Adobe Photoshop
You can manually reduce the image file size using Photoshop (or another image editing software). Just go to File > Export > Save for Web. The software allows you to adjust quality, change image format, and easily save results.
3. Squoosh
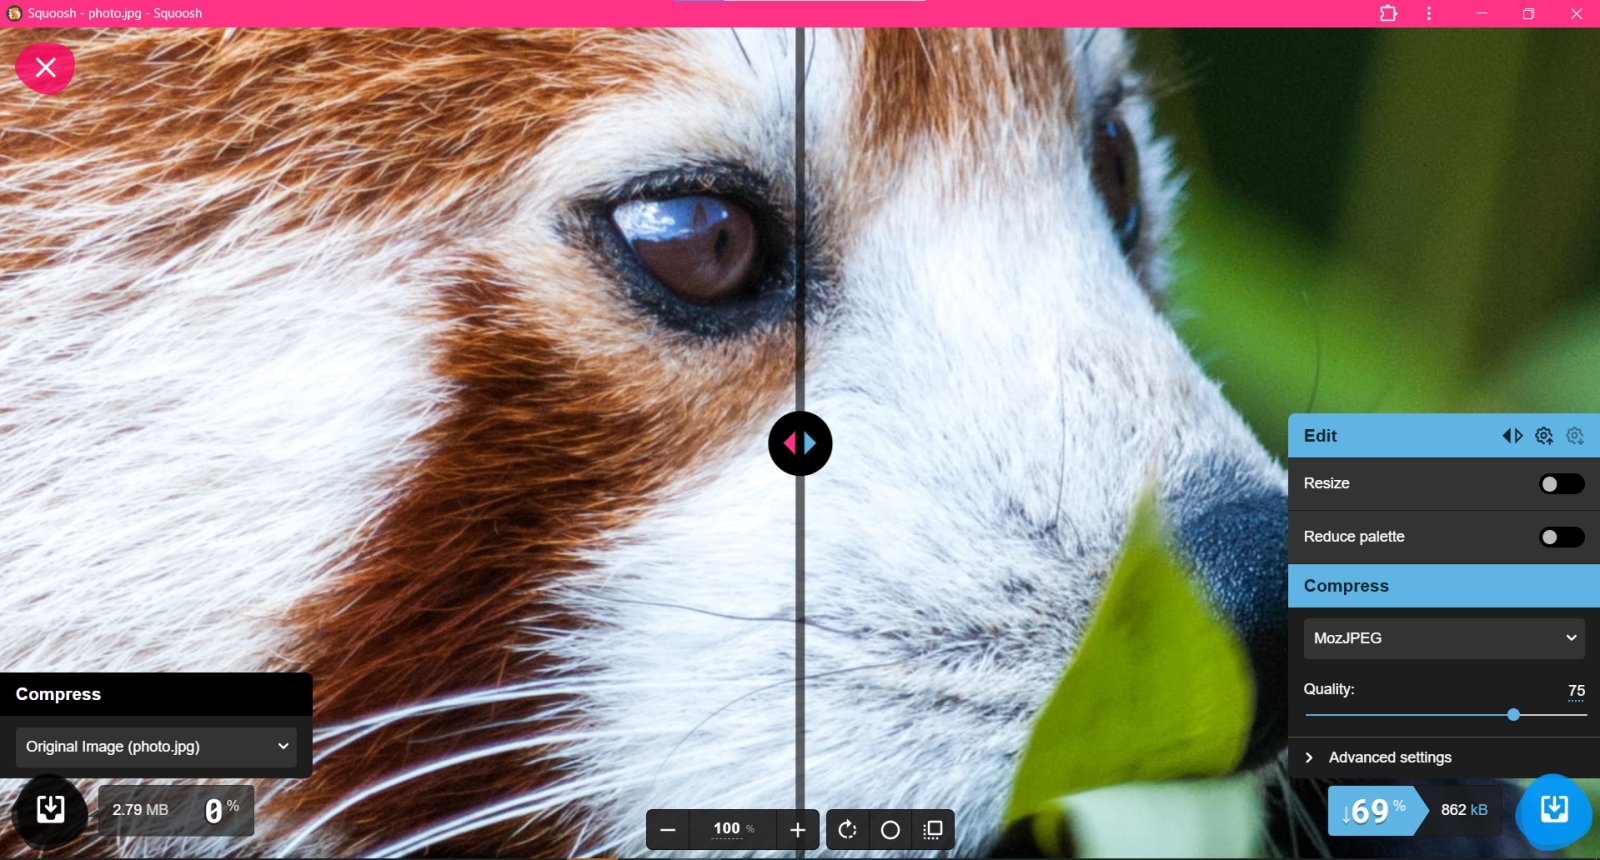
Squoosh is a free tool that you can use online or download as an app. It shows you the quality difference in real time so you can customize compression however you like.
You can use this tool to drag and drop images of many formats, including PNG, JPG, AVIF, or WebP. However, it doesn’t offer batch processing.
Why should you reduce image file size?
Reducing the image file size helps deliver the lowest file sizes while maintaining the best possible quality. Here are the main benefits it brings:
- Faster page load time. Website owners can benefit from reducing the image file size to improve website speed. Large images take longer to load, which can eventually slow down your site and lead to higher bounce rates.
- Saves resources. Reducing the image file size helps save up bandwidth and storage, resulting in lower resource costs for website owners or photographers.
- Easier to share. Many platforms, like Gmail, Facebook, and others, have image file size limits. Smaller images will make sharing more seamless.
- Boosts SEO. Speed is one of Google’s ranking factors and is an important part of the user experience. According to Google’s study, even a page load time jump from 1 to 3 seconds could increase bounce rates by 32%. So, optimizing images can ensure better chances of ranking high.
Tips to optimize images effectively
Optimizing images effectively means ensuring smaller file sizes and better performance while saving time. Here are our top image optimization and compression tips to simplify the process:
Image optimization tips
- Resize images to display size. Make sure you don’t reduce the size of your images way below or way above the actual display size to prevent visible quality loss.
- Enable lazy loading. If you’re preparing images for your website, use the lazy loading feature so your store only initially loads the images that are needed.
Image compression tips
- Prepare backups. Just in case you reduce the image file size too much or you experience a visible quality decrease, back up your original images.
- Leverage bulk compression. Reducing the file size of multiple images can take a lot of time. If you have dozens of images to compress, use an online batch compression tool like TinyIMG.
- Test the compressed image. Compare the compressed image to the original one to ensure that the quality loss isn’t too visible.
- Automate image compression. You can save a lot of time for image compression with third-party tools that offer bulk compression. For example, if you're a Shopify user, you can try out the TinyIMG app that automates image optimization.
Conclusion
Reducing the image file sizes is crucial to ensure lower storage consumption, boost page load time, and ensure you meet specific platform size limits.
The most effective ways to reduce the image file size are to compress it, reduce its dimensions, choose the right image format, and delete unnecessary metadata.
What matters is finding the optimal file size and quality ratio. You can save time and automate bulk image optimization using a free online tool like the TinyIMG image compressor. It allows compressing up to 10 images at once.

Frequently asked questions
You can reduce the image file size on Mac by opening it in the Preview app. Click Tools > Adjust Size > Resample image and enter smaller values.
To reduce the image file size without visibly affecting the quality, you can compress your JPEG, PNG or other files, resize images, or leverage lossless compression. You may benefit from free online compression tools like the TinyIMG image compressor to compress images in batch without compromising quality.
You can reduce a JPG file size with the free TinyIMG compressor. Upload the photos that you want to compress into the online file, and start compressing it. When it's done, click Download so you can get a compressed version of your photo.


