If you’re wondering how to add the Upload Photo option in Shopify product pages, there are a few ways. If you’re an advanced user, you can edit your theme code and add it yourself. However, the easiest way is to use a third-party app that can do it automatically for multiple products at once.
In this article, we’ll teach you how to add the Upload Photo option in 5 simple steps, no matter if you’re a beginner user or an advanced one.
How to add the Upload Photo option in Shopify
The easiest way to add the Upload Photo option in Shopify is by using a third-party app.
Shopify staff recommends using the Upload-Lift Image Upload app, but you can find other alternatives on their app store, like Uploadly.
Without further ado, here’s a detailed instruction guide on how to add the Upload Photo option in Shopify:
Step 1: Get the white-label products ready
Start by preparing your products and make sure they can be customized.
White-label products allow your potential customers to customize their orders more easily and visualize them better.
Some of the most popular tools for designing white-label products are Canva and Adobe Illustrator.
Once the product images are ready for uploading, make sure you choose the correct Shopify image size.
You should also pick the right file format. For product images, it’s best to use JPG or WebP format. They both offer a smaller file size, but converting to WebP also ensures better speeds. And if you have to use PNG, make sure you reduce PNG file sizes.
Step 2: Get a file upload app for Shopify
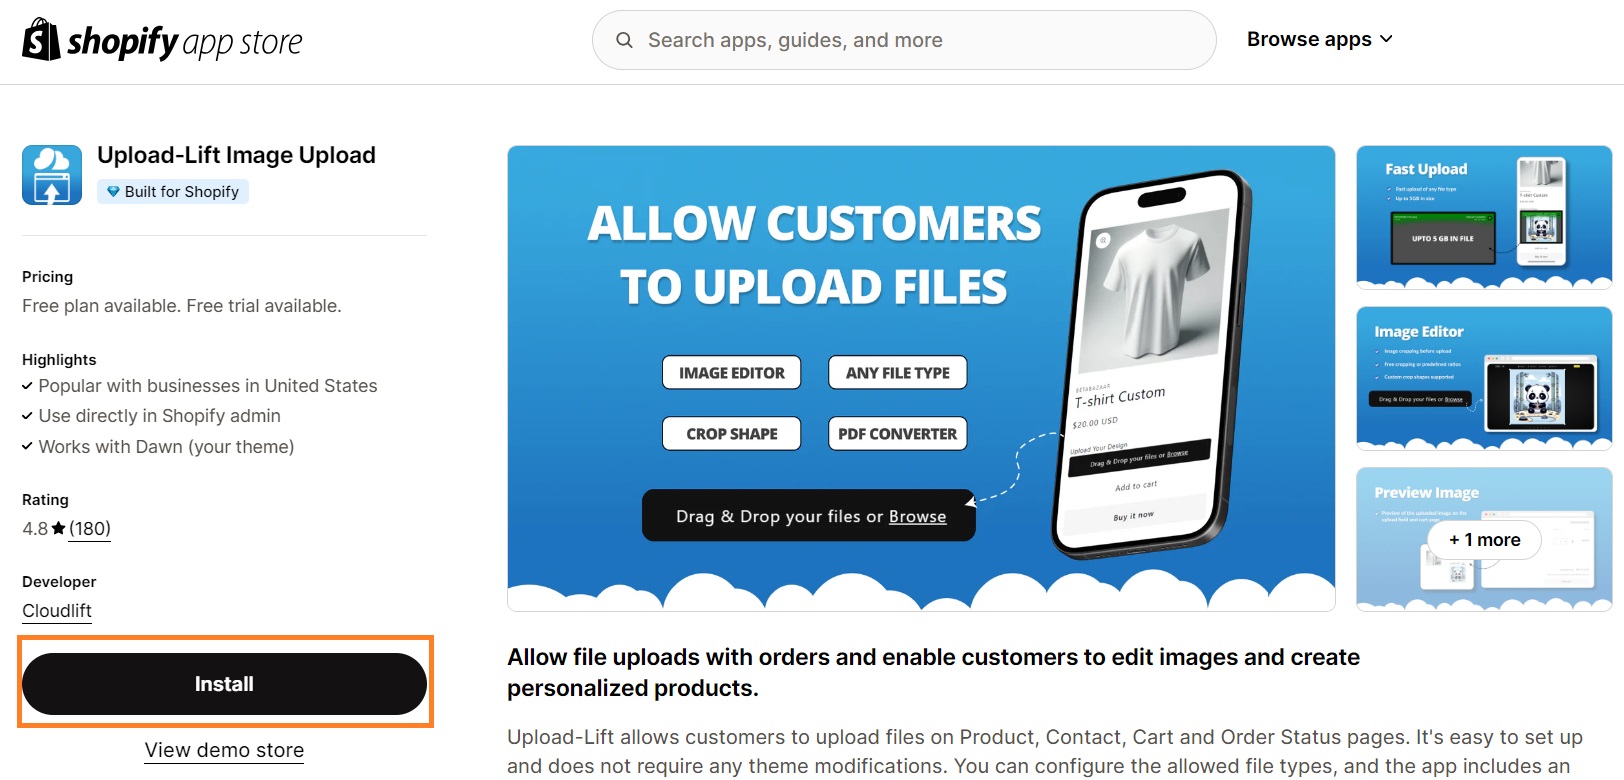
Go to the Shopify App Store and search for image upload apps. Look for apps that offer to add the Upload Photo option, like Upload-Lift Image Upload, Mighty Image Uploader + AI, or Uploadly.
We prepared a guide on how to install the Upload-Lift app, but similar instructions apply to other ones as well.
Once you find the app you want, click the Install button.
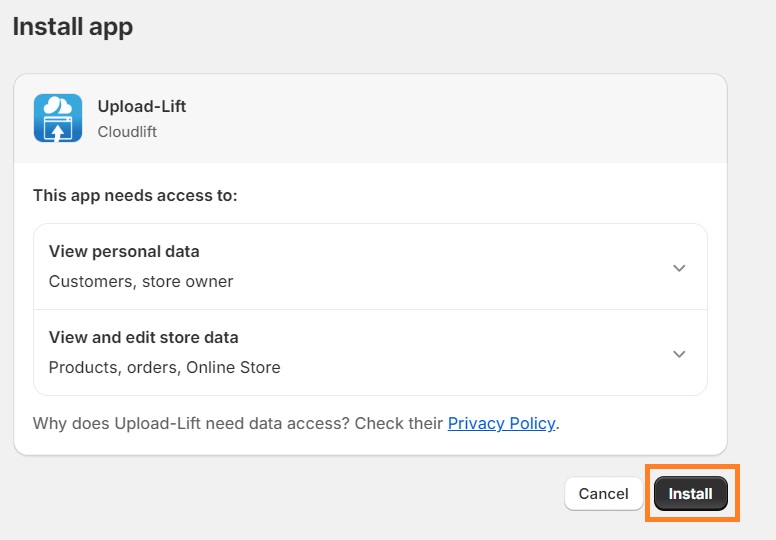
You’ll be redirected to the app’s installation page on your Shopify admin dashboard. Click the Install button again.
Step 3: Enable app embed
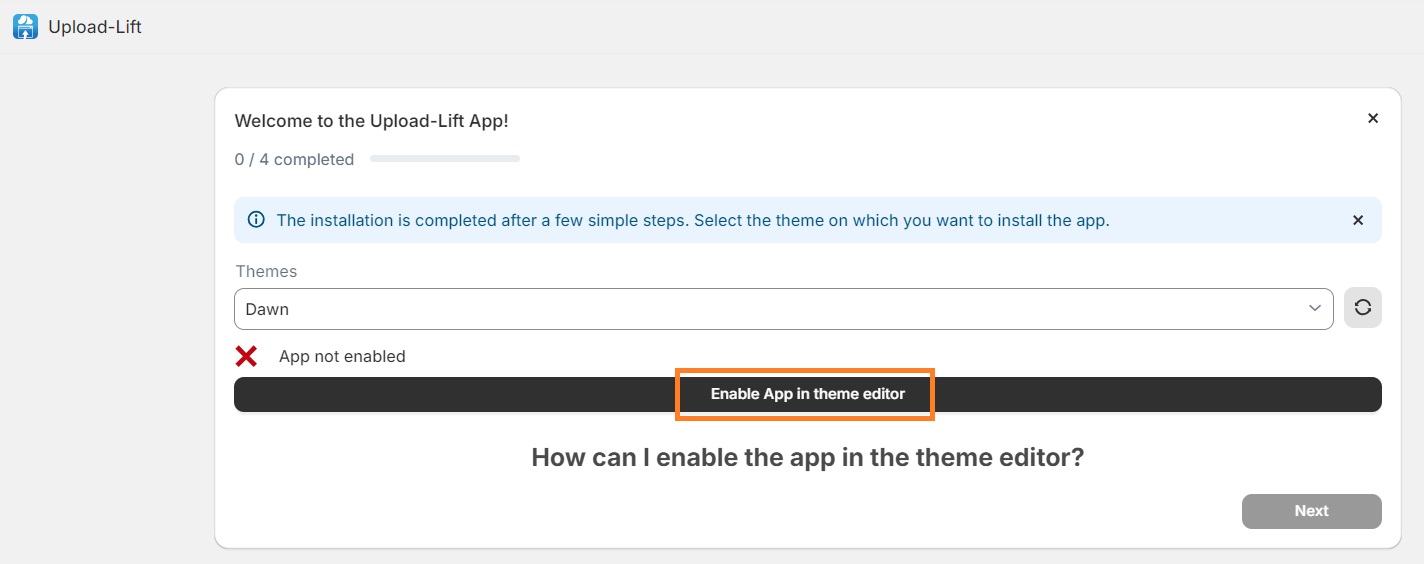
Now, you’ll need to choose the theme where you want to add the Upload Option. After that, click the Enable App In theme editor button.
Once you’re redirected to the editor, embed the app by clicking the switch, and press Save.
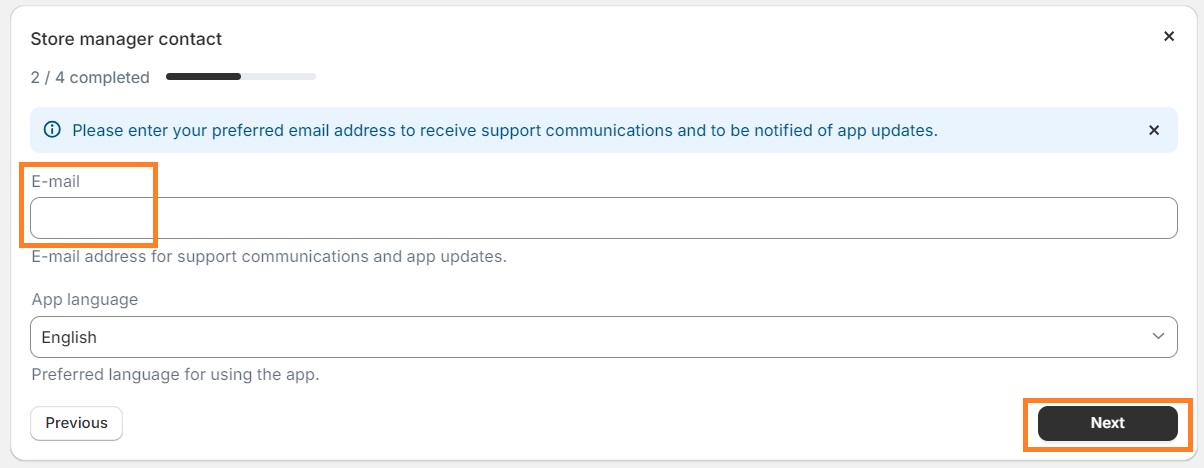
Go back to the setup page, and enter the email where you want to get support communications and news about app updates. You may also choose the app language.
Step 4: Select the products
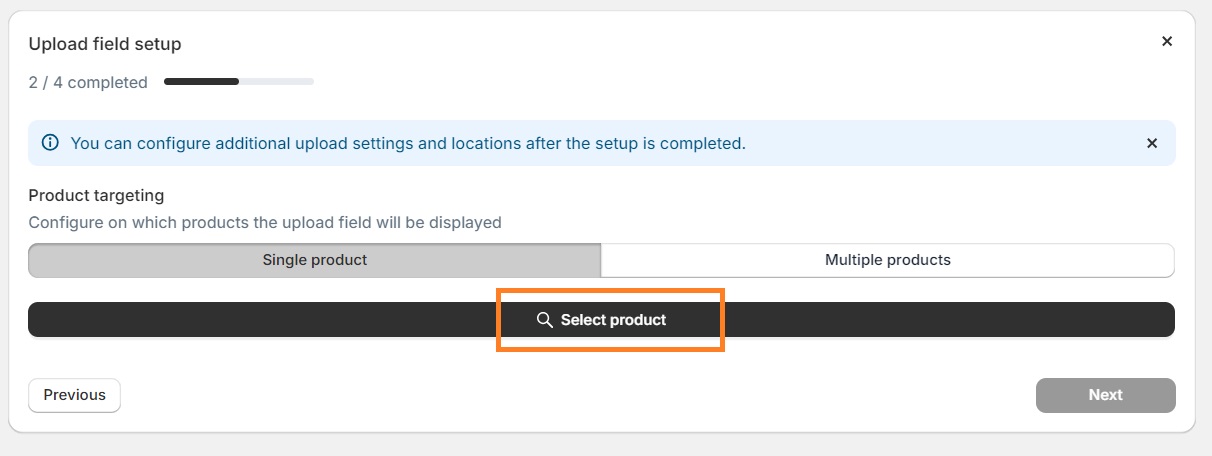
Now, you have two choices – if you want to add the upload field to one product page, choose the single product. In case you want to target more than one, click on the Multiple products button.
Click the Select product button and add the product(s) of your choice.
A “View upload location on product page” button will appear, click it.
You can now see how the default button looks on your product page.
Step 5: Add the Shopify Upload Photo option
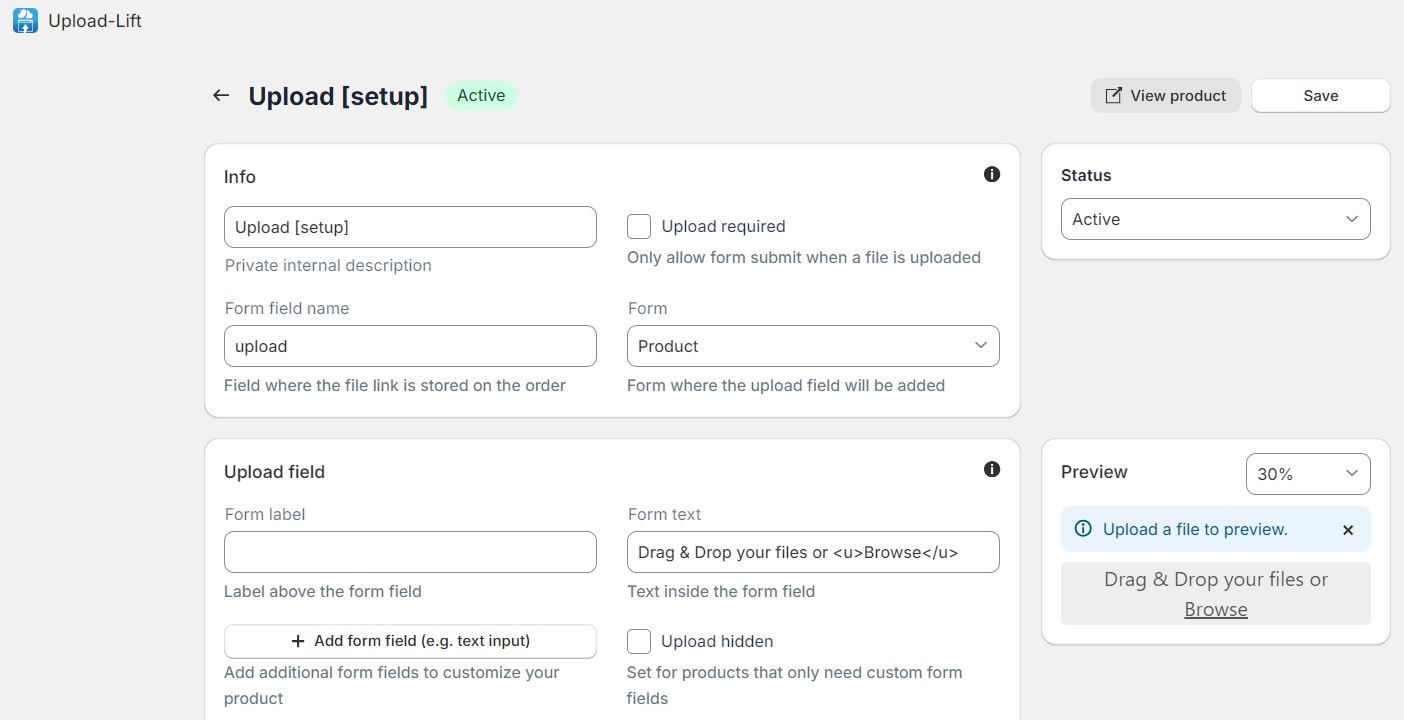
Navigate to the app on your Shopify Admin dashboard. You can find all upload fields displayed here. You can switch the Active button to enable or disable them. To customize the Upload Photo option, click the Edit button.
You can edit anything from information, upload field, and display settings to upload location and file settings.
Once you’re done, click Save.
Best apps to add Upload Photo option in Shopify
We’ve reviewed and tested a few third-party Shopify apps to see which ones are best for adding the Upload Photo field to product pages. Here are our top picks:
- Upload-Lift. It comes with a quick and straightforward setup, letting you add up to 5GB of files to various pages. It conveniently allows editing the Upload Photo field, helping you customize it to your own needs. There’s a limited free plan you can try out, while the paid tiers come with a free 7-day trial.
- Uploadly. This app helps integrate the Upload Photo field and lets customers effortlessly upload photos from any device or platforms like Instagram, Facebook, Google Drive, and more. There’s a free version you can try out. If you decide to upgrade, the premium plans come with a free 3-day trial.
- Mighty Image Uploader + AI. Aside from adding the Upload Photo field, this app helps you add custom product options, improve your images using AI, display clickable images on cart pages, and more. However, it doesn’t have a free plan. You can get it starting from $14.99/month and with a 7-day free trial.
Final thoughts
Shopify doesn’t offer adding the Upload Photo field in product pages by default. However, you can do it in 5 simple steps using a third-party app.
Shopify recommends using the Upload-Lift app, which lets you automatically add the Upload Photo option to any product page without coding. It even allows customizing the field and changing the button text, display settings, and more.
Don’t forget to also optimize your white-label product images before uploading to Shopify. Make sure you reduce their size, pick the right file format, and enable lazy loading to improve performance.
If you need more guides on Shopify images, we suggest checking out our:
- Guide to preloading images in Shopify to ensure better website performance
- Guide on how to export images from Shopify store for bulk editing or backups
- Tutorial on how to optimize your Shopify images to improve both store speed and SEO

Frequently asked questions
You can upload files to Shopify on the Files page of your admin dashboard. Just navigate to Content, click Files, and press Upload Files. Select the files (up to 20) you want to upload and press Open.
If you can’t upload pictures to Shopify, check if the image size and file format are correct. They shouldn’t exceed 20 Mb or 20 megapixels. If that doesn’t work, clear the cache, disable your firewall or pop-up blockers, or try switching browsers.
If you want to add a price add-on option in Shopify, you can use a third-party product customization app for quick implementation, like Product Options & Customizer or Variant Option Product Options.
Once you upload an image, you’ll be able to find the URL beside it in the Files section. If you wish to add it to a specific section of your store, navigate to that place, and insert an HTML code with the image URL  .
.
