The WebP image format was developed by Google and boasts a smaller file size than traditional JPG and PNG formats while maintaining the same quality.
Still, WebP isn’t as widely supported as traditional formats. You may have trouble opening the image on older operating systems, and you can’t insert them in Google Workspace or older versions of image editing software.
Luckily, there are different ways to save WebP images that you download from the web as JPG format:
- Using an online WebP to JPG converter
- Using built-in programs like Paint (for Windows) or Preview app (for Mac)
- Using free browser extensions
- Using installed third-party image editing software like Adobe Photoshop.
Whether you want to download a WebP file as JPG from the web or convert existing files to JPGs, there are methods for both. Keep reading to find the best one for you.
How to save WebP as JPG
The fastest way to save WebP files as JPG is to use a browser extension which lets you immediately save files as JPG when downloading. But if WebP files are already on your computer, you can simply open them with Paint or the Photos app, and save it as JPG.
Let’s review all the possible methods to save your WebP files as JPG.
Use an online WebP converter
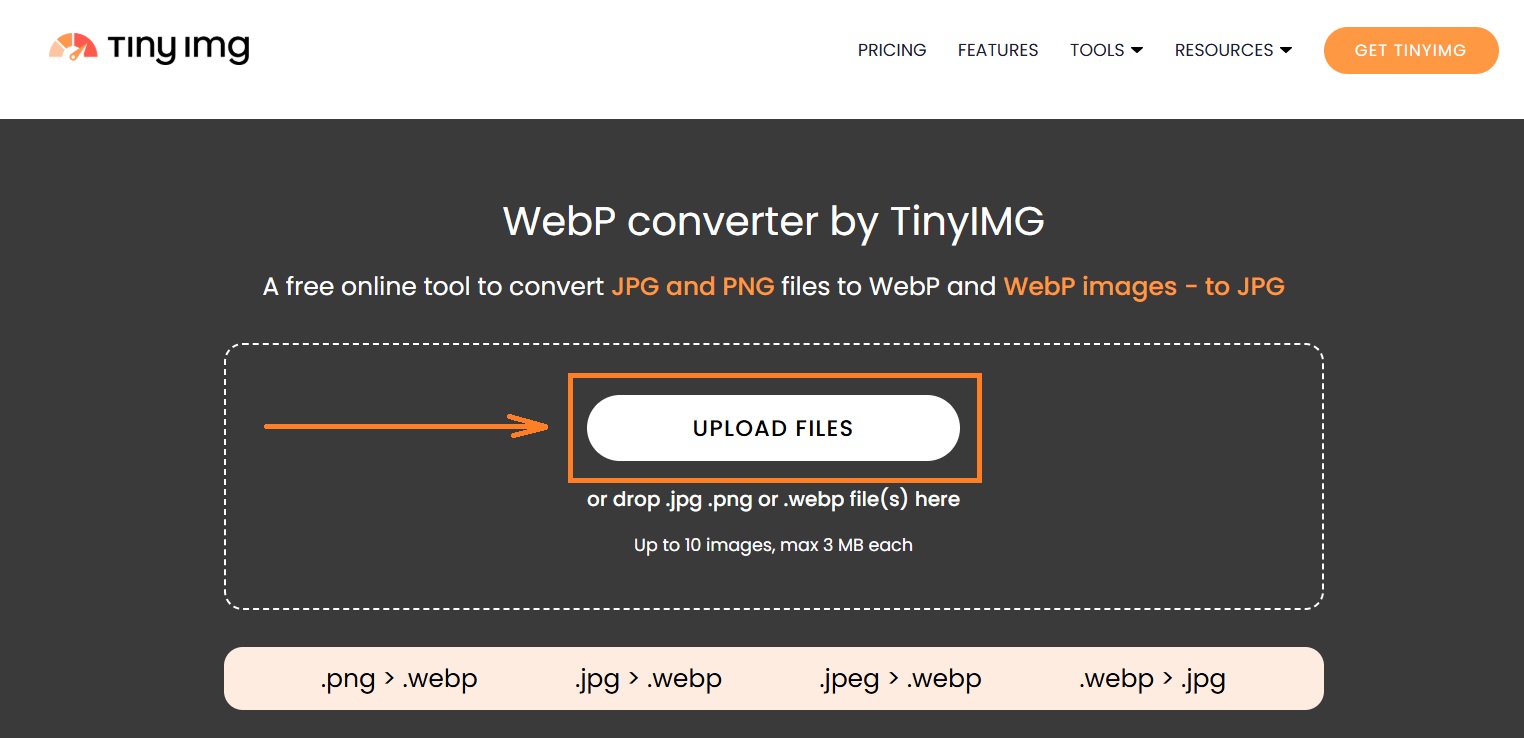
Using an online WebP converter, like the free TinyIMG WebP converter, lets you change the image format for multiple files at once. You can add up to 10 images at once, which will automatically convert them to JPG, and download all of them with one click. Here’s how to do it:
- Open the free TinyIMG WebP converter in your browser.
- Click “Upload files” or drag and drop up to 10 WebP files into the converter.
- Once the images are converted, click “Download all.”
The best part about using an online converter is that your JPG file quality stays just as good as with WebP. However, JPG files are usually larger than WebP ones, so read our guide on how to reduce JPG file size if that’s what you’re looking for.
Use the “Save as” feature
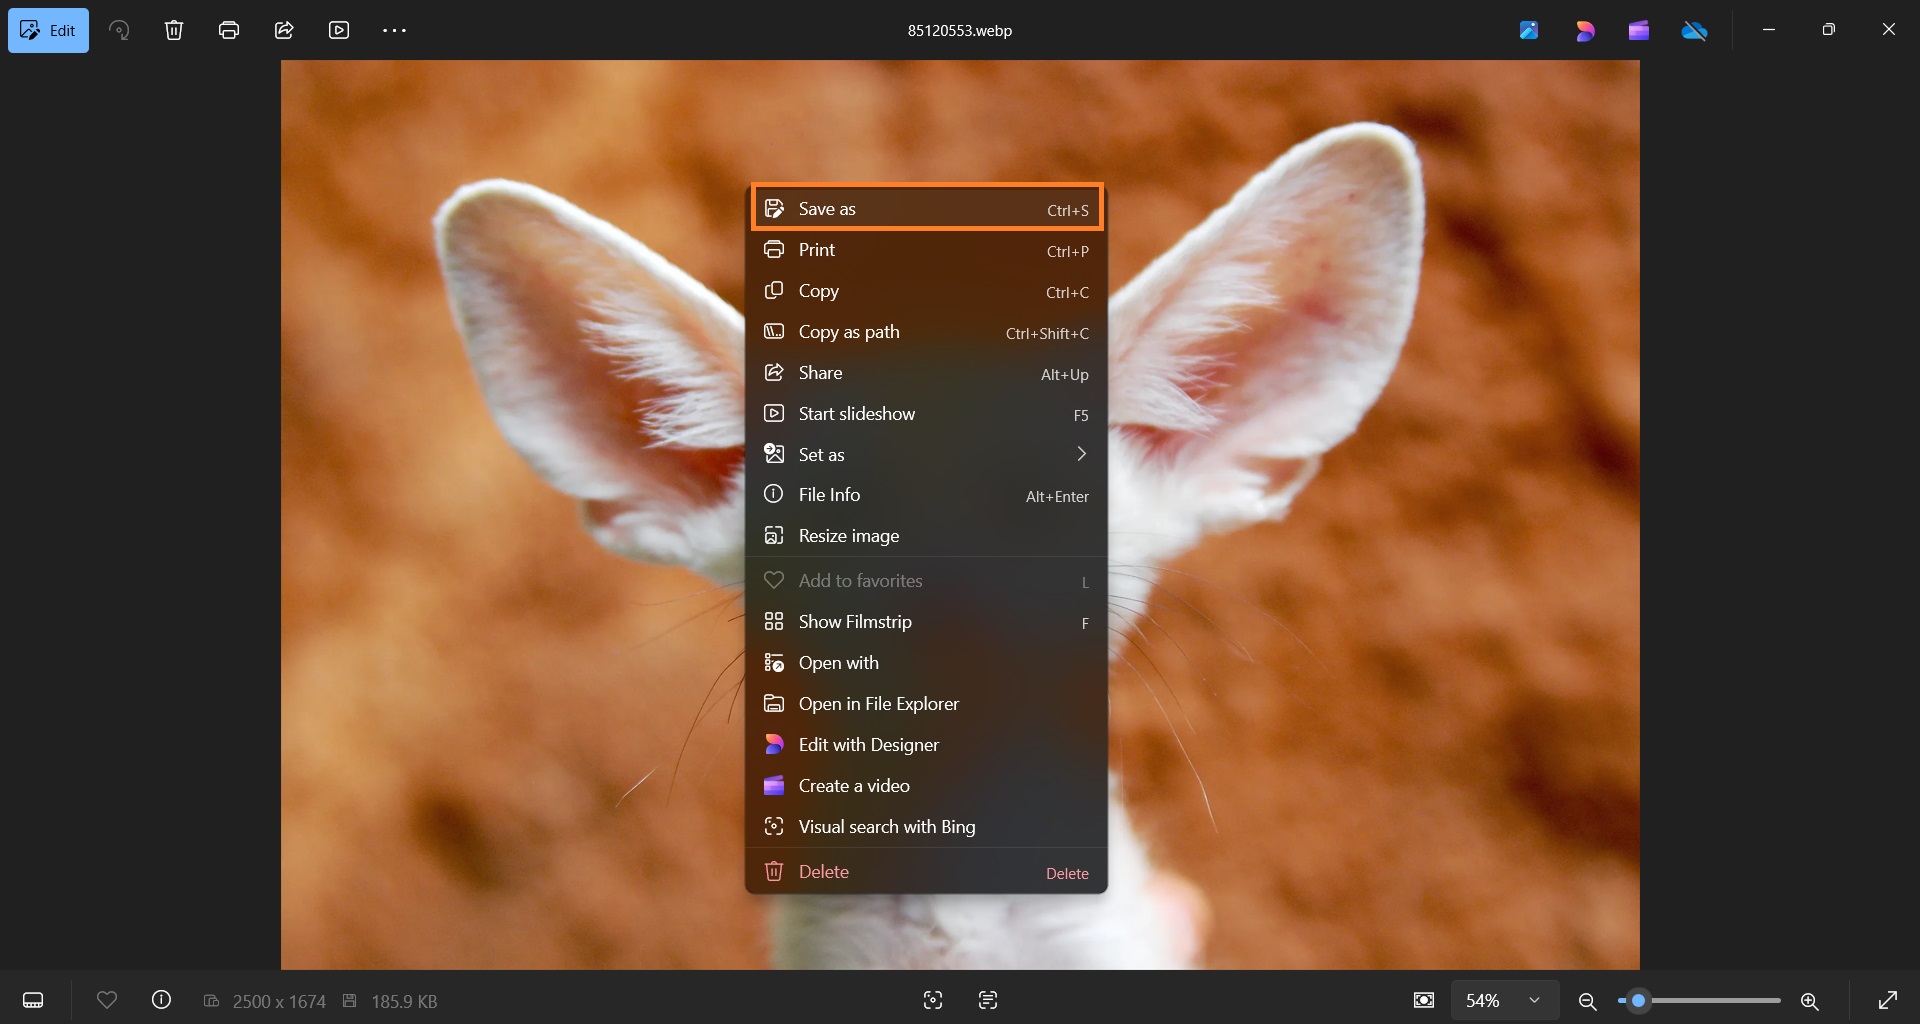
If you only need to convert a few images, you can do it straight from any photo app or image editing software. All it takes is saving a WebP image using the “Save as” feature. Let’s take a look at how to do it step by step:
- Open the image on your computer using the Photos app, Photoshop, or any other image program.
- Right-click the image and press the “Save as” button.
- Select the JPG format under the “Save as type” section and choose a location for the image.
- Click Save.
Using a browser extension
If you want to download WebP images as JPG straight from the web, you can use a browser extension. For example, I found the “Save webP as PNG or JPEG” extension on Firefox and the “Image downloader - Imageye” extension on Chrome, which work almost the same. Here’s how to use it:
- Install a WebP to JPG converter browser extension.
- Open a website with the image or an image link that you want to download.
- Right-click the image and click “Save image as JPEG” or a similarly named button with the extension’s icon.
- Choose the file format as JPG and click Save after choosing the location for the image.
Change WebP to JPG on Windows
You can quickly convert WebP images to JPG on Windows using the “save as” function in any image viewing or editing software. However, it’s only good for converting images one by one. If you need bulk conversion, use the free TinyIMG WebP converter.
But for converting single images, here’s how to do it:
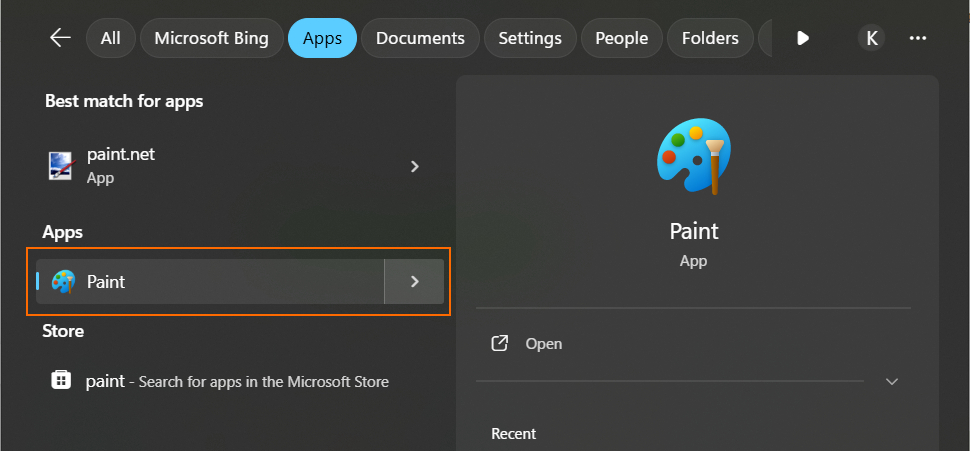
- Click the Start menu, then find and open the Paint app.
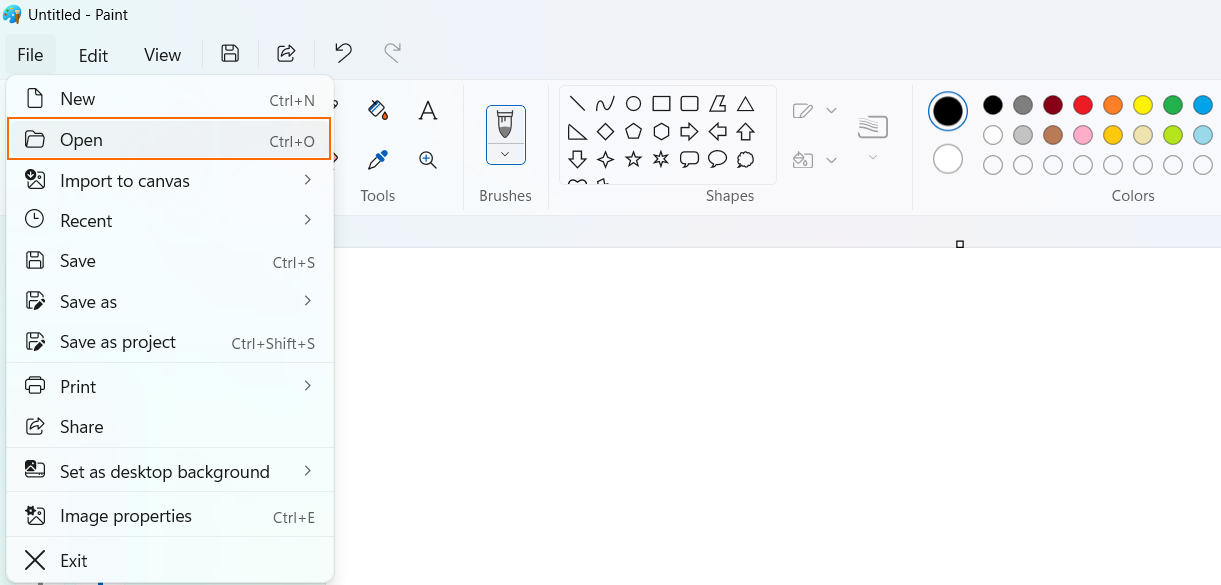
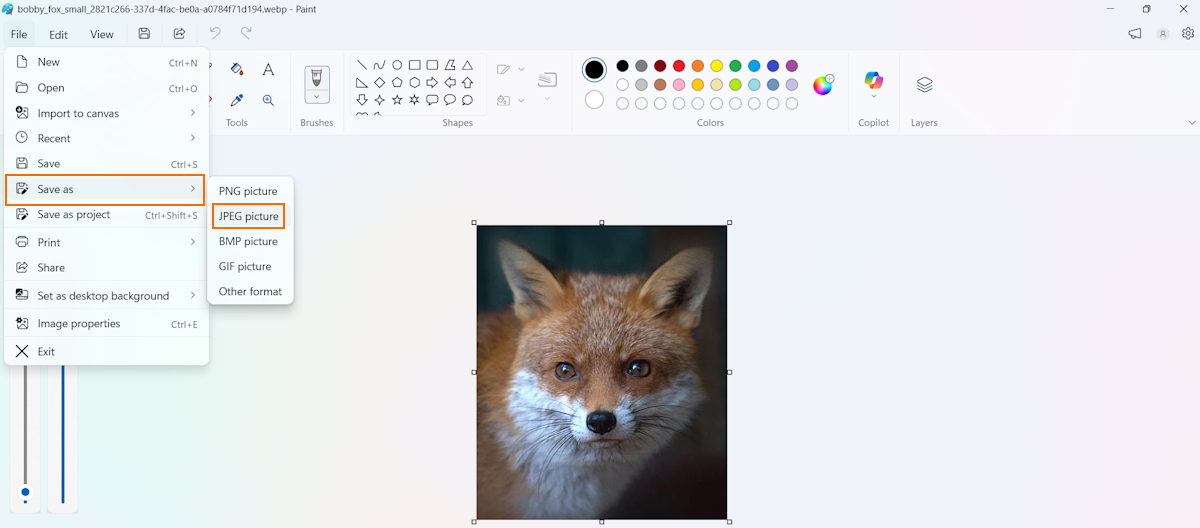
- Open the WebP image you want to convert (find it in File > Open or drag the file into the Paint window).
- Choose File > Save As > JPEG picture to save the file as a JPG. Then, indicate a folder to save your converted image.
That’s all – while Paint doesn’t have a bulk converting feature, it’s a great option for single cases.
Change WebP to JPG on Mac
Changing a WebP file to JPG on a Mac can be done with the default Mac Preview software. But for bulk converting, use a batch converter tool like TinyIMG, as Mac Preview only allows one-by-one compression.
Here are the steps to convert WebP images to JPG images on Mac:
1. Open the Finder on your Mac and choose the WebP file.
2. Double-click the image file to open it by default in the Preview app.
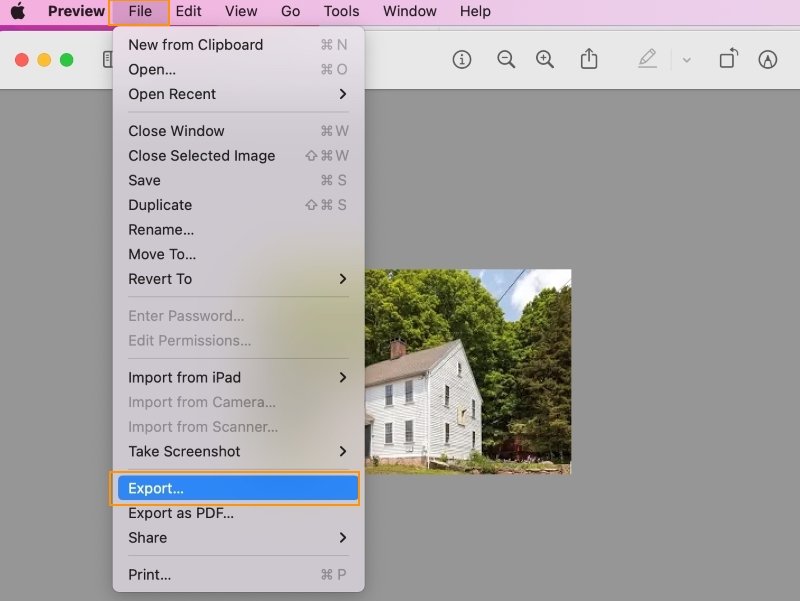
3. Choose File > Export.
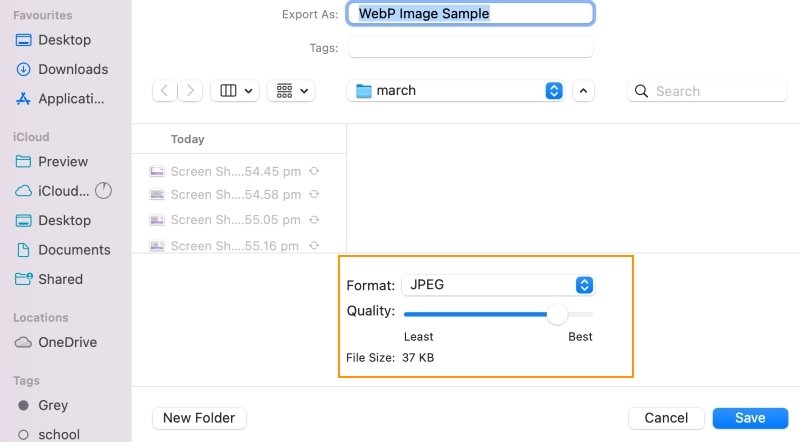
4. In the export menu settings, choose Format > JPEG.
5. Save the image in the desired location under the desired name.
Other ways to change WebP to JPG format
You can use other not-so-conventional ways to convert image files in WebP to JPG format. These methods work across different devices and are simple to use too. You can use these methods on any operating system too.
Take a screenshot of a WebP image
While this is not the cleanest method of converting a WebP image file, it works. The resolution of the image will likely be impacted.
However, you may be able to use the image for references and basic requirements. To take a screenshot, follow these instructions:
- Windows: Windows logo key + Shift + S (or the PrtSc button)
- MacOS: Shift-Command-5
Alternatively, you can use a screenshot application on your system.
Install desktop image converters
You can get a desktop image converter, which is very convenient if you often have loads of images to change the format. Some of them even offer additional image editing features. Here are a few of the most popular desktop image converters to change WebP to JPG format:
- XnConvert
- Webp to JPG Image Converter from the Microsoft app store
- Batch Picture Resizer
- Any2Pic
Get a WebP converter app on mobile
If you’re using a mobile device to convert images, then you can use an app from the Google Play or Apple App store. Here are a few suggestions that worked for me:
- Android: Webp Image Converter
- iOS: The Image Converter (no bulk converting)
Upload and download from Canva
You can easily upload your WebP images to Canva and convert them by changing the format during download. Just follow this tutorial:
- Log in or sign up to Canva.com
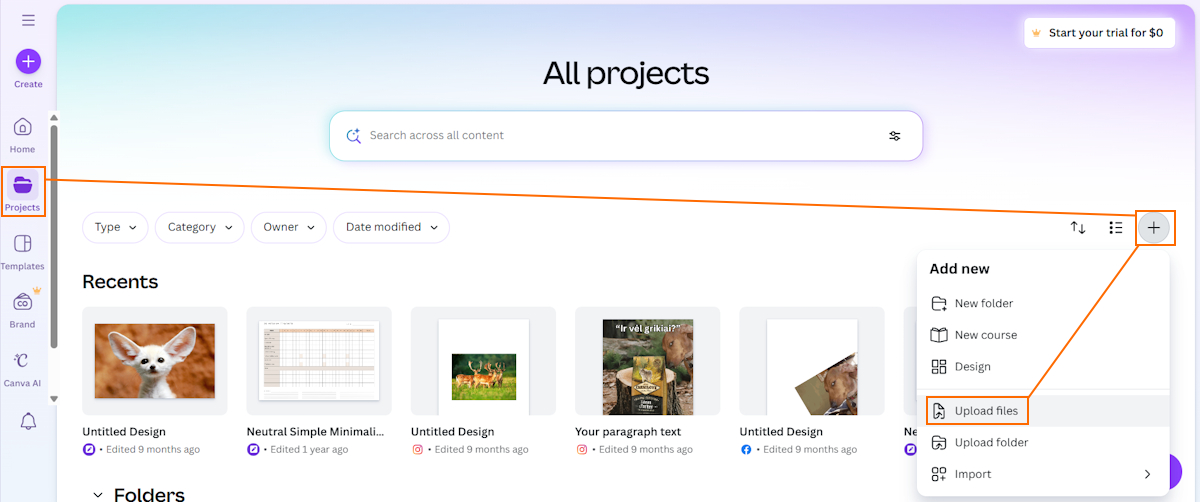
- Go to Projects, click the “+” sign, press “Upload files,” and insert the image.
- Open the image by clicking on it and press “Open in editor.”
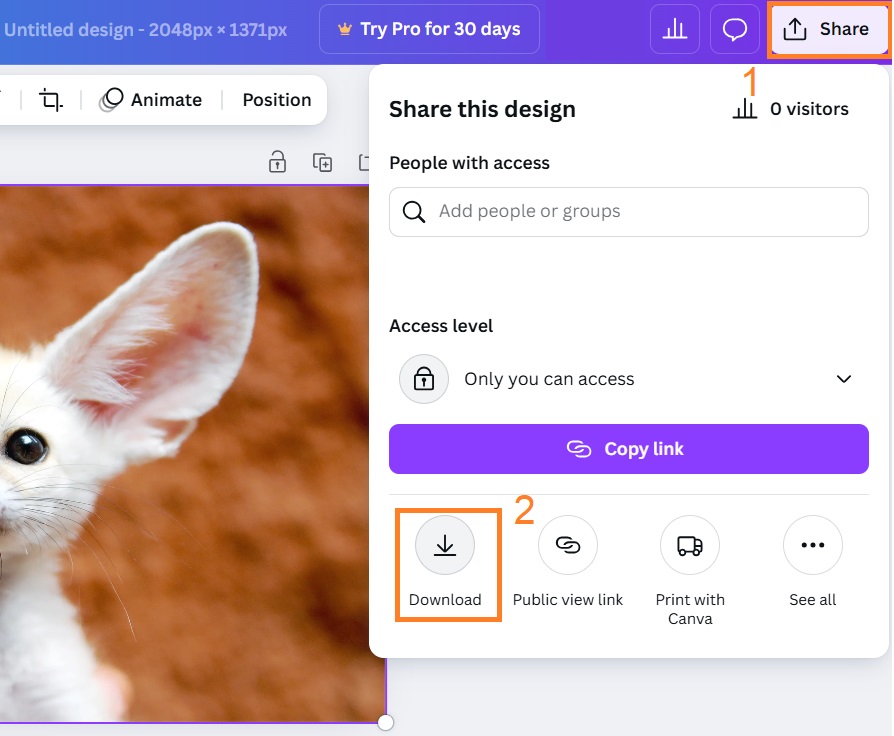
- Click Share > Download and choose the file format as JPEG.
- Click Download again.
Summary
WebP has become a popular image file format for websites and online stores due to its excellent compression quality. However, it’s still not supported on some services, like Google Docs, Microsoft Word (older versions), LinkedIn, or older website builder themes.
The only solution in such cases is to convert WebP to JPG or other formats. The easiest way to do it is to use an online tool like the free online TinyIMG image converter. It’s quick and lets you add images in bulk.
However, if you need ways to save WebP images from the web as JPG, I suggest using a browser extension like “Save webP as PNG or JPEG” on Firefox or “Image downloader - Imageye” on Chrome.

Frequently asked questions
Photoshop allows you to easily convert images from WebP to JPG or other formats, including PNG, BMP, and TIFF, and vice versa. You can even convert professional image formats, such as PSD.
The best and easiest way to convert a WebP image to a JPG is with an online WebP converter like TinyIMG WebP converter. There is no need to use any extra app or software, and you can convert up to 10 WebP image files to JPG at once and in seconds.
To change a WebP file format to PNG, you can use the Windows Photos App, Mac Preview app, Photoshop, or Paint. For example, just open Paint, click “File,” open the image, press “File” again, and select Save as > PNG.
Drag and drop your files or click “Upload files” in the free TinyIMG WebP converter to batch convert up to 10 images. The files will automatically be changed to JPG. You can download the whole batch in one click after the conversion process is complete.

