JPEG images are commonly used in emails, websites, and online stores. You may need to compress a JPEG file to save storage space, add multiple images to your emails, or make your website load quickly.
There are several ways to compress JPEG files:
- Using online JPEG compression tools
- Using Photo or Preview tools (depending on what computer you use)
- Using third-party image editing tools
Let's go through each of them step by step.
Compress a JPEG image using online tools
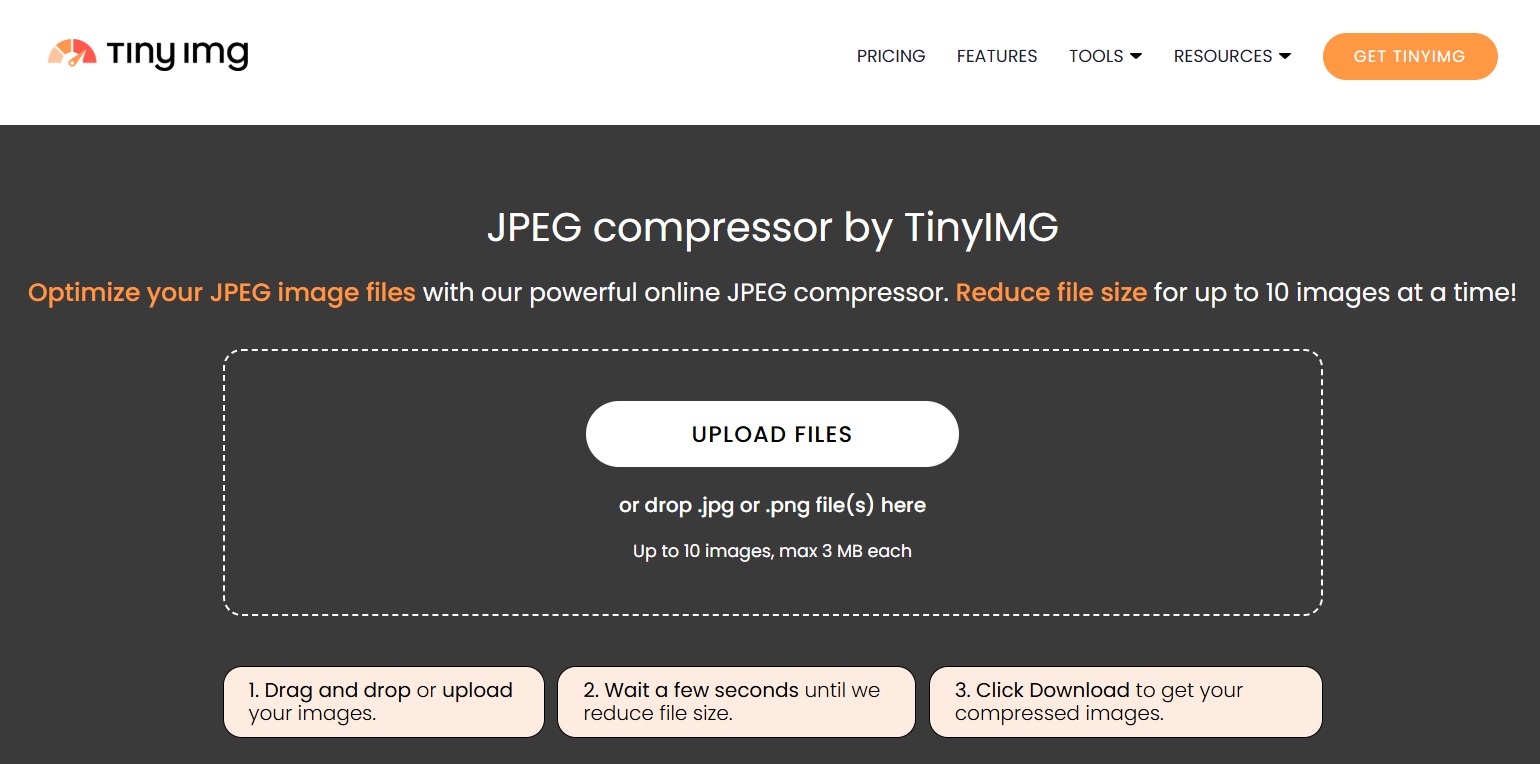
Most of the time, reducing a JPEG file size is an urgent task that an email or website requires. For such cases, one of the easiest and quickest ways to compress a JPEG file is to use an online JPEG compression tool like TinyIMG.
The free online compression tool is perfect for small jobs. Here are the steps to making jpg files smaller:
- Open the free TinyIMG JPEG compressor on your browser.
- Drag and drop your image files into the box where you are prompted to drop your files. You can compress up to 10 JPEG files at once, each at a max size of 3MB.
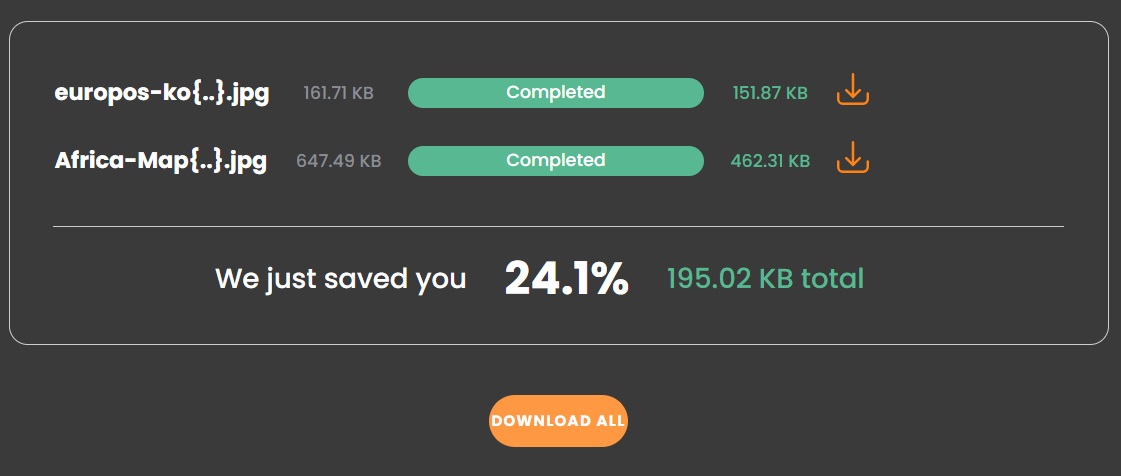
- Download the compressed JPEG files, and on the screen you can see the difference in sizes before you download them.
In case you're not tied to the JPG format, you can also convert JPG to WebP and enjoy the reduced size and high image quality.
Compress a JPEG file on Windows PC
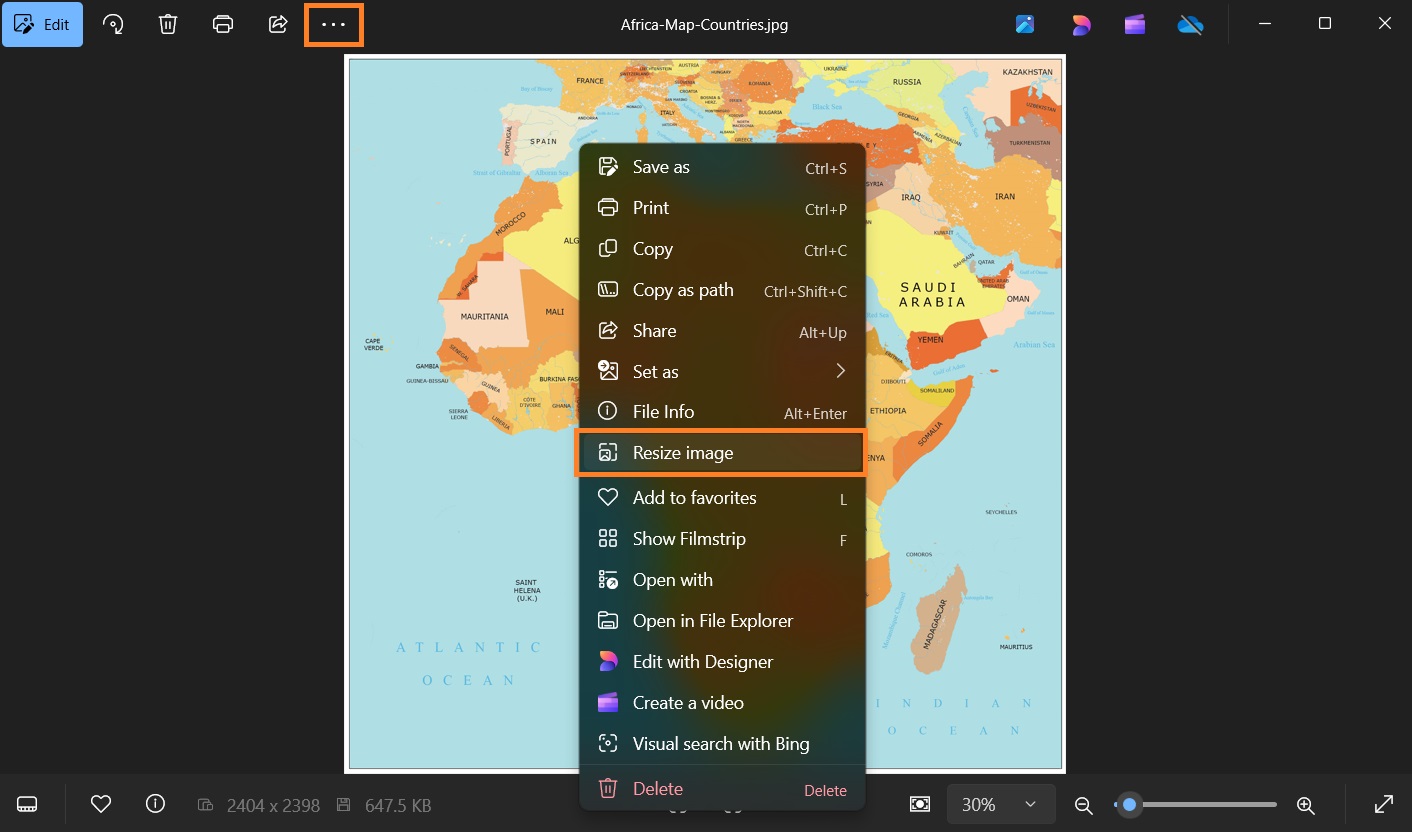
To compress a JPEG file on Windows, you can use the Photos app. Unlike the free TinyIMG JPEG compressor, it’s only good for optimizing single files and can drastically reduce quality based on compression level. Here are the steps on how to do it using the Photos app:
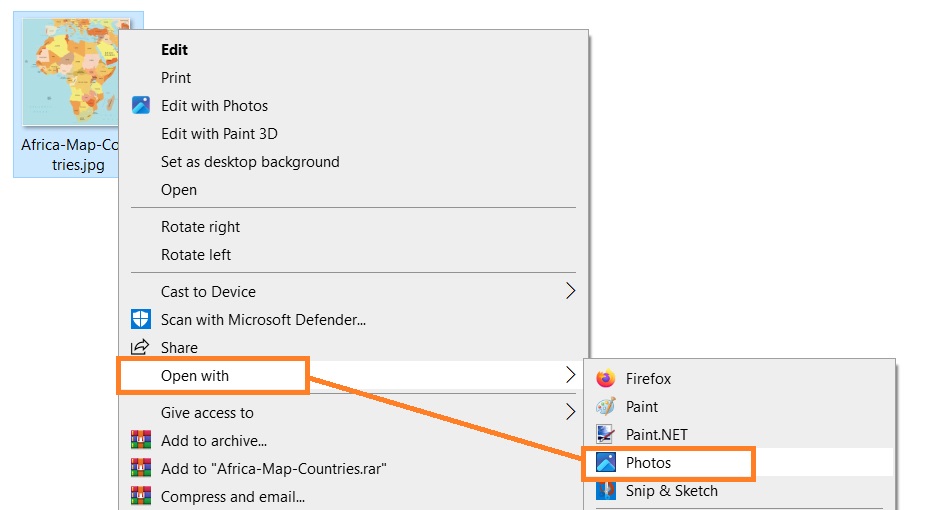
- Choose the image you wish to compress and double-click it to open it in Windows Photos by default. Alternatively, you can right-click and choose Open With > Photos.
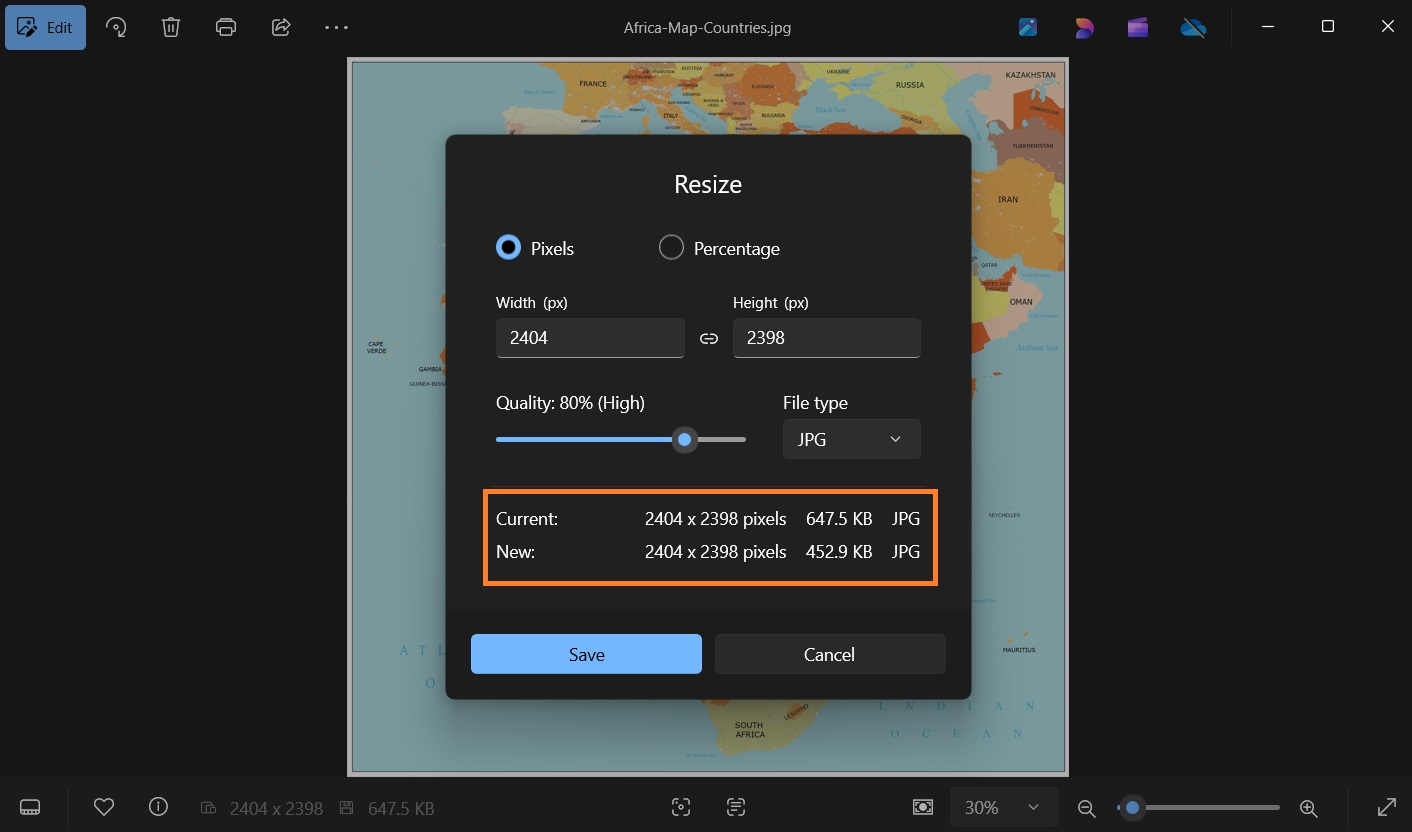
- You will notice three dots at the top-right side of the Windows Photo window. Right-click the image or click on the Three dots ("…") > Resize image.
- Choose the custom dimensions (C) setting to lower the image quality and reduce the file size without changing the image size.
- Once you have chosen the desired outcome, decide on the filename and save the JPEG file in the location you want
Compress a JPEG on Mac
If you’re a MacOS user, you can compress JPEG files using the default Preview app. However, note that it can drastically affect your image quality. Plus, you can only compress files one by one, whereas you could compress images in batch using the free TinyIMG compressor online.
But if you just need to compress one image, here are the steps to follow on MacOS:
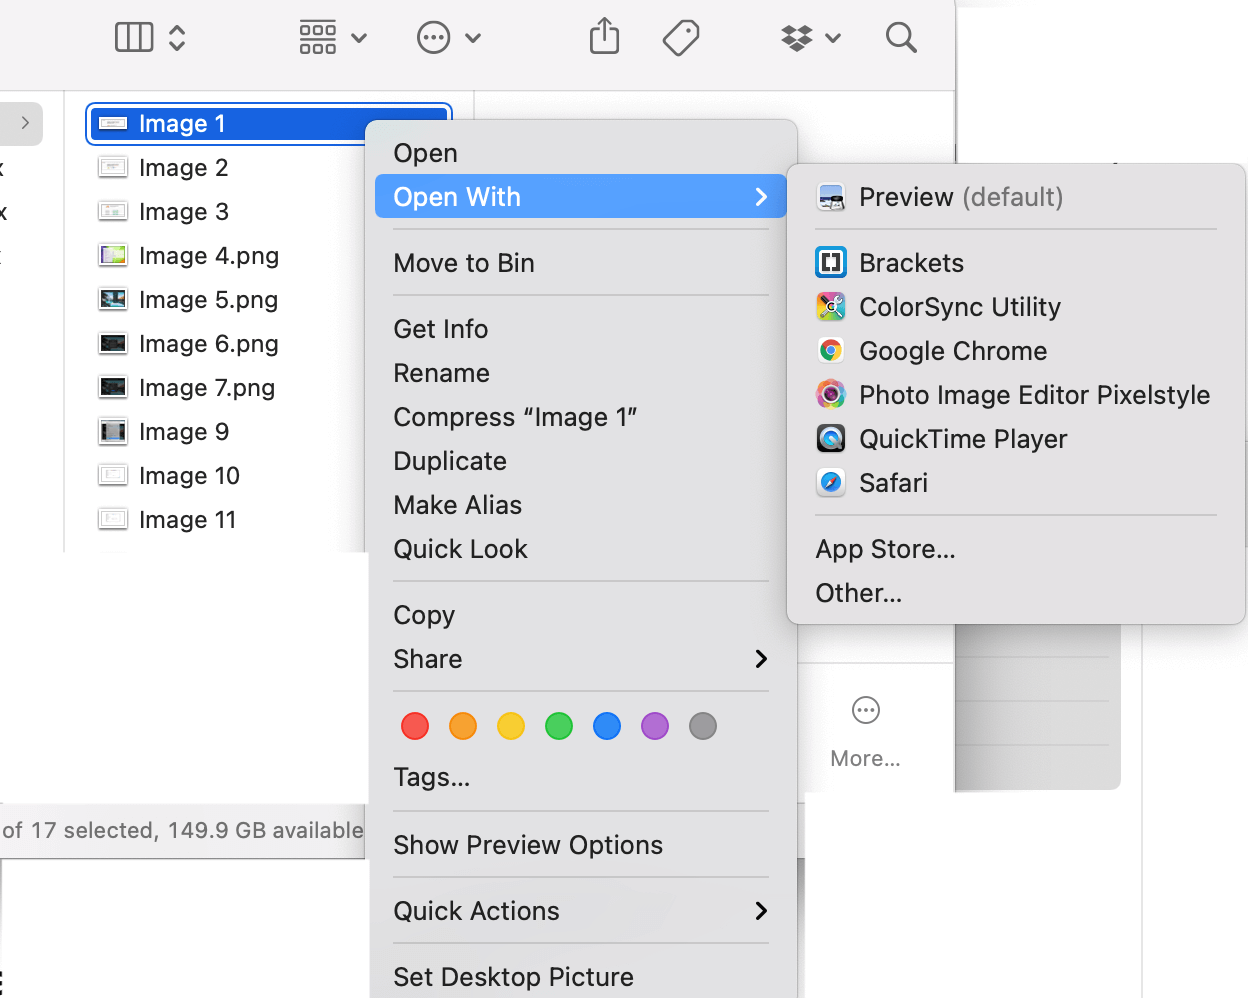
- Open the image you want to compress in Mac Preview by right-clicking it and choosing Open With > Preview.
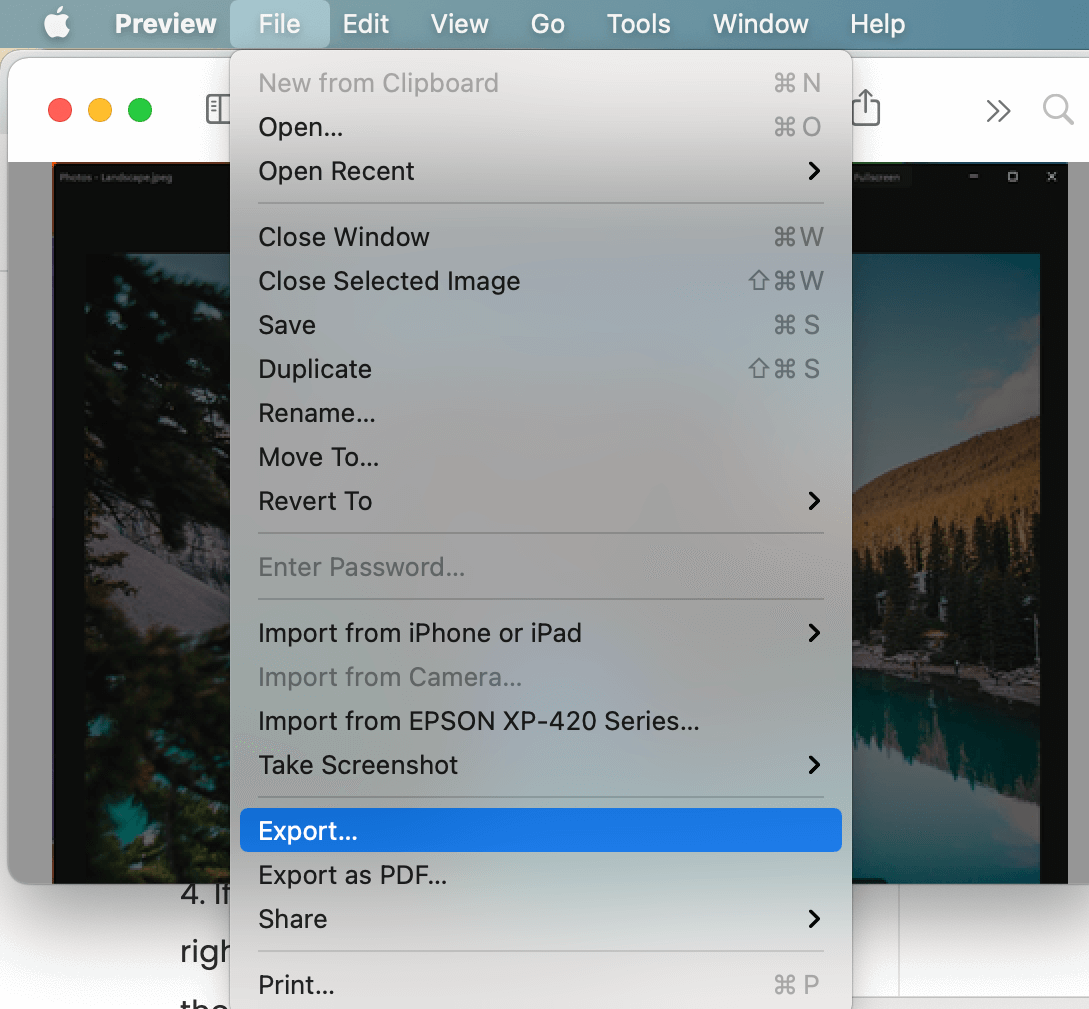
- Once you have opened the file, choose File > Export.
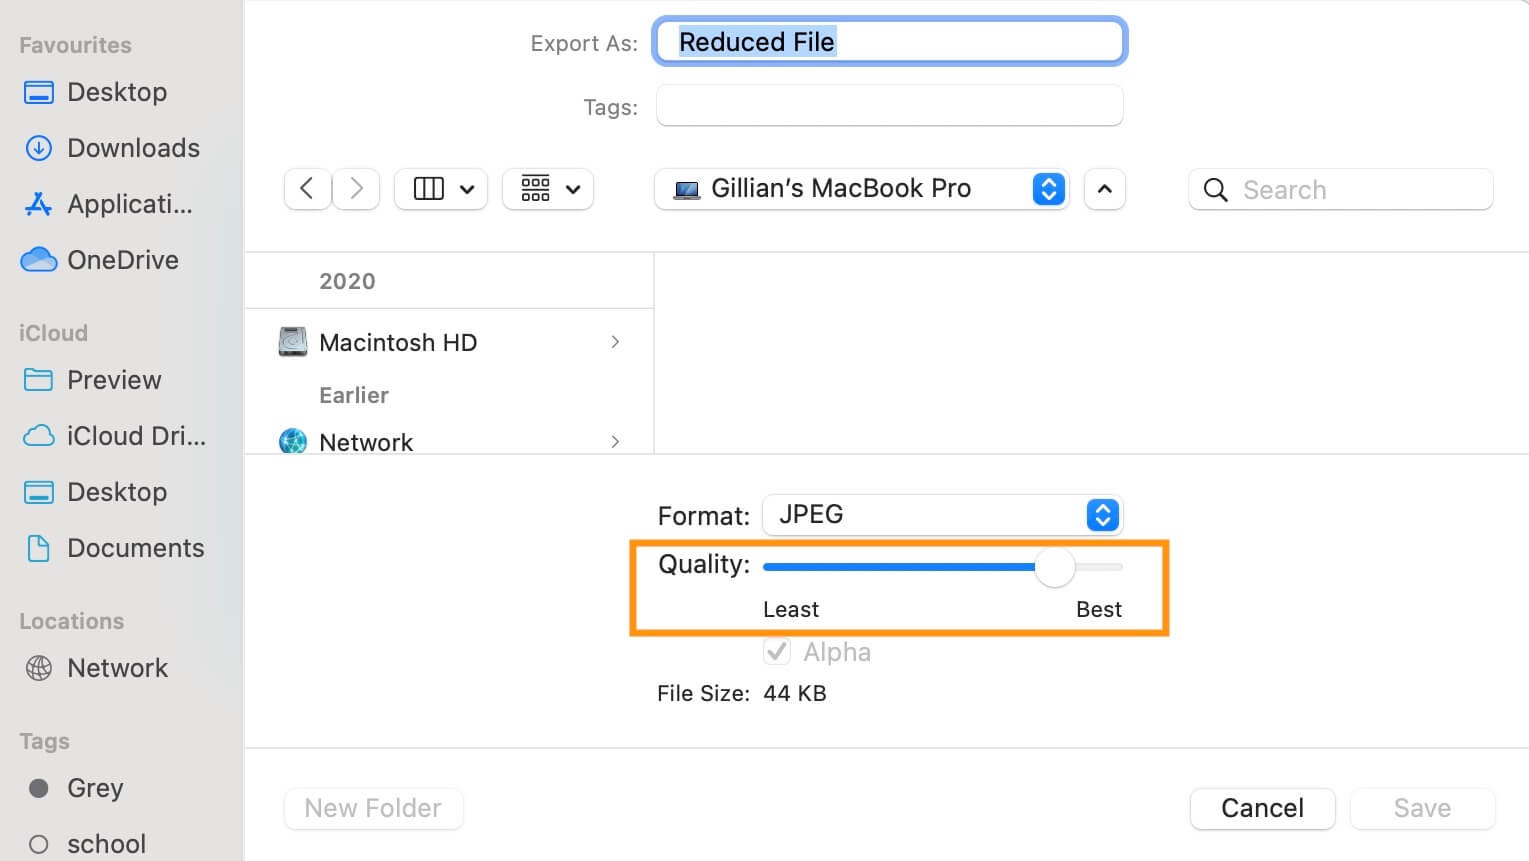
- The Mac Explorer window will appear. You can choose where to save the file and how to name it. In the same window, choose Format > JPEG and slide the bar found under Quality to the desired level of compression. You will see how much the file size is reduced at the chosen quality.
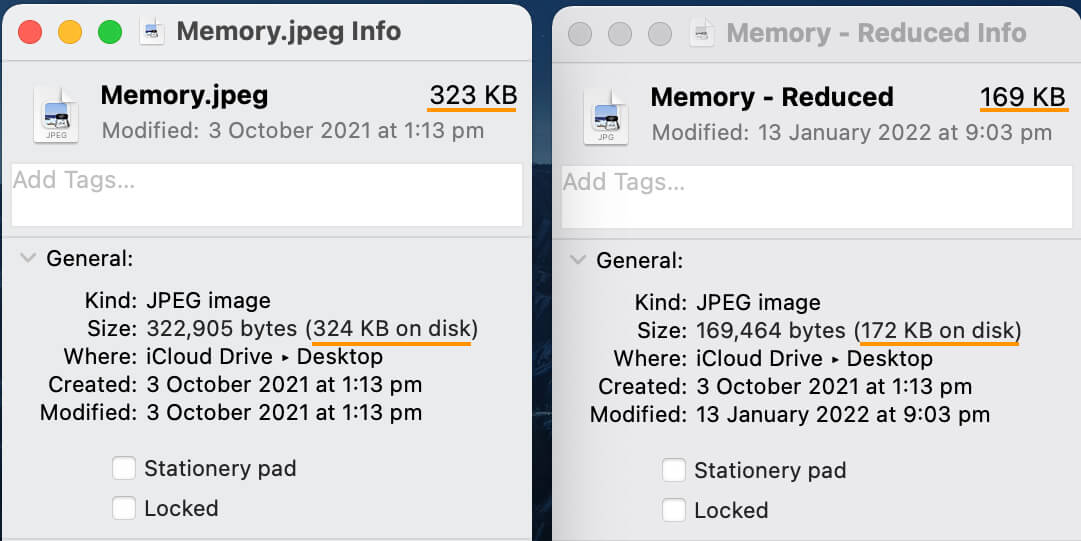
- Click Save. You can select the uncompressed and compressed files one by one and press Cmd + I to check how much the file size changed.
You can reduce a PNG file size or many other formats in the exact same way.
Compress a JPEG with image editing tools
You can also compress images using image editing tools like Photoshop or GIMP. However, if you don’t have them and only need them to compress JPEG files, they’ll take up unnecessary space on your device. In such cases, we suggest using other methods, such as the online TinyIMG JPEG compressor.
But if you already own Photoshop or GIMP, here are the compression steps for both apps:
- Open the image of your choice in Photoshop or GIMP.
- In Photoshop, select File > Export as, then choose JPG as File type and adjust the Quality slider. Press Export Photo.
- In GIMP, select File > Export As, select the location, click Export. A new window will appear – Adjust the Quality and click Export again.
- Choose the location where the new file should be saved.
- Type the name of the new file and click Save.
Compress a JPEG on mobile
If you’re looking for ways to compress JPEG files on mobile, you can use an application from the Google Play or Apple App store. They’re usually very easy to use and some even allow bulk compression. Here are a few mobile apps for JPG file compression that worked for me:
- Android: Photo Compressor and Resizer
- iOS: Compress Photos & Pictures
How does compressing a JPEG file work?
Compression stands for reducing a JPEG file size in terms of MB. It breaks it up into smaller pieces of similar colors and removes any attached metadata. There are two compression level types:
- Lossy compression – helps reduce the file size by removing some image data, which can impact quality. It’s usually used for JPEG files and is an ideal compression type for web or emails where a smaller size is needed.
- Lossless compression – reduces the file size by preserving image data and maintaining high quality. It’s usually used for PNG or TIFF files, especially in design and printing.
Lossless compression is ideal when you need to retain the highest quality possible. Meanwhile, if you’re looking to save space or want to improve image SEO or user experience, lossy compression may just be the right choice for your JPG files.

Frequently asked questions
A JPEG file is a type of digital image file format that can store a lot of data in a smaller file size. It’s a great format used for sharing photos or storing them online or on your device.
Uncompressed JPEG files can be large in size and take up unnecessary space on your device or website. Many uncompressed files could even slow your site down or drain resources quicker. Compression helps reduce the image file size, save space and improve site speed without changing image dimensions.
JPEG compression can lead to some quality loss because JPEG uses lossy compression to reduce the file size. Lossy compression removes some image data, which can lead to some loss in terms of detail or sharpness. However, the final result depends on the compression level.
You can only compress a JPEG file in Paint by reducing its dimensions or cropping the image. Here’s a quick guide on how to modify dimensions in Paint:
- Open the image in the Paint application.
- Click Resize under the Home tab.
- Checkmark “Maintain aspect ratio” and set the width.
- Click OK and save the image.
Compressing a JPEG file reduces the file size by removing a part of image data, leading to some quality loss. The image size depends on the applied compression level. The more you compress the JPEG file, the more pixelated it will become.
